It started with a kitchen catastrophe that still haunts my culinary dreams: a batch of plain chicken tenders that came out dry and flavorless. I stared at the oven, the timer ticking, and felt the familiar dread that comes from a recipe that simply doesn’t deliver. That night, I was determined to rewrite the narrative and create a dish that would make every bite sing. The result? A Cheesy Jalapeño Ranch Baked Ch that feels like a warm hug on a cold evening.
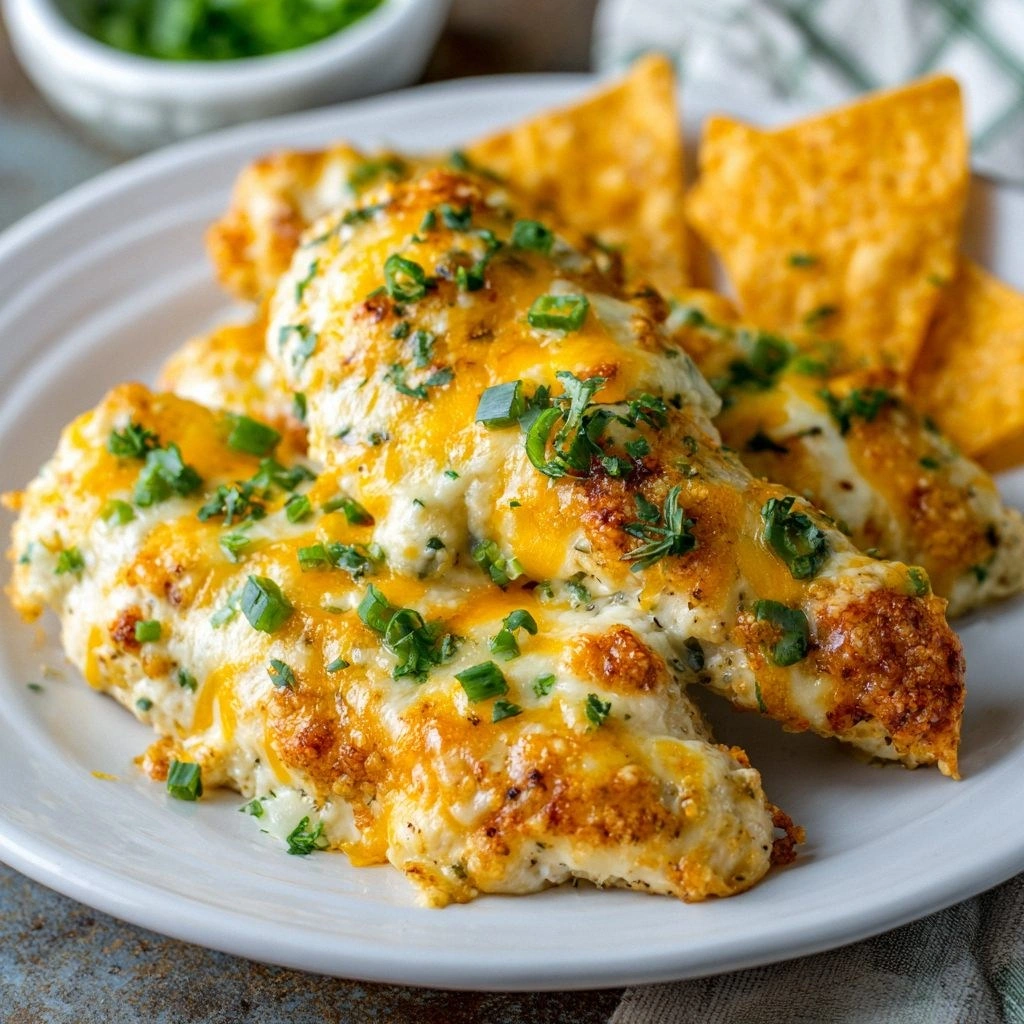
Picture the moment the chicken hits the hot oven—an audible pop, a gentle sizzle that fills the kitchen with a savory promise. The aroma of melted cheddar mingles with the sharp bite of fresh jalapeños, while the ranch dressing’s tang adds a creamy undertone. The sight of golden edges cracking like thin ice is a visual cue that the flavors are about to erupt. When you take that first bite, the crunch gives way to a molten cheese core that melts in your mouth, leaving a lingering peppery aftertaste. It’s a sensory rollercoaster that starts with anticipation and ends with a satisfied sigh.
What sets this version apart from every other recipe you’ve tried is the deliberate layering of textures and flavors. I’ve paired a crisp, breadcrumb-free coating with a creamy, spicy sauce that coats each tender like velvet. The jalapeños are sliced thin enough to burst with heat but not so hot that they overpower the cheese. The ranch dressing is homemade, giving it a depth that store-bought versions simply can’t match. Together, they create a dish that feels indulgent yet comforting, and that’s why I keep reaching for the recipe card again and again.
And here’s the kicker—you’ll discover a secret ingredient that most people overlook: a splash of buttermilk in the flour batter. This tiny addition lifts the coating to a lighter, fluffier texture and balances the richness of the cheese. I dare you to taste this and not go back for seconds, because the flavor profile is so complete that the second bite feels like a revelation. Let me walk you through every single step—by the end, you’ll wonder how you ever made it any other way.
What Makes This Version Stand Out
- Flavor Depth: The combination of ranch, cheddar, and jalapeños creates a multi-layered taste that satisfies both savory and spicy cravings. The homemade ranch adds a fresh tang that cuts through the richness.
- Texture Contrast: A crisp, lightly floured coating meets a molten cheese center, delivering an exciting bite that never feels monotonous.
- Time Efficiency: From prep to plate, the entire process takes less than an hour, making it ideal for busy weeknights without sacrificing quality.
- Ingredient Flexibility: Swap out jalapeños for green chilies or use a dairy-free cheese to adapt the dish to your dietary preferences.
- Crowd-Pleaser: The vibrant color and bold flavor make it a hit at potlucks, family dinners, or game day gatherings.
- Make‑Ahead Friendly: The chicken can be prepared ahead, refrigerated, and baked when ready, saving you valuable time.
Alright, let's break down exactly what goes into this masterpiece…
Inside the Ingredient List
The Flavor Base
The ranch dressing is the cornerstone of this dish, providing a creamy, herbaceous foundation that balances the heat from the jalapeños. A homemade blend of buttermilk, mayo, and fresh herbs ensures a depth that bottled versions can’t match. Skipping this step results in a bland coating that fails to carry the cheese’s richness. For those who prefer a dairy-free option, a cashew‑based ranch works wonders.
The Texture Crew
All-purpose flour, eggs, and buttermilk form a simple batter that clings to each chicken strip. The flour’s protein structure creates a golden crust, while the eggs bind the mixture, preventing the coating from falling off. If you omit the buttermilk, the coating may become dense and heavy. Choosing a light‑weight flour, like cake flour, can make the crust extra airy.
The Unexpected Star
Jalapeños bring a bright, fiery punch that cuts through the cheese’s richness. Sliced thin ensures the heat is evenly distributed without overwhelming the palate. If you’re sensitive to spice, reserve half the peppers for a milder version and keep the rest for a kick. A quick blanch in hot water before slicing reduces any bitterness.
The Final Flourish
Shredded cheddar cheese is the molten core that delivers a gooey, indulgent texture. Adding a dash of smoked paprika gives a subtle smoky undertone that complements the jalapeños. A pinch of salt and pepper enhances every element without drowning them. Butter and olive oil provide a glossy finish and help the crust achieve a perfect golden hue.
Everything's prepped? Good. Let's get into the real action...
The Method — Step by Step
- Preheat your oven to 425°F (220°C) and line a baking sheet with parchment. The high heat ensures a crisp exterior while keeping the interior moist. Place the sheet on the middle rack for even cooking. Let the oven settle for 10 minutes before adding the chicken. This step guarantees a consistent bake.
- In a shallow dish, combine the flour, garlic powder, smoked paprika, salt, and pepper. Stir until the spices are evenly distributed. This dry mixture will form the base of the coating. The spices infuse the crust with a subtle depth that elevates the dish. Keep the mixture ready for the next step.
- Whisk the eggs with buttermilk in a separate bowl until frothy. This liquid batter will help the flour adhere to the chicken. The buttermilk adds acidity, which tenderizes the meat. Dip each chicken strip in the batter, allowing excess to drip off. This ensures a light, airy coating.
- Coat each strip in the seasoned flour mixture, pressing gently to adhere. The flour layer should be even and light. Place the coated chicken on the prepared baking sheet. The spacing prevents steaming and encourages crisping. This step is crucial for achieving that perfect crunch.
- Brush the chicken lightly with olive oil to promote browning. The oil also helps the cheese melt evenly. Bake for 20 minutes, flipping halfway through. The chicken should be golden and the coating crisp. The internal temperature should reach 165°F (74°C).
- While the chicken bakes, mix the ranch dressing, cheddar cheese, and sliced jalapeños in a bowl. Stir until the cheese is fully incorporated. This sauce will coat the chicken and create a creamy, spicy layer. Keep the mixture at room temperature for easy spreading.
- Remove the chicken from the oven and spread the ranch‑cheese mixture over each strip. The sauce should melt into the coating, forming a glossy, flavorful crust. Return the chicken to the oven for an additional 10 minutes. The cheese should be bubbly and slightly golden.
- For the finishing touch, switch the oven to broil and broil for 2 minutes. Watch the edges turn a deep amber, but be careful not to burn them. The broil caramelizes the cheese, adding a caramelized flavor. This step gives the dish a restaurant‑quality finish.
- Let the chicken rest for 5 minutes before serving. Resting allows the juices to redistribute, keeping the meat moist. It also lets the cheese set slightly, preventing it from sliding off. This final pause is often overlooked but essential for a flawless bite.
- Serve immediately with a side of fresh salad or roasted vegetables. The bright flavors of the dish pair beautifully with a crisp green accompaniment. Garnish with extra jalapeño slices if you crave more heat. Enjoy the symphony of textures and flavors that dance on your palate.
That's it—you did it. But hold on, I've got a few more tricks that'll take this to another level...
Insider Tricks for Flawless Results
The Temperature Rule Nobody Follows
Many chefs bake at 400°F, but 425°F is the sweet spot for crispness. The higher temperature creates a rapid Maillard reaction, giving the coating a deep, caramelized crust. If you lower the heat, the coating will be soggy and the cheese may not melt evenly. Use a thermometer to ensure the oven reaches the correct temperature before baking.
Why Your Nose Knows Best
Smell the chicken as it bakes—if you detect a slight nutty aroma, the coating is golden. A buttery scent indicates the cheese is melting properly. If the smell is flat, you may need to add more oil or adjust the baking time. Your nose is a reliable indicator of doneness.
The 5-Minute Rest That Changes Everything
After removing the chicken from the oven, let it rest for exactly five minutes. This pause allows the juices to redistribute, preventing a dry bite. It also lets the cheese set, giving a more stable coating. Skipping this step often results in a runny, unappealing texture.
Use Fresh Jalapeños for Peak Heat
Frozen jalapeños can lose their punch, making the dish milder. Slice fresh peppers and remove seeds for a sharper bite. If you prefer a milder flavor, keep the seeds. Fresh jalapeños also add a vibrant color that enhances visual appeal.
Butter vs. Oil for a Glazed Finish
Butter adds a rich, silky sheen to the coating, while olive oil gives a lighter, crisp finish. A mix of both yields the best of both worlds. If you’re watching calories, use olive oil exclusively. For indulgence, a generous pat of butter on top before broiling works wonders.
Preheat the Baking Sheet
Placing the chicken on a preheated sheet accelerates the crust formation. The hot surface sears the coating instantly, locking in moisture. If you place the chicken on a cold sheet, it will steam rather than crisp. Preheat the sheet for 10 minutes before baking.
Creative Twists and Variations
This recipe is a playground. Here are some of my favorite ways to switch things up:
Mediterranean Kick
Replace jalapeños with sun‑dried tomatoes and add chopped kalamata olives. Swap cheddar for feta to introduce a briny contrast. This version pairs well with a cucumber yogurt dip.
Asian Fusion
Use a soy‑based ranch and sprinkle toasted sesame seeds on top. Add sliced scallions for freshness. Serve over steamed rice or lettuce cups for a low‑carb option.
Vegan Delight
Use plant‑based ranch, vegan cheddar, and a dairy‑free flour blend. Replace chicken with tofu strips or tempeh. The result is a creamy, spicy bite that’s cruelty‑free.
Breakfast Edition
Serve the chicken with a side of scrambled eggs and hash browns. Drizzle maple syrup over the top for a sweet‑savory twist. This version is a hearty brunch that satisfies every craving.
Low‑Carb Variation
Omit the flour and use almond flour instead. Add a pinch of xanthan gum to bind the coating. This keeps the dish keto‑friendly while preserving flavor.
Dessert‑Inspired
Add a sprinkle of cinnamon to the ranch mix for a warm, sweet undertone. Serve with a drizzle of caramel sauce. This playful take turns the dish into a sweet‑savory surprise.
Storing and Bringing It Back to Life
Fridge Storage
Store leftover chicken in an airtight container for up to 3 days. Keep the sauce separate to avoid sogginess. Reheat in a 350°F oven for 10 minutes, then finish under the broiler for 2 minutes to restore crispness. This method preserves the original texture and flavor.
Freezer Friendly
Freeze the chicken in a single layer on a parchment sheet before transferring to a freezer bag. This prevents clumping. When ready, bake at 425°F for 15 minutes, then broil for 2 minutes. The result is as good as fresh.
Best Reheating Method
Add a splash of water to the pan before reheating to create steam, keeping the chicken moist. Use a skillet over medium heat, covering loosely with foil for 5 minutes. Finish with a quick broil to re‑crisp the coating. This technique ensures the dish stays juicy and flavorful.