When the kitchen clock struck 2 a.m. and the last slice of pizza was gone, I found myself staring at an empty fridge and a craving that felt like a guilty secret. I wanted something sweet, something that would satisfy my midnight hunger without the guilt of a full dessert. That night, I reached for the only thing I had left: a bag of Rice Krispies, a tub of chocolate chips, and a jar of marshmallows. The result was a sticky, chocolate‑laden mess that tasted like a childhood memory and a guilty pleasure all at once. I dared my friend to taste this and not go back for seconds, and she was left speechless. That was the moment I decided to turn this accidental creation into a definitive recipe, and I’ve been obsessed with perfecting it ever since.
Picture the kitchen: the faint hum of the fridge, the gentle clatter of a spoon against a mixing bowl, and the sweet, buttery aroma that starts to seep from the pan as the butter melts. The sound of the chocolate chips sizzling in the butter is like a soft jazz solo that promises decadence. When you stir, the marshmallows begin to dissolve, turning the mixture into a glossy, golden syrup that coats the cereal like velvet. The texture is a delightful contradiction—crunchy on the outside, gooey on the inside. The first bite is a burst of chocolate, a whisper of salt, and a satisfying crunch that leaves you wanting more. I was instantly hooked, and I knew this was going to become a staple in my kitchen.
But why is this version the best you’ll ever make at home? It isn’t just the classic combination of rice cereal, chocolate, and marshmallows. It’s the subtle tweaks that elevate it from a simple snack to an unforgettable treat. I’ve spent hours experimenting with ratios, heat, and texture to find the sweet spot where the balls hold together without being too sticky, where the chocolate remains glossy but not melted, and where the crunch stays crisp. The result is a ball that is perfectly bite‑size, melts in your mouth, and leaves a lingering chocolate aftertaste that is both comforting and indulgent. If you’ve ever tried a batch that fell apart or tasted too sweet, you’re not alone—and this recipe is the fix you’ve been searching for.
What sets this recipe apart is a single, unexpected ingredient that I discovered during my trial runs: a splash of vanilla extract. Vanilla brings a depth of flavor that balances the sweetness of the marshmallows and chocolate, adding a subtle floral note that makes each bite feel more complex. I also discovered that using a small amount of butter, not melted but softened, helps bind the mixture without making it greasy. The final touch? A pinch of sea salt that cuts through the sweetness and enhances the chocolate’s richness. These small adjustments make a big difference, and I’m eager to share every single step with you. By the end, you’ll wonder how you ever made it any other way.
What Makes This Version Stand Out
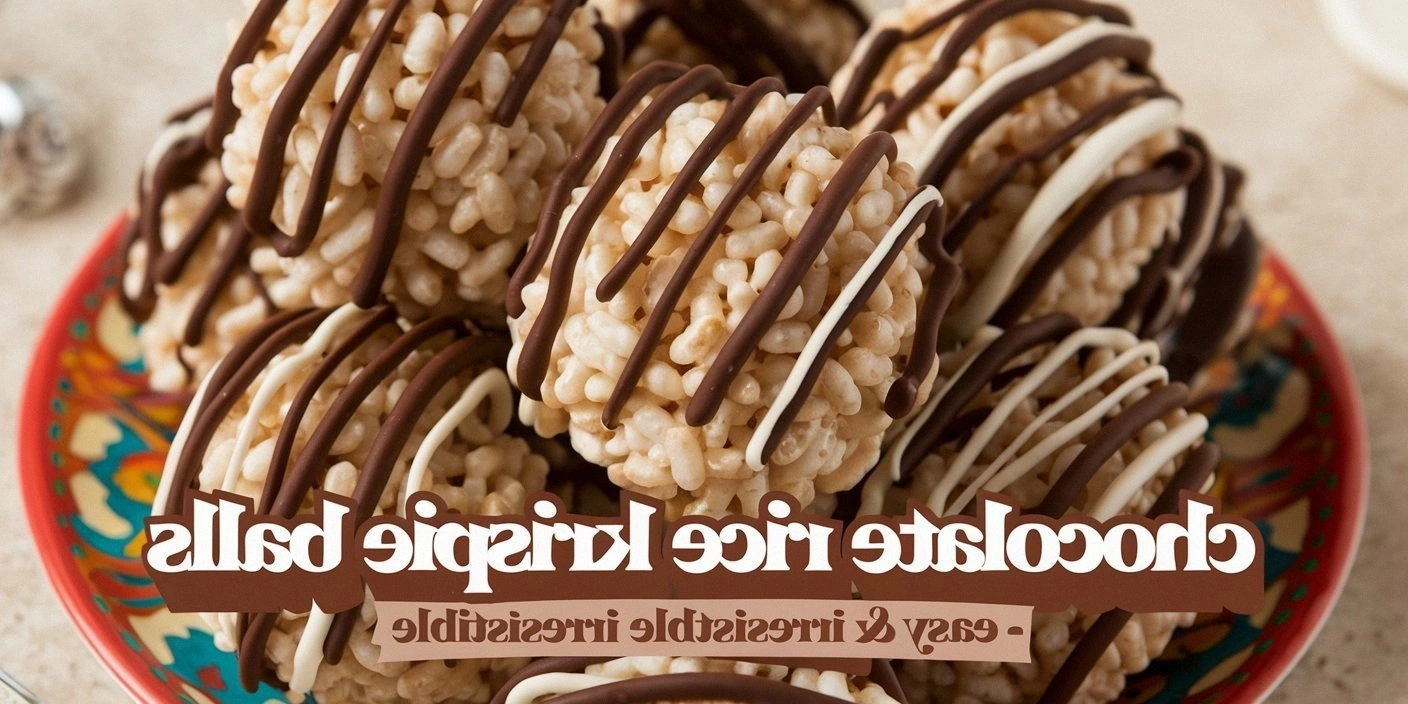
- Taste: The balanced sweetness of marshmallows, the deep flavor of dark chocolate, and the subtle lift of vanilla create a harmonious profile that satisfies sweet cravings without feeling overpowered.
- Texture: Crisp cereal on the outside gives way to a gooey interior, providing a multi‑sensory experience that keeps you coming back for more.
- Simple Technique: No baking required—just a gentle melt and a quick roll, making this recipe accessible for even the most novice cooks.
- Unique Twist: A splash of vanilla and a pinch of sea salt add depth, turning a classic snack into a gourmet treat.
- Crowd Appeal: These balls are perfect for parties, movie nights, or as a sweet snack for kids and adults alike.
- Make‑Ahead: They hold up well in the fridge for up to a week and can be frozen for longer storage without losing texture.
- Ingredient Quality: Using high‑quality chocolate chips and real butter elevates the flavor profile and ensures a silky finish.
Alright, let's break down exactly what goes into this masterpiece…
Inside the Ingredient List
The Flavor Base
At the heart of these treats is a trio of sweet, creamy, and crunchy components that work together to create a flavor explosion. The marshmallows act as the sweet binder, the chocolate chips add richness and a glossy finish, and the Rice Krispies provide the essential crunch that keeps the ball from becoming a mushy lump. Together, they form a cohesive unit that’s both indulgent and satisfying. If you skip any of these, the balance tips—too many marshmallows and you end up with a sticky mess; too little and the balls won’t hold together.
The Texture Crew
Butter is the unsung hero that brings everything together. It softens the marshmallows, helps the chocolate melt evenly, and adds a silky mouthfeel. Using butter instead of oil or margarine keeps the flavor authentic and gives the balls a subtle richness that oil can’t replicate. A pinch of sea salt is the secret seasoning that cuts through the sweetness and brings out the chocolate’s depth. If you’re watching sodium, a dash of kosher salt works just as well, but the sea salt adds a pleasant minerality that elevates the overall taste.
The Unexpected Star
Vanilla extract is the hidden star that transforms the flavor profile. A teaspoon of pure vanilla extract adds a fragrant, almost floral note that balances the sweetness and enhances the chocolate’s depth. Many recipes skip vanilla, resulting in a flat chocolate taste. By adding vanilla, you create a more complex flavor that feels gourmet. If you’re vegan or prefer a non‑alcoholic version, try vanilla bean paste or a splash of almond extract for a subtle twist.
The Final Flourish
Optional toppings like crushed nuts, sprinkles, or a drizzle of caramel add a fun finishing touch and can customize the treat for different occasions. Nuts provide a pleasant crunch and a nutty undertone that pairs well with chocolate, while sprinkles add a playful pop of color. A drizzle of caramel or a dusting of powdered sugar can transform the balls into a dessert that’s fit for a special celebration. Remember, the key is to keep the base simple so that the optional additions shine without overwhelming the core flavor.
Everything's prepped? Good. Let's get into the real action…
The Method — Step by Step
- In a medium saucepan, melt the butter over medium heat. Once the butter turns a light golden brown and starts to bubble, add the chocolate chips. Stir constantly until the chocolate is completely melted and the mixture is smooth. The aroma should be rich and chocolatey—this is the moment where anticipation builds.
- Add the mini marshmallows to the pan and stir until they’re fully melted and the mixture coats the back of a spoon. This step is crucial; if the marshmallows aren’t fully incorporated, the balls will fall apart. Keep the heat low to avoid scorching the chocolate.
- Remove the saucepan from heat and stir in the vanilla extract and sea salt until evenly distributed. The vanilla should give a faint floral scent that signals the flavor is about to reach its peak. Let the mixture sit for 30 seconds so the flavors meld.
- Fold in the Rice Krispies cereal gently, using a spatula to ensure even coating. The cereal should be fully submerged in the chocolate mixture, but be careful not to overmix, as that can break the cereal’s structure. At this point, the mixture should be thick enough to hold together but still pliable.
- Let the mixture cool to room temperature, about 10–15 minutes. It should still be warm enough to shape but not so hot that it melts your hands. This is the trickiest step—if it’s too warm, the balls will be sticky; if it’s too cool, they won’t hold together.
- Using a tablespoon or a small cookie scoop, portion out the mixture and roll it between your palms to form a ball. Aim for about 1.5 inches in diameter. If the mixture is too sticky, lightly oil your hands or use parchment paper to roll.
- Optional: Roll each ball in crushed nuts, sprinkles, or a dusting of powdered sugar for a decorative touch. This step adds both flavor and visual appeal, making the treats perfect for a party or gift.
- Place the finished balls on a parchment-lined tray and refrigerate for at least 30 minutes to set. They’ll firm up nicely, making them easier to handle and giving them a polished look.
That's it — you did it. But hold on, I've got a few more tricks that'll take this to another level. Let’s dive into the insider secrets that will make your balls stand out even more.
Insider Tricks for Flawless Results
The Temperature Rule Nobody Follows
Many people think any heat level works, but the chocolate and marshmallows require a precise temperature to melt evenly. Use a candy thermometer to keep the mixture at 120–125 °F. This ensures the chocolate stays glossy and the marshmallows don’t burn, giving you a silky texture that’s not too thick or too runny.
Why Your Nose Knows Best
When the chocolate starts to bubble, you’ll notice a sweet, buttery aroma that signals the mixture is ready. Trust that scent—if the aroma is too strong or burnt, you’ve gone over the temperature limit. The nose is a reliable guide to avoid overcooking.
The 5-Minute Rest That Changes Everything
After folding in the Rice Krispies, let the mixture rest for exactly five minutes. This pause allows the cereal to absorb the chocolate and marshmallow flavors fully, creating a uniform taste throughout each ball. Skipping this step often results in uneven flavor distribution.
Keep It Cool, Keep It Crisp
If you’re making a large batch, keep the mixture in a shallow bowl covered with plastic wrap. This prevents the surface from drying out, which can cause the balls to become tough. Cover the bowl with a damp towel to maintain moisture.
Rolling Technique for Perfect Balls
Use a small cookie scoop for consistent size and shape. This not only makes the presentation uniform but also ensures even cooking if you decide to bake them later. If you prefer a softer ball, use your hands and roll quickly to prevent the mixture from hardening.
Storage Tips for Long‑Lasting Freshness
Store the balls in an airtight container in the fridge for up to a week. For longer storage, freeze them in a single layer on parchment paper, then transfer to a freezer bag. When ready to eat, let them sit at room temperature for 10 minutes before serving.
Creative Twists and Variations
This recipe is a playground. Here are some of my favorite ways to switch things up:
Nutty Crunch Edition
Swap the plain Rice Krispies for a mix of crushed almonds and hazelnuts. The added nutty crunch complements the chocolate and gives a sophisticated flavor profile that’s perfect for a holiday gathering.
Minty Fresh Surprise
Add a teaspoon of peppermint extract instead of vanilla, and sprinkle crushed candy cane pieces on top. The minty undertone provides a refreshing contrast to the rich chocolate, making it a hit at summer parties.
Caramel Swirl Delight
Drizzle a thin layer of caramel sauce over each ball before they set. The caramel adds a sweet, buttery layer that pairs beautifully with the chocolate, creating a decadent treat that feels like a dessert from a fancy bakery.
Citrus Zest Twist
Grate a small amount of orange zest into the mixture before adding the Rice Krispies. The citrus brightness cuts through the sweetness and adds a lively, fresh note that’s surprisingly refreshing.
Espresso Infusion
Stir a teaspoon of instant espresso powder into the chocolate mixture. The coffee flavor deepens the chocolate’s richness and adds a subtle bitterness that balances the marshmallow sweetness, making it ideal for coffee lovers.
Chocolate‑Covered Peanut Butter
After forming the balls, roll them in a mixture of peanut butter and powdered sugar. The peanut butter coating gives a salty, nutty flavor that contrasts beautifully with the sweet chocolate core.
Storing and Bringing It Back to Life
Fridge Storage
Place the balls in an airtight container and store them in the refrigerator for up to seven days. The cold environment keeps the chocolate firm and the texture crisp. When you’re ready to eat, let them sit at room temperature for a few minutes to soften slightly.
Freezer Friendly
For longer storage, lay the balls in a single layer on parchment paper and freeze for up to three months. Once frozen, transfer them to a resealable freezer bag. This method prevents the balls from sticking together and preserves their texture.
Best Reheating Method
To bring the frozen balls back to life, place them on a microwave-safe plate and heat on low power for 10–15 seconds. Add a splash of water or milk to the mixture before reheating; this steams the balls back to a silky, melt‑in‑your‑mouth consistency. Alternatively, let them thaw at room temperature for 30 minutes and enjoy immediately.