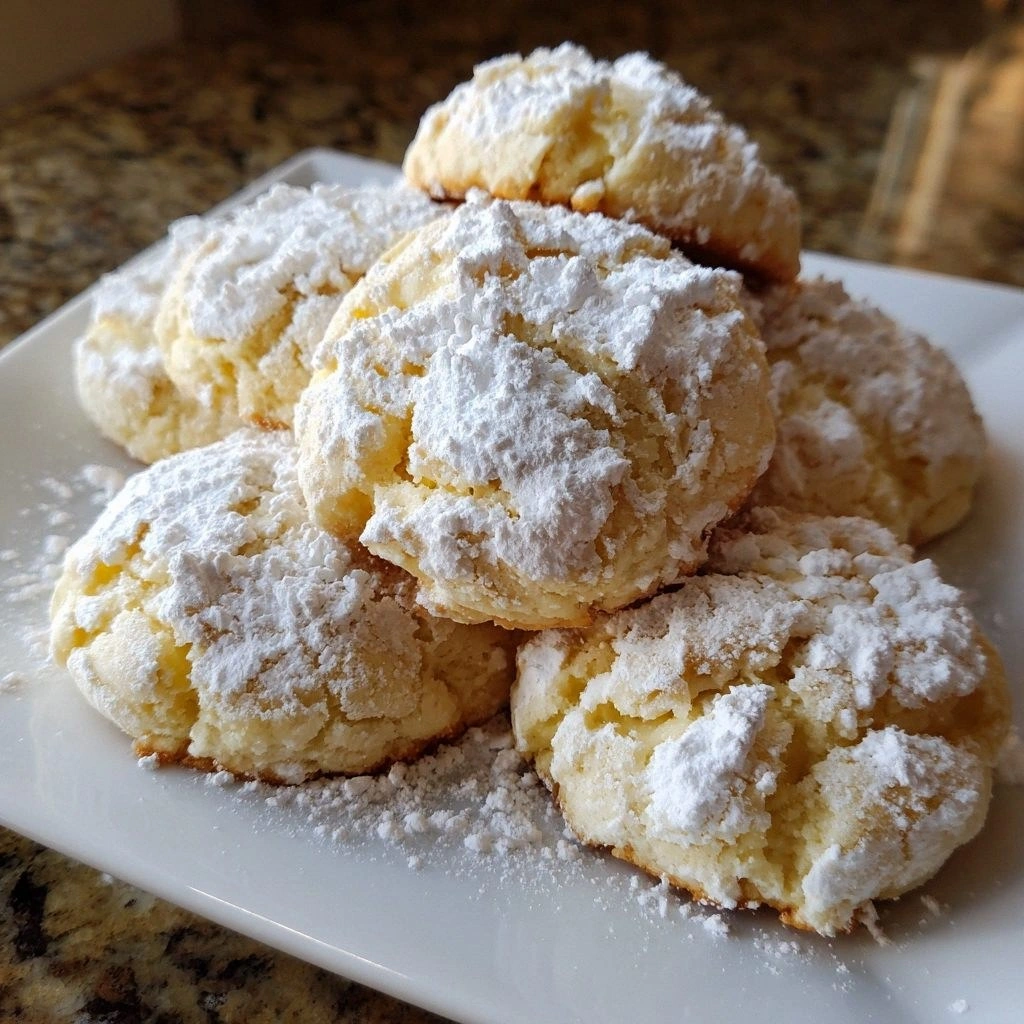
Picture this: it’s a snowy Saturday morning, the kitchen lights are dim, and you’re in full‑blown holiday mode, ready to bake the most iconic cookie of the season. You open the pantry, pull out the bag of flour, and the aroma of butter starts to dance in the air. Suddenly, a rogue bag of flour flies off the counter, splattering everywhere like a white confetti storm. The kitchen looks like a winter wonderland gone wild, but you’re still determined to turn that chaos into culinary gold.
I’m talking about the buttery, chocolate‑laden, melt‑in‑your‑mouth cookies that have become a staple at every family gathering. The sound of the dough being folded, the golden edges curling just right, and that first bite—soft, chewy, and decadently gooey—creates a symphony of textures that feels like a holiday hug. The scent of fresh butter and caramelized sugar wafts through the air, mingling with the faintest hint of vanilla, making the kitchen feel like it’s wrapped in a warm blanket of comfort.
What sets this version apart from the endless array of cookie recipes you’ll find online is the meticulous balance between the sweet and the buttery, the use of high‑quality ingredients that elevate the flavor profile, and a technique that ensures every cookie is a masterpiece. It’s not just a cookie; it’s a statement of love, a promise of nostalgia, and a testament to the power of a well‑crafted dough.
And here’s the twist that will have you saying, “I dare you to taste this and not go back for seconds.” The secret? A splash of milk that keeps the dough silky, a generous portion of chocolate chips that melt into a glossy, velvety center, and a dash of salt that amplifies every flavor note. Ready? Let me walk you through every single step—by the end, you’ll wonder how you ever made it any other way.
What Makes This Version Stand Out
- Flavor: The combination of brown and white sugar creates a caramelized base that pairs perfectly with the rich butter.
- Texture: The dough’s unique consistency yields cookies that are crisp on the edges but melt‑in‑your‑mouth in the center.
- Ingredient Quality: Using real butter and premium chocolate chips elevates every bite.
- Simplicity: Only nine ingredients, no fancy equipment, and a straightforward method.
- Make‑Ahead: The dough can be frozen and baked later, making it ideal for holiday parties.
- Visual Appeal: The glossy chocolate chips give each cookie a festive, almost jewel‑like appearance.
- Scalability: Whether you’re baking for a family of four or a hundred guests, the recipe scales effortlessly.
Alright, let’s break down exactly what goes into this masterpiece. And trust me, once you see the magic behind each ingredient, you’ll be tempted to tweak everything.
Inside the Ingredient List
Before we dive into the dough, let’s talk about the players in our cookie orchestra. Each ingredient has a role, and missing one is like taking out a violin from a symphony—everything just doesn’t sound right.
The Flour
All‑purpose flour is the backbone of any cookie. It provides structure and a neutral canvas for the butter and sugars to shine. If you use whole wheat instead, the cookies will be denser and have a nuttier flavor, which could be a tasty twist but will change the classic feel. For the best results, sift the flour to remove any lumps and ensure an airy crumb.
The Baking Soda
Baking soda is the gentle leavening agent that gives the cookies a slight lift and helps them spread evenly. Without it, the cookies would be thick, dense, and not reach that perfect golden edge. If you’re out of baking soda, you can substitute baking powder, but use 1.5 times the amount and watch the cookies rise too much.
The Salt
Salt isn’t just a flavor enhancer; it balances the sweetness and brings out the richness of the butter and chocolate. A pinch of sea salt on top after baking adds a subtle crunch and a burst of flavor that elevates the entire cookie. If you forget the salt, the cookies will taste flat and overly sweet.
The Butter
Unsalted butter is the star of the show. Its high fat content creates a silky dough that yields a tender, melt‑in‑your‑mouth center. Using salted butter will add an extra layer of flavor, but you’ll need to reduce the added salt accordingly. For an extra buttery kick, consider using European-style butter, which has a higher butterfat percentage.
The Sugars
Brown sugar brings caramel notes and moisture, while white sugar adds sweetness and helps with browning. Together, they create a balanced sweetness that isn’t overpowering. If you prefer a less sweet cookie, reduce the white sugar by half and increase the brown sugar.
The Vanilla
Vanilla extract adds depth and a subtle aroma that complements the chocolate. A splash of vanilla bean paste gives a more intense flavor profile, but it’s a bit more expensive. If you’re on a budget, a teaspoon of vanilla extract is more than enough.
The Milk
A tablespoon or two of milk keeps the dough smooth and prevents the butter from hardening too quickly during mixing. It also helps the dough spread evenly during baking. If you’re lactose intolerant, you can use a dairy‑free milk alternative; just make sure it’s unsweetened to avoid altering the sugar balance.
The Chocolate Chips
The chocolate chips are the showstopper. They melt into a glossy center while the edges stay crisp. Use high‑quality dark chocolate chips for a richer flavor, or a mix of milk and dark chips for a balanced sweetness. If you’re adventurous, try adding a handful of white chocolate chips for a subtle twist.
Everything’s prepped? Good. Let’s get into the real action and start turning dough into deliciousness.
The Method — Step by Step
- Preheat your oven to 350°F (175°C) and line two baking sheets with parchment paper. The parchment prevents sticking and ensures even browning. If you’re using a metal sheet, lightly grease it for extra crispness.
- In a medium bowl, whisk together the flour, baking soda, and salt. Sifting the dry ingredients ensures there are no clumps and gives the dough a light, airy base. This step is crucial for a consistent texture.
- In a larger bowl, beat the softened butter, brown sugar, and white sugar with an electric mixer on medium speed until the mixture is light and fluffy—about 3 to 4 minutes. The goal is to incorporate air for that tender crumb.
- Add the vanilla extract and milk to the butter mixture, mixing until fully combined. The milk will help the dough stay smooth and prevent the butter from separating. Keep mixing until the mixture is silky.
- Gradually add the dry flour mixture to the wet mixture, mixing on low speed just until the dough comes together. Overmixing can make the cookies tough, so stop as soon as you see a cohesive dough.
- Fold in the chocolate chips by hand, ensuring an even distribution. The chips should be fully coated in dough, preventing any raw chocolate pockets.
- Using a tablespoon or a cookie scoop, drop rounded balls of dough onto the prepared baking sheets, spacing them about 2 inches apart. The spacing allows the cookies to spread without merging.
- Bake for 10 to 12 minutes, or until the edges are golden brown and the centers still look slightly undercooked. The trick is to let the center stay soft—once removed from the oven, the cookies will firm up as they cool.
- Let the cookies rest on the sheet for 5 minutes before transferring them to a wire rack to cool completely. This resting period allows the chocolate to set without cracking.
- Enjoy your freshly baked cookies with a glass of cold milk or a steaming mug of hot cocoa. The buttery aroma and chocolate melt will transport you to a cozy winter cabin.
That’s it—you did it. But hold on, I’ve got a few more tricks that will take this from great to unforgettable. These are the subtle touches that seasoned bakers swear by.
Insider Tricks for Flawless Results
The Temperature Rule Nobody Follows
The oven’s actual temperature can vary by up to 25°F. Use an oven thermometer to confirm the heat. If your oven runs hot, lower the temperature by 25°F to prevent over‑browning. Conversely, if it’s on the cool side, raise the temperature slightly.
Why Your Nose Knows Best
The aroma of butter and sugar rising in the oven is a reliable indicator of progress. When you smell a caramelized, buttery scent, the cookies are nearing perfection. Trust that scent over the timer for a more intuitive bake.
The 5-Minute Rest That Changes Everything
Leaving the cookies on the sheet for 5 minutes before moving them to a rack allows the chocolate to set without cracking. This brief pause also lets the edges firm up, preventing them from sticking to the parchment.
The Secret of Even Spreading
If your cookies spread too much, chill the dough for 30 minutes before scooping. The cold dough holds its shape better, resulting in a thicker cookie with a perfect bite.
The Final Flourish of Sea Salt
Sprinkling a pinch of flaky sea salt over the cookies right before they go into the oven adds a delightful crunch and enhances the chocolate flavor. The salt crystals melt into the warm dough, leaving a subtle, satisfying contrast.
Creative Twists and Variations
This recipe is a playground. Here are some of my favorite ways to switch things up:
Cocoa Butter Cookies
Replace the butter with cocoa butter for a richer, chocolate‑forward flavor. The cookies will have a deep chocolate aroma and a slightly firmer bite.
Nutty Chocolate Crunch
Add ½ cup chopped walnuts or pecans to the dough. The nuts add a delightful crunch and a nutty undertone that pairs beautifully with the chocolate.
Citrus‑Infused Delight
Grate the zest of one orange or lemon into the dough. The citrus brightens the chocolate, giving the cookies a fresh, vibrant finish.
Caramel Swirl
Swirl in a few spoonfuls of caramel sauce before baking. The caramel melts into the dough, creating pockets of gooey sweetness.
Spiced Gingerbread
Add 1 tsp ground ginger, ½ tsp cinnamon, and a pinch of cloves. The spices give the cookies a warm, holiday‑spiced kick.
Minty Chocolate Surprise
Mix in a teaspoon of peppermint extract and a handful of crushed peppermint candies. The mint pairs with the chocolate for a refreshing twist.
Storing and Bringing It Back to Life
Fridge Storage
Store cooled cookies in an airtight container at room temperature for up to 5 days. If you need to keep them longer, refrigerate them for up to a week. The cooler temperature preserves the buttery texture.
Freezer Friendly
Place the cooled cookies in a freezer bag, pressing out excess air. They’ll stay fresh for up to 3 months. When you’re ready, let them thaw at room temperature for 30 minutes.
Best Reheating Method
Reheat frozen or refrigerated cookies in a 350°F oven for 5 minutes to revive their crisp edges. Add a tiny splash of water to the dough before baking if you’re reheating from frozen; this steams the cookies back to perfection.