I was halfway through a midnight snack run, the fridge door slamming behind me, when I realized my usual bag of chips was gone—left for the neighbor’s dog. The kitchen was a chaotic blur of empty bags, a handful of stale crackers, and my own frantic search for something crunchy. I stared at the empty space on the counter and thought, “This is the perfect excuse to create something that’s both wholesome and irresistibly crispy.” The moment I cracked a small bowl of cottage cheese, the air filled with a sweet, milky aroma that made my taste buds tingle with anticipation.
Picture this: the cottage cheese glistening like a creamy snowfield, the garlic powder whispering a subtle, earthy undertone, and a dusting of paprika adding a smoky blush. As I whisked, the mixture turned into a golden, almost translucent batter that smelled like a sun‑kissed kitchen. When the first spoonful hit the hot pan, a satisfying sizzle erupted, sending a burst of buttery aroma across the room. The texture was almost like a velvety mousse that cracked into airy, bite‑sized pieces when cooked to perfection. I could almost hear the crunch in my head before the first chip even touched the pan.
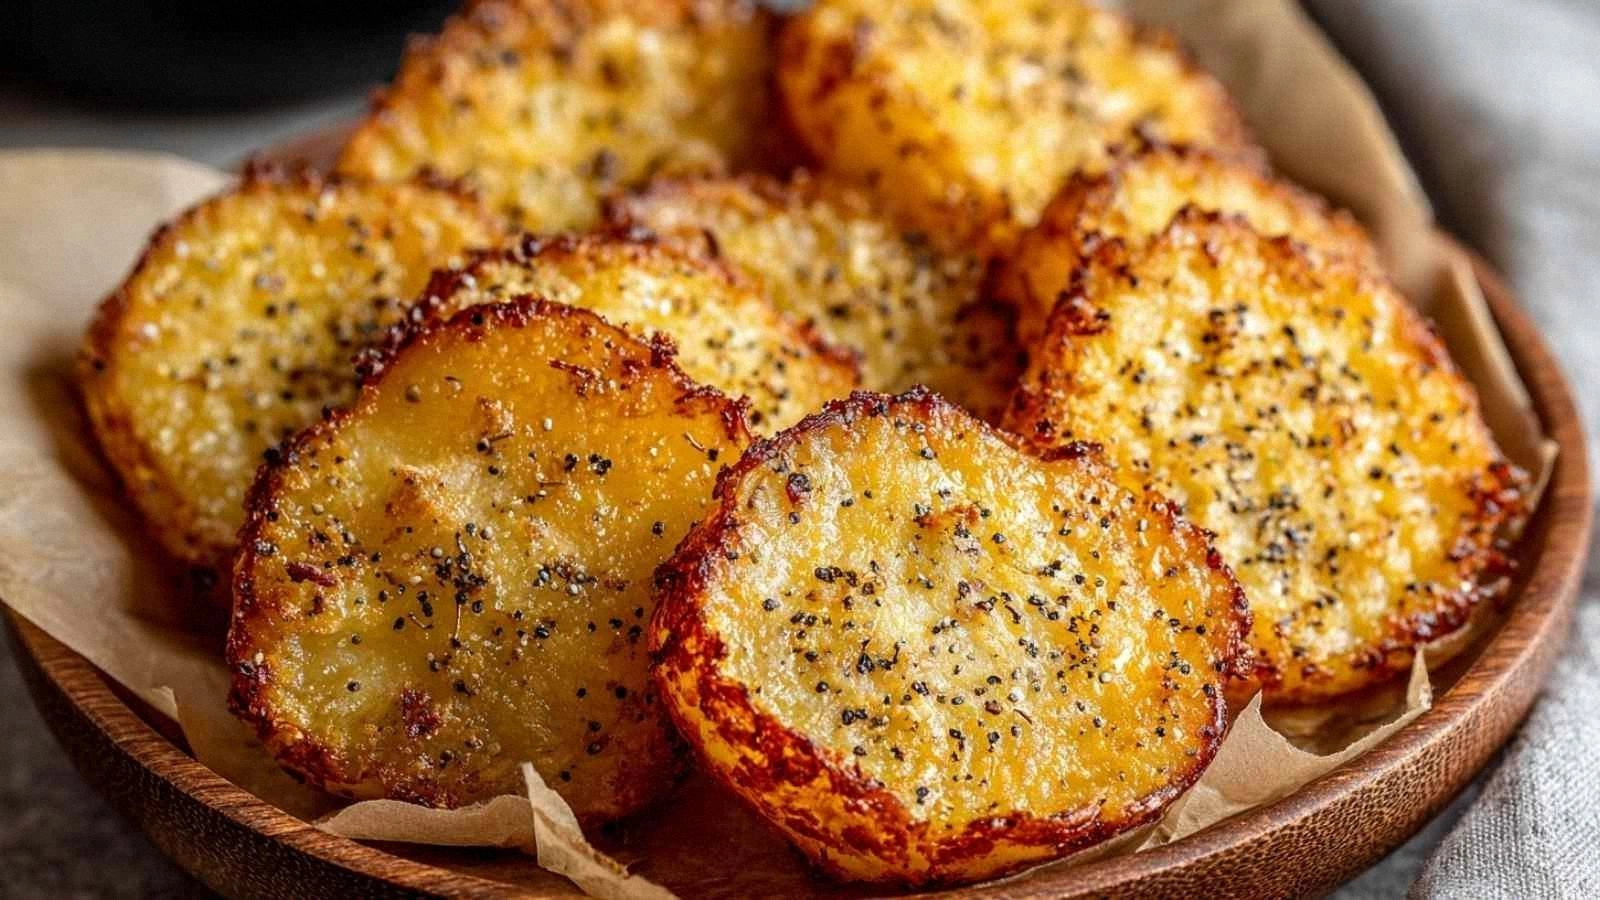
What sets this version apart is that it takes the humble cottage cheese and transforms it into a protein‑packed, low‑carb snack that feels like a gourmet treat. Unlike the usual fried or baked versions that can become soggy or greasy, this recipe locks in moisture and creates a crisp edge that shatters like thin ice. The seasoning blend—garlic, paprika, Parmesan, and pepper—works together to give each chip a complex flavor profile that’s savory, slightly sweet, and peppery all at once. I dare you to taste this and not go back for seconds. It’s hands down the best version you’ll ever make at home.
I’ll be honest—once I finished the first batch, I ate half before anyone else had a chance to try it. That moment of triumph was the spark that turned a simple kitchen mishap into a culinary revelation. The next time you’re craving something crunchy, picture yourself pulling this out of the oven, the whole kitchen smelling incredible, and the chips ready to bite into a cloud of flavor. Okay, ready for the game‑changer? Let me walk you through every single step—by the end, you’ll wonder how you ever made it any other way.
What Makes This Version Stand Out
- Taste: The subtle sweetness of the cottage cheese is elevated by a bold blend of garlic, paprika, and Parmesan, creating a savory, umami‑rich flavor that’s far from ordinary. Each chip delivers a balanced bite that satisfies without overwhelming the palate.
- Texture: The batter’s airy consistency turns into a crisp, golden shell that shatters delightfully, yet retains a soft, chewy center. The result is a chip that feels like a light cloud when you bite into it.
- Protein: With 25 grams of protein per serving, these chips are a powerhouse snack that keeps you satiated and energized. The cottage cheese and Parmesan provide a clean source of protein without the heaviness of traditional fried snacks.
- Low Carb: By using cottage cheese as the base, you eliminate the need for flour or breadcrumbs, cutting carbs dramatically while keeping the snack flavorful.
- Simple Method: No deep frying, no pre‑baking, just a single pan and a few minutes of attentive cooking. The technique is foolproof and works on any stovetop.
- Make‑Ahead Friendly: These chips can be stored in an airtight container for up to a week and reheated to crispness, making them an ideal prep‑in‑advance snack.
- Versatile Flavor Profile: The seasoning blend can be tweaked to suit any palate—add a pinch of cayenne for heat, or a sprinkle of dried oregano for an herby twist.
- Quick Gratification: From prep to finish, the entire process takes less than 45 minutes, giving you a satisfying snack without a long wait.
Inside the Ingredient List
The Flavor Base
The foundation of these chips is the cottage cheese itself—a creamy, tangy dairy product that brings moisture and protein to the mix. Whole milk small curd cottage cheese is preferred for its buttery texture, which yields a richer flavor and a smoother batter. If you’re looking for a dairy-free twist, Greek yogurt can substitute, but the taste will shift slightly toward a tangier profile.
The Texture Crew
The Parmesan cheese is the secret to that coveted crisp edge. Grated finely, it melts into the batter, creating a golden crust that cracks when you bite. A pinch of fine sea salt balances the saltiness of the cheese and enhances the overall flavor. Skipping the salt will leave the chips bland and flat, so keep it in mind.
The Unexpected Star
Garlic powder might seem like a basic pantry item, but it delivers a deep, roasted aroma that elevates the snack from ordinary to extraordinary. Paprika adds a subtle smoky sweetness and a vibrant color that makes each chip visually appealing. Together, they create a flavor profile that’s reminiscent of a well‑seasoned cracker.
The Final Flourish
Freshly ground black pepper adds a subtle heat and a peppery finish that lingers on the palate. It’s the final touch that ties all the flavors together, ensuring each chip has a complex, layered taste. If you’re sensitive to pepper, a pinch of smoked paprika can replace it for a milder yet still aromatic finish.
Everything’s prepped? Good. Let’s get into the real action...
The Method — Step by Step
- Begin by placing a large non‑stick skillet over medium heat and allowing it to preheat for about two minutes. The pan should be hot enough that a drop of water sizzles and evaporates almost instantly. This ensures a quick sear and prevents the batter from sticking. I’ve found that a preheated pan eliminates the need for oil, keeping the chips light and airy.
- While the pan heats, combine the cottage cheese, garlic powder, paprika, fine sea salt, Parmesan cheese, and black pepper in a medium bowl. Whisk until the mixture is smooth and the spices are evenly distributed. The batter should be slightly thick—think of it as a thick, creamy paste that will spread into thin sheets.
- Once the skillet is hot, spoon a heaping tablespoon of the batter onto the pan. Immediately tilt the pan to spread the batter into a thin, even circle about 2–3 inches in diameter. The batter should slide easily; if it’s too thick, add a splash of milk to thin it out. Watch the edges as they begin to lift—this is the first sign of crispness.
- Let the chip cook for 3–4 minutes, or until the underside turns golden brown and the top begins to set. Use a spatula to gently flip the chip, cooking the other side until it achieves the same golden hue. The sizzle should be audible, and the aroma will turn from milky to toasted. This is the moment of truth.
- Transfer the cooked chip onto a paper towel‑lined plate to drain any excess moisture. Repeat the process with the remaining batter, ensuring the skillet stays hot to maintain consistent cooking. I recommend arranging the chips in a single layer to avoid overcrowding, which can cause steaming instead of crisping.
- Once all the chips are cooked, let them cool for a minute or two. They will continue to crisp as they cool, giving them that signature airy texture. If you prefer a crunchier chip, let them cool on a wire rack to allow air circulation on all sides.
- Optional: For an extra burst of flavor, sprinkle a pinch of smoked paprika or a dash of hot sauce over the chips while they’re still warm. The heat will seep into the freshly cooked surface, adding a new dimension to the taste.
- Serve the chips immediately with a side of your favorite dip—perhaps a tangy yogurt sauce or a creamy avocado spread. The warm chips pair beautifully with cool, creamy dips, creating a textural contrast that is simply irresistible.
- If you’re preparing a large batch, store the cooled chips in an airtight container for up to a week. When you’re ready to eat, reheat them in a 350°F oven for 5 minutes or in a skillet over low heat until they regain their crispness. This step brings back the golden crunch without sacrificing moisture.
That's it — you did it. But hold on, I've got a few more tricks that'll take this to another level...
Insider Tricks for Flawless Results
The Temperature Rule Nobody Follows
Maintaining a consistent medium heat is key. If the pan is too hot, the chips will brown too quickly on the outside while remaining raw inside. Conversely, a too‑low temperature will cause them to steam, losing the coveted crunch. Use a thermometer if you’re unsure, and keep the temperature between 320°F and 350°F.
Why Your Nose Knows Best
The aroma is a reliable indicator of doneness. When the chips start to emit a nutty, toasted scent, they’re almost ready to flip. If you’re in doubt, give the chip a gentle tug; if it sticks, give it another minute.
The 5-Minute Rest That Changes Everything
After cooking, let the chips rest on a wire rack for at least five minutes. This rest period allows steam to escape, ensuring each chip retains its crispness. Skipping this step often results in a chewy texture that’s hard to recover.
Use a Silicone Mat for Even Browning
A silicone cooking mat placed on the skillet provides a non‑stick surface that distributes heat evenly, preventing hotspots that can burn the edges while leaving the center undercooked. It’s a small addition that pays off big in texture.
Don’t Forget the Pepper Finish
A final dusting of freshly ground pepper right after flipping adds a burst of aroma and a subtle heat that lingers on the palate. This step is often overlooked but can transform a good chip into a great one.
Creative Twists and Variations
This recipe is a playground. Here are some of my favorite ways to switch things up:
Smoky Chipotle Crunch
Swap the paprika for chipotle powder and add a pinch of cumin. The smoky heat pairs wonderfully with a cooling cilantro‑lime dip, creating a flavor explosion that feels like a taco night in a bite.
Herbal Mediterranean Delight
Replace the black pepper with dried oregano and sprinkle a dash of lemon zest. These chips make an excellent accompaniment to a Greek salad or a bowl of hummus, delivering a bright, herbaceous bite.
Cheesy Jalapeño Burst
Fold in finely diced jalapeño into the batter and increase the Parmesan by 2 tablespoons. The result is a spicy, cheesy chip that’s perfect for a party where guests crave a little heat.
Vegan Coconut Twist
Use coconut milk cottage cheese (or a vegan alternative) and replace the Parmesan with nutritional yeast. The chips will have a nutty, slightly sweet flavor that satisfies dairy‑free cravings.
Savory Mushroom Infusion
Sauté finely chopped mushrooms and fold them into the batter. The earthy umami of mushrooms adds depth, making the chips a great side for a mushroom risotto or a hearty stew.
Storing and Bringing It Back to Life
Fridge Storage
Place cooled chips in an airtight container or zip‑top bag, leaving a small air pocket to prevent them from becoming soggy. They’ll stay crisp for up to five days when stored in a cool, dry place.
Freezer Friendly
For longer storage, arrange the chips on a baking sheet, freeze until solid, then transfer to a freezer bag. They can be stored for up to three months. When ready to eat, let them thaw at room temperature for 10 minutes before reheating.
Best Reheating Method
Reheat frozen or refrigerated chips in a 350°F oven for 5–7 minutes, or in a skillet over low heat for 2–3 minutes, until they’re golden and crispy again. Adding a tiny splash of water before reheating steams them back to perfection without drying them out.