Picture this: I was standing in my tiny apartment kitchen, the air thick with the scent of garlic and soy, when the stove alarm blared like a broken alarm clock. I had just tried to recreate the teriyaki chicken my aunt makes, but the sauce had thickened into a cloying syrup that clung to the pan like a bad habit. My dinner—once a promise of flavor—turned into a soggy, flavorless disappointment that left my taste buds questioning their own existence. That night, I swore to myself that I’d find a way to make teriyaki chicken that would not only taste heavenly but also sing with texture and aroma.
I spent the next few evenings experimenting, flipping between high heat and low simmer, adding sugar, vinegar, and the occasional splash of water, but nothing seemed to hit the sweet spot. Finally, after a series of burnt attempts, I discovered that the secret lay in the balance of acidity and sweetness, and that the key to that glossy, caramelized coating was the right timing of cornstarch addition. When the sauce thickened just before the chicken was done, it coated each piece like velvet, and the edges crisped to a golden crunch that shivered like thin ice under the pan. The aroma that filled the kitchen was unmistakably Asian—sweet, salty, slightly sweet, and with a subtle, warm undertone that made the air itself feel like a hug.
What makes this version stand out is not just the flavor profile but the sheer simplicity of the technique. I’ve stripped the recipe down to a single pan, eliminated the need for pre-soaking or marinating, and introduced a small but mighty tweak: a quick cornstarch slurry that locks in moisture and gives the sauce a silky finish. The result is a dish that feels like a gourmet meal yet takes less than fifteen minutes from start to finish. I dare you to taste this and not go back for seconds—once you’ve had a bite, you’ll never settle for bland teriyaki again. This is hands down the best version you'll ever make at home, and I’m here to show you how.
If you’ve ever struggled with teriyaki chicken, you’re not alone—most recipes get this completely wrong, either by overcooking the meat or by letting the sauce burn. The trick is to keep the heat moderate, to stir constantly, and to let the sauce reduce just enough to coat the chicken without turning into a glaze. Picture yourself pulling this out of the pan, the whole kitchen smelling incredible, the plate glistening with that signature glossy sheen, and the first bite delivering a burst of umami followed by a sweet finish that lingers. And now, let’s dive into every single step—by the end, you’ll wonder how you ever made it any other way.
What Makes This Version Stand Out
- Flavor: The sauce balances sweet, salty, and umami in a way that coats the chicken without overwhelming it. The subtle kick of fresh ginger cuts through the richness, leaving a clean finish on the palate.
- Texture: The quick cornstarch slurry gives the sauce a silky sheen that clings to the meat, while the pan’s high heat creates a caramelized exterior that snaps when you bite into it.
- Simplicity: Everything happens in one skillet—no separate sauce pan, no marinating time, and no complicated steps. Just chop, cook, and serve.
- Time: From prep to plate, you’re looking at a total of fifteen minutes. It’s the perfect weeknight dinner for anyone who wants flavor without the fuss.
- Ingredient Quality: Using fresh ginger and high‑grade soy sauce elevates the dish from ordinary to extraordinary. Even a simple brown sugar works wonders when paired with the right acidity.
- Make‑Ahead Potential: The sauce can be pre‑made and stored; just reheat and add the chicken to finish cooking in minutes.
- Versatility: Toss it over rice, noodles, or steamed broccoli, and it becomes a complete meal in seconds.
- Crowd‑Pleaser: Even picky eaters love the sweet‑savory profile. I’ve had friends ask for the recipe after a single bite—no kidding.
Alright, let's break down exactly what goes into this masterpiece…
Inside the Ingredient List
The Flavor Base
Soy Sauce (1/4 cup): It’s the backbone of the teriyaki flavor—provides saltiness and umami. A splash of low‑sodium soy can keep the dish from becoming too salty, but a regular soy sauce gives that classic depth. If you’re allergic to soy, tamari or coconut aminos can substitute, though the flavor will shift slightly.
Brown Sugar (2 tbsp): The sweet counterpoint to the soy’s salt. Brown sugar’s molasses content adds a hint of caramel flavor that caramelizes beautifully when heated. If you prefer a lighter sweetness, try honey or maple syrup, but keep in mind it will alter the sauce’s consistency.
Rice Vinegar (1 tbsp): This is the acid that balances the sweetness and prevents the sauce from becoming cloying. A good rice vinegar is mild and not overly sharp. If you can’t find it, white wine vinegar works, but the flavor will be slightly different.
The Texture Crew
Cornstarch (1 tbsp): The secret to that glossy, silky coating. When whisked with a little cold water, it forms a slurry that thickens the sauce instantly without making it gritty. If you’re gluten‑free, use arrowroot or tapioca starch.
Sesame Oil (2 tsp): Adds a nutty aroma that elevates the dish. A little goes a long way—too much can overpower the other flavors. Toasted sesame oil is optional but gives a richer taste.
The Unexpected Star
Fresh Ginger (1 tbsp): It’s not just a garnish; ginger provides a bright, peppery note that cuts through the sweetness. Grate it finely to release its juices. If you’re short on time, a tablespoon of ginger paste works, but fresh is best.
Garlic (2 cloves): Adds depth and warmth. Mince the garlic finely so it releases quickly and doesn’t burn. You can also use garlic powder, but the fresh flavor is irreplaceable.
The Final Flourish
Green Onions (2 tbsp): Provide a fresh, crisp bite that balances the richness. Slice them thinly and sprinkle over the finished dish. If you’re allergic to onions, scallions or chives work as substitutes.
Sesame Seeds (1 tbsp): Add a subtle crunch and a nutty finish. Toast them lightly in a dry skillet before adding for a deeper flavor. If you’re avoiding nuts, omit or replace with poppy seeds.
Everything's prepped? Good. Let's get into the real action...
The Method — Step by Step
- Begin by patting the chicken thighs dry with paper towels. This step is crucial because moisture on the surface will prevent the meat from browning properly. Season both sides lightly with salt and pepper, then set aside while you prepare the aromatics.
- In a small bowl, whisk together the soy sauce, brown sugar, rice vinegar, grated ginger, and minced garlic. Stir until the sugar dissolves completely. This mixture will become the flavor base that infuses the chicken as it cooks.
- Heat a large skillet over medium‑high heat and drizzle in the sesame oil. Once the oil shimmers, add the chicken thighs skin‑side down. Let them sear for about 3–4 minutes until the skin turns golden brown and releases easily from the pan.
- Flip the thighs and pour the sauce mixture over the top. The sauce should immediately start bubbling—this is the moment of truth. Stir gently to ensure every piece is coated.
- Let the chicken simmer in the sauce for 5 minutes, then whisk the cornstarch slurry (1 tbsp cornstarch mixed with 2 tbsp cold water). Pour the slurry into the pan while stirring vigorously. The sauce will thicken and coat the chicken in a glossy sheen.
- Continue to cook for another 3–4 minutes, or until the chicken reaches an internal temperature of 165°F (74°C). The sauce should have reduced to a syrupy consistency that clings to the meat.
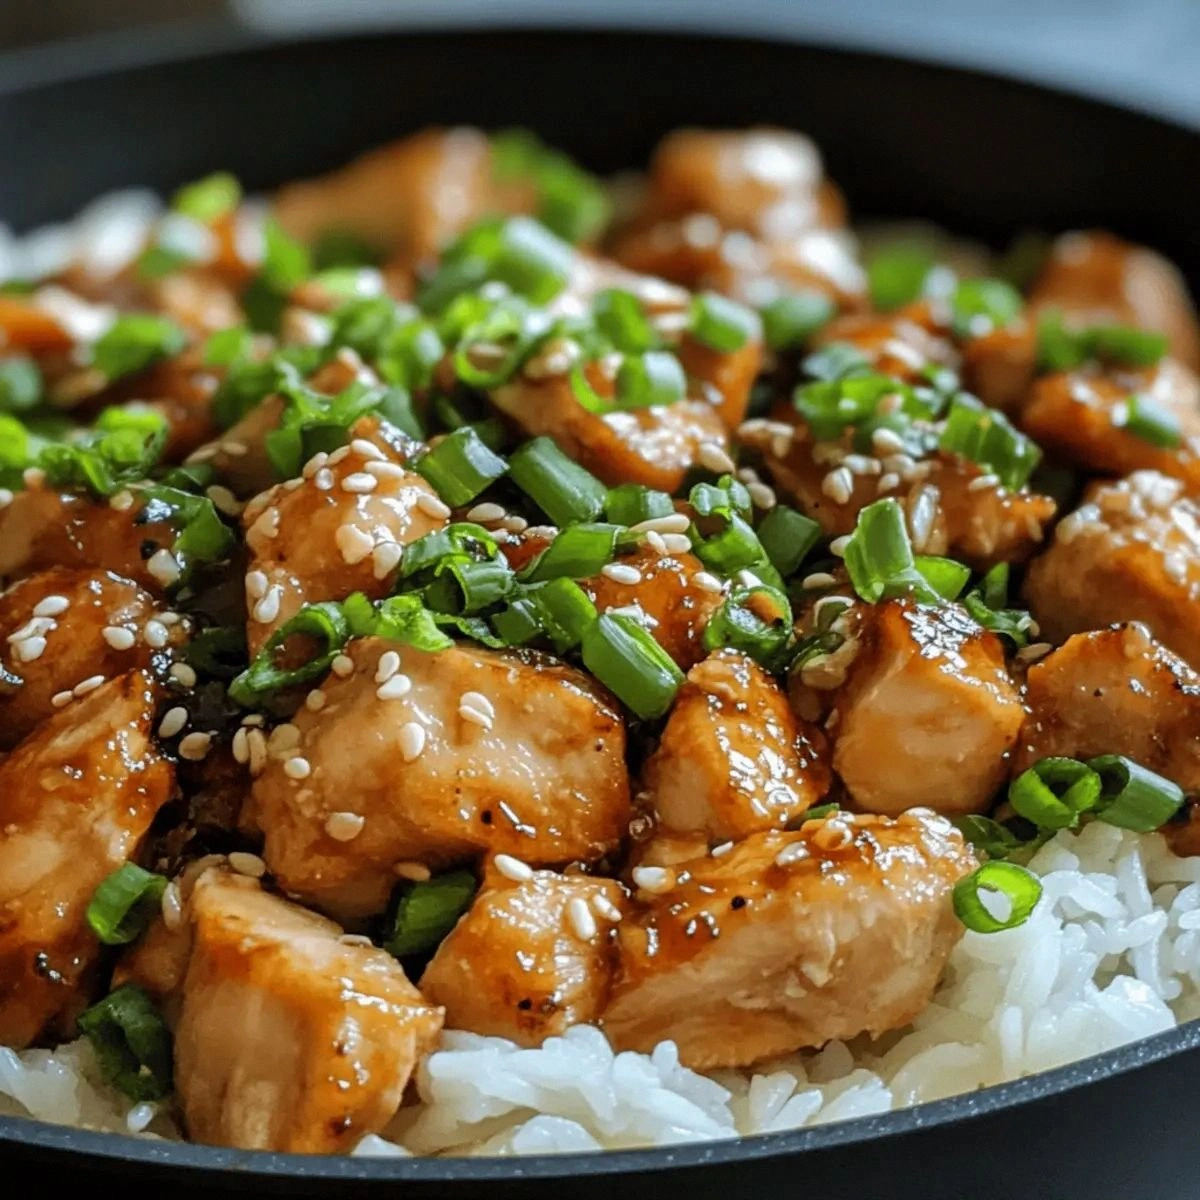
- Remove the pan from heat, sprinkle the sesame seeds and green onions over the top, and give it one final gentle stir. The seeds add a subtle crunch, while the onions bring a fresh brightness that lifts the dish.
- Serve immediately over steamed rice or sautéed noodles. The sauce will cling beautifully to the grains, creating a single‑pan meal that’s both satisfying and Instagram‑ready.
That’s it—you did it. But hold on, I've got a few more tricks that'll take this to another level…
Insider Tricks for Flawless Results
The Temperature Rule Nobody Follows
Many cooks instinctively crank the heat to the highest setting, hoping for a quick sear. In reality, a steady medium‑high heat is the sweet spot; it allows the chicken to develop a caramelized crust without burning the sugars in the sauce. If you’re using a non‑stick skillet, lower the heat slightly after the first sear to prevent flare‑ups.
Why Your Nose Knows Best
As the sauce simmers, a subtle aroma of sweet‑savory umami will fill the kitchen. Trust that scent as a cue—when it’s rich and fragrant, the sauce is at its peak. If it starts to smell burnt or overly sweet, it’s time to reduce the heat or stir more frequently.
The 5‑Minute Rest That Changes Everything
After removing the chicken from the pan, let it rest on a plate for two minutes before cutting. This short pause allows the juices to redistribute, keeping the meat moist and tender. A quick rest also lets the sauce thicken slightly, giving it a more cohesive coating.
Use Fresh Ginger, Not Powder
Fresh ginger releases bright, zesty oils that powder cannot match. Grate it finely so it mixes evenly into the sauce. If you’re in a hurry, a tablespoon of ginger paste works, but the flavor will be muted.
Add a Splash of Water if the Sauce Seesaw
Sometimes the sauce can thicken too quickly, creating a syrupy mess. A splash of water (about a tablespoon) will loosen it back to a silky consistency without diluting the flavor. Just remember to re‑reduction it for a minute to regain thickness.
Creative Twists and Variations
This recipe is a playground. Here are some of my favorite ways to switch things up:
Spicy Pineapple Teriyaki
Add a handful of chopped fresh pineapple and a pinch of crushed red pepper flakes to the sauce. The fruit’s natural sweetness balances the heat, while the pepper adds a subtle kick that pairs beautifully with the savory base.
Miso‑Infused Teriyaki
Replace half of the soy sauce with white miso paste for a deeper umami profile. Miso brings a creamy texture and a slightly nutty undertone that transforms the sauce into a richer, more complex flavor.
Coconut‑Cream Teriyaki
Stir in a splash of coconut milk after the sauce has thickened. The coconut adds a subtle sweetness and a silky mouthfeel, making the dish feel indulgent without being heavy.
Garlic‑Butter Teriyaki
Finish the chicken with a knob of butter and a squeeze of lemon juice. The butter enriches the sauce, while the lemon brightens the flavors, creating a luxurious, velvety finish.
Teriyaki with a Crunch
Top the finished dish with crushed roasted peanuts or cashews. The crunch provides a delightful contrast to the silky sauce and adds an extra protein boost.
Vegetarian Teriyaki Stir‑Fry
Swap the chicken for firm tofu or tempeh, and add a medley of bell peppers, broccoli, and snap peas. The tofu absorbs the sauce beautifully, while the veggies add color, crunch, and nutrition.
Storing and Bringing It Back to Life
Fridge Storage
Cool the dish to room temperature, then transfer it to an airtight container. Store in the refrigerator for up to 3 days. The sauce may thicken slightly when chilled; a quick stir before serving restores its silky texture.
Freezer Friendly
For longer storage, portion the chicken into freezer‑safe containers and freeze for up to 2 months. When reheating, add a splash of water or broth to loosen the sauce, then heat on low until steaming.
Best Reheating Method
Reheat the dish in a skillet over medium heat, stirring gently to prevent sticking. Add a teaspoon of water or broth if the sauce seems thick. The chicken will stay juicy, and the sauce will regain its glossy sheen.