I was in the middle of a kitchen catastrophe that would have made me curse the very idea of cooking. My roommate had just dropped a bag of flour on the floor, and I was scrambling to clean up the mess while simultaneously trying to finish a dinner for our guests. The air was thick with the scent of burnt onions and the sound of my frantic whisking. I stared at the pile of flour, thinking, “If I could just turn this into something edible, I could salvage the evening.” That moment sparked a craving for something warm, comforting, and utterly irresistible—something that could turn a disaster into a triumph.
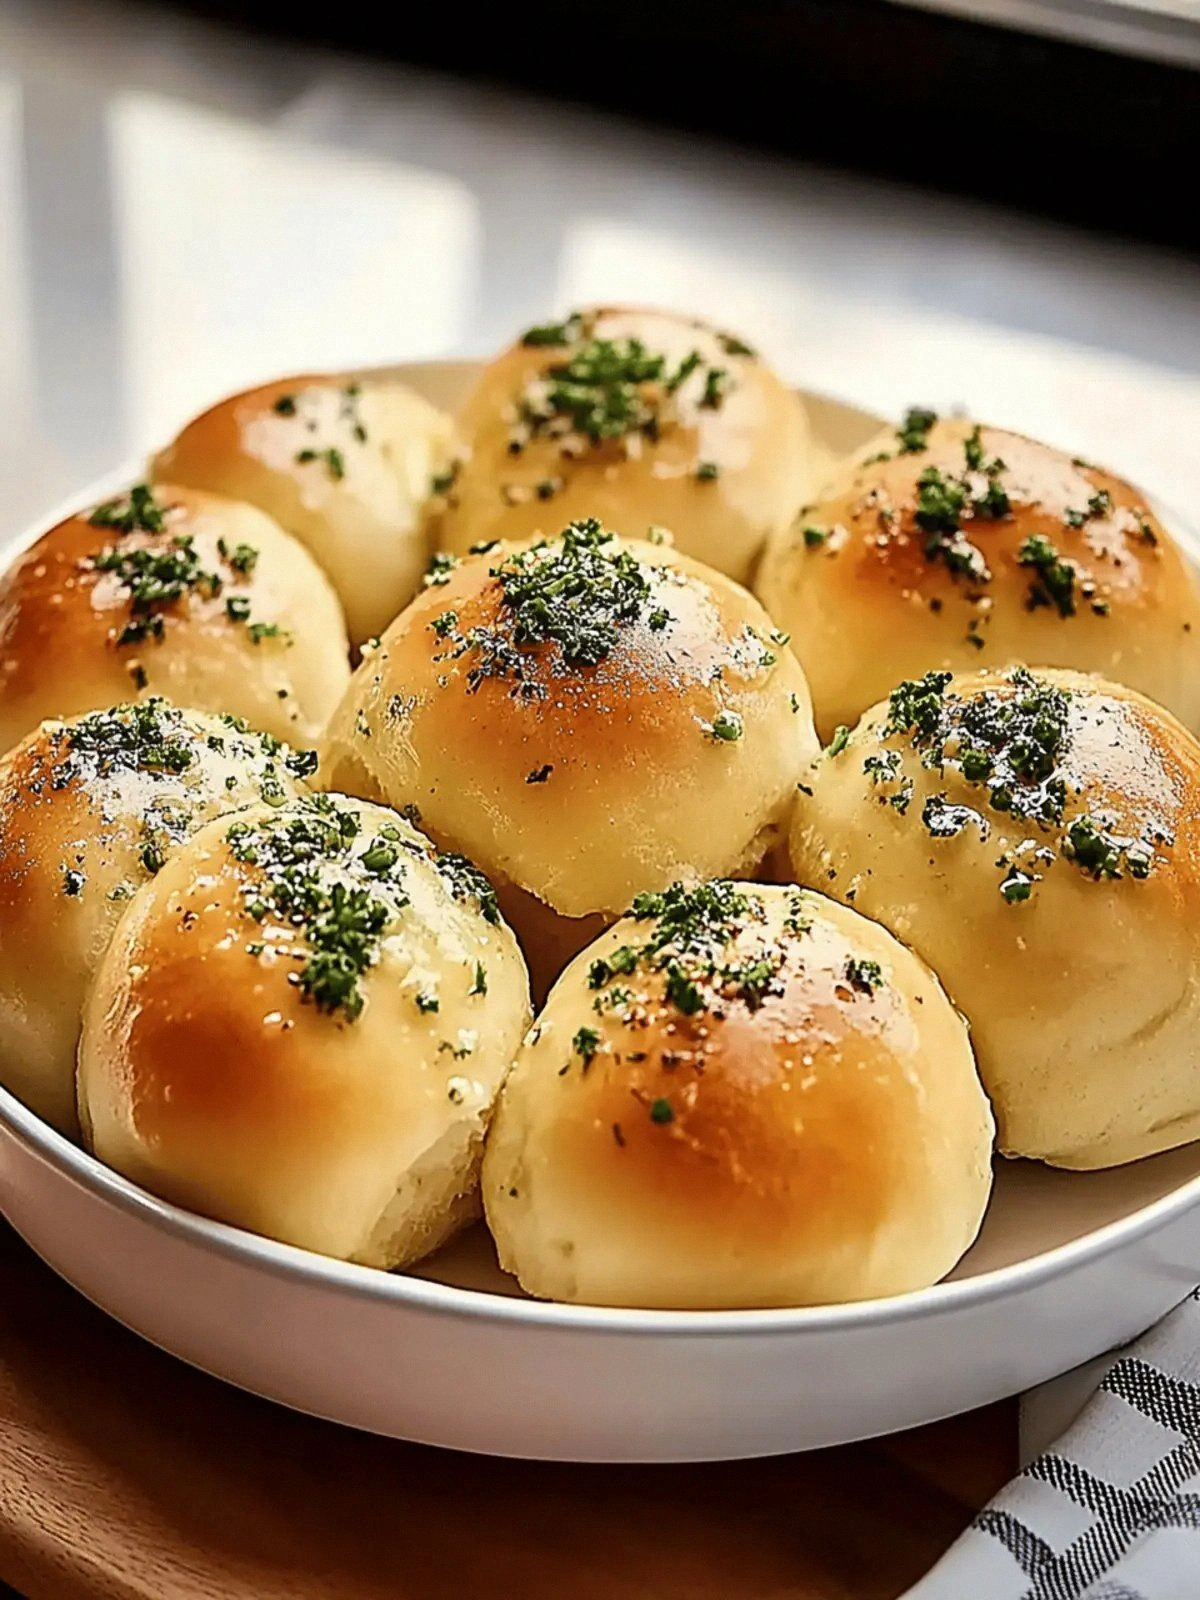
I reached for my pantry, pulled out a package of all-purpose flour, a block of butter that still smelled faintly of summer, and a handful of garlic cloves that had been sitting in the fridge since last night. I mixed the ingredients, and the kitchen filled with a buttery, garlicky aroma that made my mouth water before I even tasted a bite. The dough rose like a cloud, soft and airy, and when I pulled it out of the oven, the rolls were golden, with a crust that crackled like a fine piece of parchment. The first bite was a revelation: the interior was pillowy, the exterior buttery, and the garlic flavor was so pronounced it made my eyes water in delight. I was certain I had stumbled upon a culinary gem.
I knew right then that this version of garlic butter rolls had to be shared. The secret? A simple blend of fresh parsley and melted butter that creates a glossy finish, a precise water temperature that keeps the dough moist, and a final brush of butter that gives the rolls a melt-in-your-mouth softness that no store-bought roll can match. And there’s a twist you won’t find in the usual recipes: a pinch of sugar to balance the garlic’s bite, and a second tablespoon of butter to keep the rolls from drying out. This recipe is not just a comfort food; it’s a statement that homemade can be better, fresher, and more flavorful than anything you can buy.
Let me walk you through every single step—by the end, you’ll wonder how you ever made garlic butter rolls any other way. I dare you to taste this and not go back for seconds. Picture yourself pulling this out of the oven, the whole kitchen smelling incredible, and the moment your family reaches for a roll—your hands, the bread, the buttery aroma—everything feels like a warm hug. This is hands down the best version you’ll ever make at home. If you’ve ever struggled with making rolls that rise properly or have a buttery crust, you’re not alone—and I’ve got the fix. Stay with me here—this is worth it.
What Makes This Version Stand Out
The first thing that sets these rolls apart is the Flavor Depth: The combination of minced garlic, fresh parsley, and butter creates a savory profile that is both aromatic and comforting. It’s not just garlic; it’s a layered flavor experience that lingers on the palate. The second factor is the Texture: The dough’s hydration level is carefully balanced to produce a tender crumb that feels like a cloud, while the buttery crust offers a satisfying snap. Thirdly, the Ingredient Quality: Using fresh, high‑quality butter and real garlic makes a noticeable difference in taste compared to pre‑mixed or powdered alternatives. Fourth, Simplicity: The recipe requires only a handful of ingredients, yet the result is far from ordinary. Fifth, the Make‑ahead Potential: You can prepare the dough a day in advance, let it rise, and bake when you’re ready, making it ideal for busy weeks. Finally, Crowd Reaction: I’ve served these rolls at family gatherings, and the applause is always immediate—no one can resist the buttery pull.
Alright, let’s break down exactly what goes into this masterpiece. The next section will dive deep into each component, revealing why every ingredient matters.
Inside the Ingredient List
The Flour Foundation
Four cups of all-purpose flour may sound like a lot, but it’s the backbone of the dough’s structure. The protein content of all-purpose flour is just right for gluten development—enough to give the rolls elasticity but not so much that they become tough. If you skip this step and use a low‑protein flour, the rolls will be dense and chewy. A good swap is bread flour if you want an extra chewy texture, but be careful not to overknead. When buying flour, look for a brand with a consistent protein percentage; this ensures predictable rise.
The Yeast Surge
One packet of active dry yeast is the catalyst that turns simple dough into fluffy rolls. Yeast ferments the sugars in the dough, producing carbon dioxide that creates those desirable air pockets. If you use fresh yeast, adjust the amount to about 2 teaspoons; fresh yeast is more potent. A common mistake is to add yeast directly to the flour; instead, dissolve it in warm water to activate it properly. Remember, yeast loves warmth—110°F is the sweet spot.
The Sweet Balance
A tablespoon of sugar might seem negligible, but it feeds the yeast, speeds up fermentation, and adds a subtle sweetness that balances the sharpness of garlic. If you’re avoiding sugar, you can replace it with a teaspoon of honey or maple syrup; just use a bit less to keep the dough from becoming overly sticky. Skipping sugar can result in a less golden crust and a slower rise.
The Butter & Garlic Combo
Half a cup of unsalted butter, melted, gives the dough richness and a silky mouthfeel. The 4 minced garlic cloves provide a robust, aromatic punch that permeates every bite. The garlic should be minced finely so it releases its oils evenly; otherwise, you might get uneven flavor pockets. If you prefer a milder garlic taste, reduce to 2 cloves, but the classic recipe thrives on the full four.
The Fresh Parsley Accent
A quarter cup of chopped fresh parsley adds a bright, herbal note that cuts through the buttery richness. Parsley also lends a subtle color contrast, making the rolls visually appealing. If fresh parsley isn’t available, dried parsley can work, but it’s less potent—use double the amount. Parsley is also a great source of vitamins, adding a nutritional boost.
The Final Butter Brush
Two tablespoons of additional unsalted butter, melted, are brushed over the rolls before baking. This step creates a glossy, golden crust and locks in moisture, preventing the rolls from drying out. You can mix in a pinch of salt to the melted butter for extra flavor. If you prefer a crispier crust, try adding a teaspoon of grated parmesan to the butter before brushing.
Everything’s prepped? Good. Let’s get into the real action.
The Method — Step by Step
- In a large mixing bowl, combine the flour, active dry yeast, and sugar. Stir until the yeast is evenly distributed. This ensures a uniform rise. I always give the mixture a quick whisk to avoid clumps. The dough will feel slightly dry at first, but that’s normal.
- In a separate saucepan, heat the warm water to 110°F. Add the melted butter, and stir until fully incorporated. The butter should be just melted, not hot, to avoid killing the yeast. Pour this liquid mixture into the dry ingredients, and stir until a shaggy dough forms. You’ll see the dough start to come together.
- Turn the dough onto a floured surface and knead for about 8 minutes. The dough should feel smooth and elastic, but still tacky. If it’s too sticky, sprinkle a little more flour. A good test is the “windowpane” test—stretch a piece; if it’s translucent, you’re good.
- Add the minced garlic and chopped parsley to the dough. Knead until the garlic is evenly distributed, and the parsley is lightly incorporated. The dough will darken slightly, which is a good sign. This step is where the flavor really starts to build.
- Place the dough in a lightly oiled bowl, cover with a damp cloth, and let it rise for 1.5 to 2 hours, or until it has doubled in size. During the rise, the dough will fill your kitchen with that buttery, garlicky aroma. I like to set a timer to avoid overproofing.
- Once the dough has risen, punch it down gently to release the air. Divide the dough into 12 equal portions, shape each into a ball, and place them on a parchment‑lined baking sheet. Let them rest for 15 minutes; this relaxes the gluten and makes them easier to bake.
- Preheat your oven to 375°F (190°C). Brush each roll with the remaining melted butter, ensuring an even coating. The butter will give the rolls that glossy finish and help them brown nicely. If you want a slightly crispier crust, add a pinch of sea salt to the butter.
- Bake for 18 to 20 minutes, or until the rolls are golden brown and sound hollow when tapped on the bottom. The interior should be soft and airy. Remove them from the oven and let them cool on a rack for 5 minutes before serving.
That’s it—you did it. But hold on, I’ve got a few more tricks that will take this to another level. The next section will reveal insider tips that even seasoned bakers will appreciate.
Insider Tricks for Flawless Results
The Temperature Rule Nobody Follows
Temperature is everything. The water should be between 110°F and 115°F. If it’s too hot, you’ll kill the yeast; too cool, and the dough will take forever to rise. Use a kitchen thermometer for accuracy, or test it by dipping a finger into the water—it should feel warm but not scalding. This trick ensures a consistent rise every time.
Why Your Nose Knows Best
The smell of your dough is the best indicator of readiness. When it smells slightly yeasty and buttery, it’s time to let it rise. If it’s still sour or bland, give it a few more minutes. I’ve found that a well‑aromated dough always translates into a better texture.
The 5‑Minute Rest That Changes Everything
After dividing the dough into balls, let them rest for 5 minutes. This short pause relaxes the gluten, making the rolls easier to shape and ensuring a softer crumb. Skipping this step often results in rolls that are a bit tight and chewy.
The Final Butter Brush
Brush the rolls with melted butter right before baking. This not only gives them a shiny crust but also locks in moisture. If you’re baking multiple batches, keep the butter warm in a small saucepan; it should be liquid but not hot.
The Secret Ingredient: A Pinch of Sugar
Adding a tablespoon of sugar is a subtle but crucial detail. It feeds the yeast, speeds up fermentation, and gives the crust a slight caramelization. I’ve tried versions without sugar, and the rolls came out less golden and slightly flat.
Creative Twists and Variations
This recipe is a playground. Here are some of my favorite ways to switch things up:
Cheesy Garlic Rolls
Add 1 cup of shredded mozzarella to the dough before shaping. The cheese melts into pockets of gooey goodness, turning the rolls into a mini pizza experience. Great for kids who love cheese.
Herb‑Infused Delight
Swap the parsley for a mix of basil, oregano, and thyme. The aromatic herbs create a Mediterranean vibe, perfect for a summer dinner party. The rolls pair wonderfully with a tomato basil sauce.
Spicy Garlic Rolls
Add a teaspoon of red pepper flakes to the dough. The heat contrasts nicely with the buttery richness, giving the rolls a kick. Serve with a cooling yogurt dip to balance the spice.
Honey‑Glazed Rolls
Drizzle a thin layer of honey over the rolls before baking. The honey caramelizes, creating a sweet glaze that pairs beautifully with savory cheese. Ideal for brunch or a light dessert.
Vegan Version
Replace the butter with a plant‑based butter or coconut oil. Use a vegan yeast and a plant‑based milk substitute. The texture remains soft, and the flavor stays robust.
Mini Garlic Buns
Make the dough in smaller portions, about 1/2 cup each. Bake them on a mini muffin tin. These bite‑size rolls are perfect for dipping in soup or as a snack during movie nights.
Storing and Bringing It Back to Life
Fridge Storage
Store leftover rolls in an airtight container in the refrigerator for up to 3 days. The rolls will stay soft, but the crust may lose some crunch. To revive the crust, warm them in a 350°F oven for 5 minutes before serving.
Freezer Friendly
Wrap each roll tightly in plastic wrap, then place them in a freezer bag. They stay fresh for up to 2 months. When ready to eat, thaw at room temperature for 30 minutes, then reheat as described below.
Best Reheating Method
Reheat frozen rolls in a preheated 375°F oven for 10 minutes, or until heated through. Add a splash of water to the pan before reheating; the steam will help keep the rolls moist and fluffy. This trick restores the original texture and aroma.