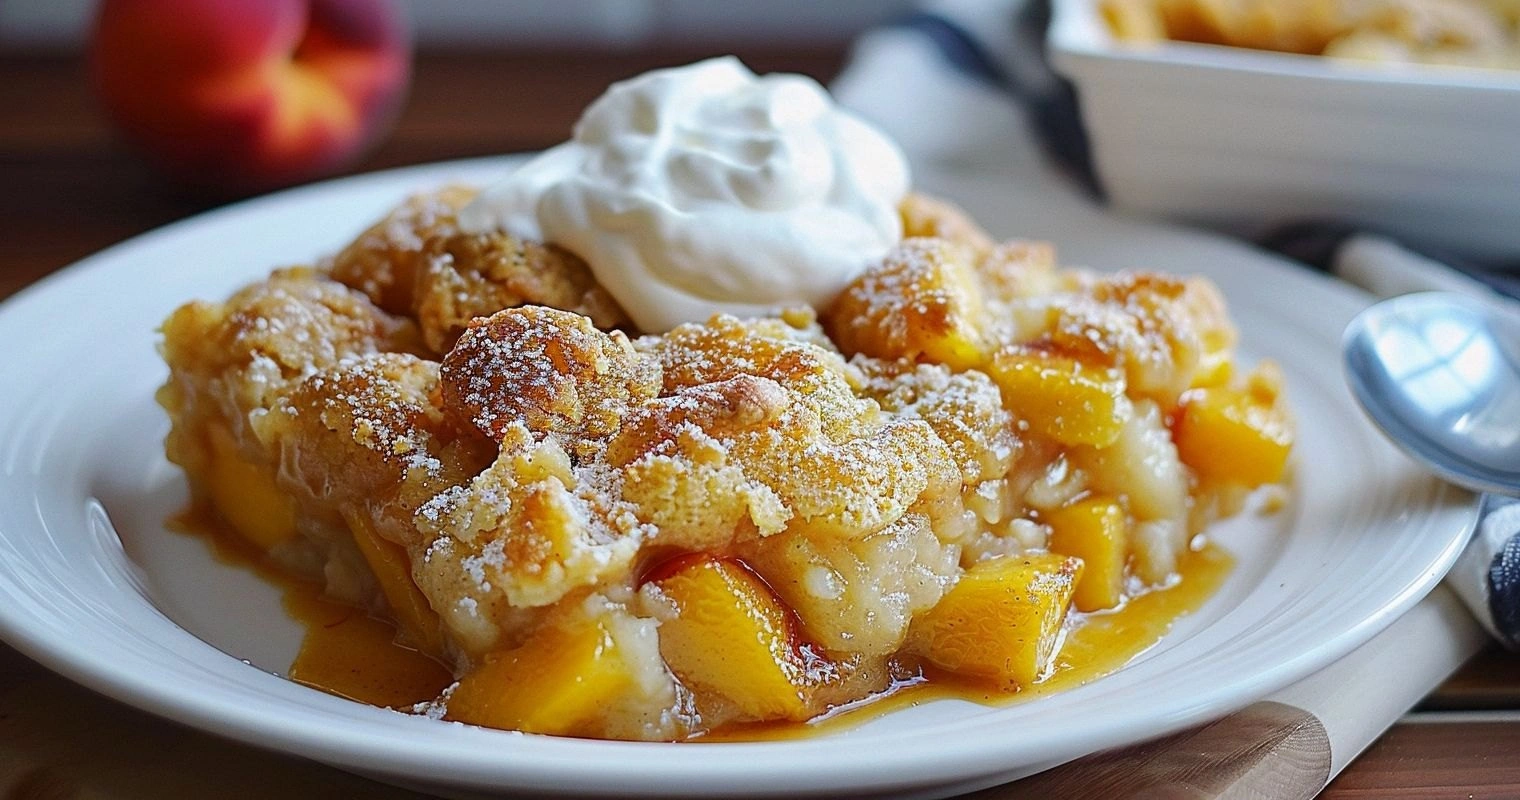
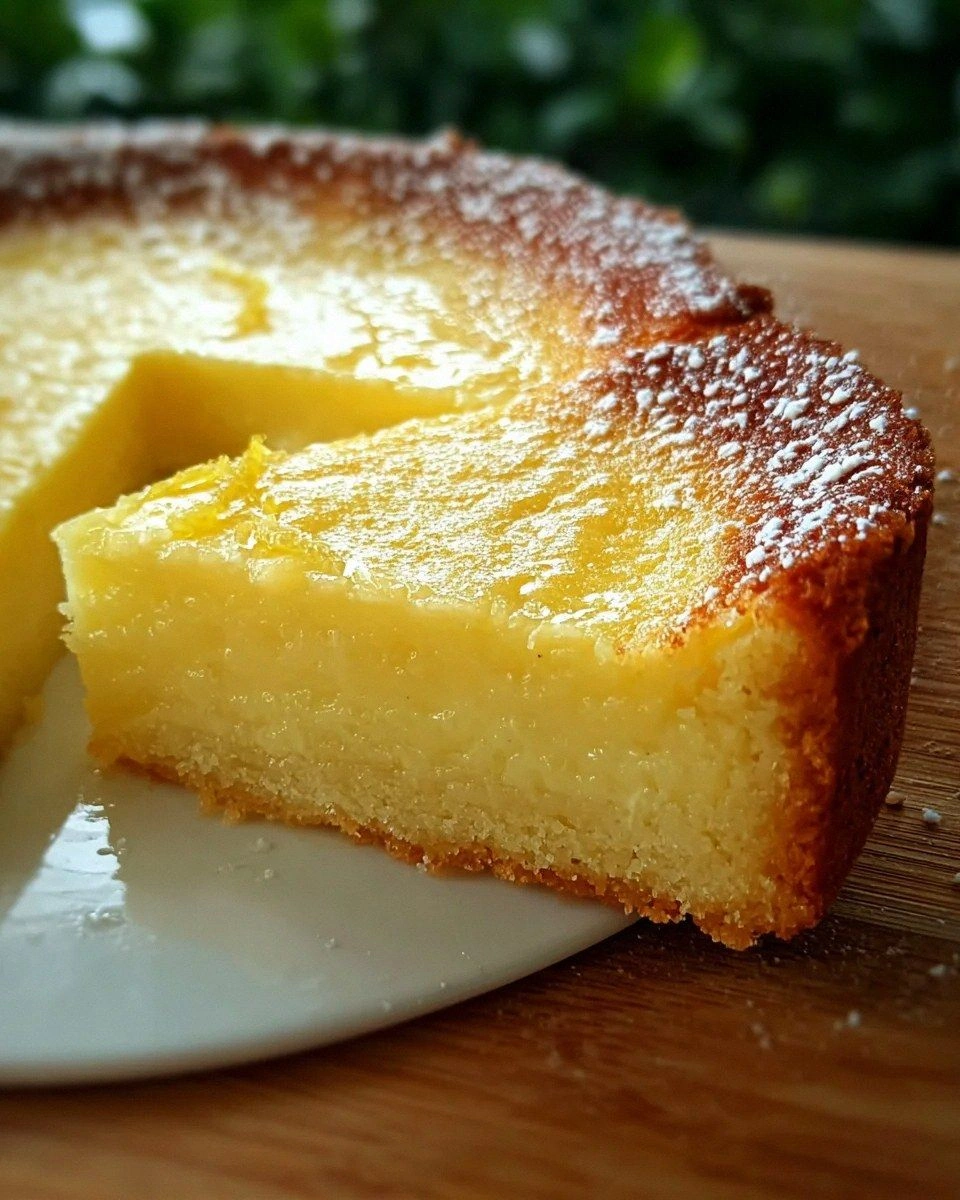
I was standing in my tiny city apartment, the oven humming like a lazy cat, when my roommate tossed a half‑eaten lemon tart into the trash because it was “too sour.” I stared at that abandoned slice and thought, “If I can’t make a lemon tart that sings, I’ll make a lemon cake that shouts.” The next twelve hours were a whirlwind of flour clouds, butter that melted like sunshine on a summer balcony, and a custard that thickened so slowly it felt like watching a sunrise in slow motion. The result? A cake that tastes like a sun‑kissed Amalfi coast, with a custard that slides across your palate like silk‑smooth sea foam.
Picture this: the moment you pull the cake from the oven, the kitchen fills with a citrus perfume so bright it could outshine a midday Mediterranean market. The crust cracks just enough to reveal a buttery, crumbly interior that sighs under the weight of a lemon‑infused custard that jiggles like a perfectly set panna cotta. You hear the faint crackle of the top as you tap it with a spoon, and the first bite delivers a zing that makes your taste buds do a little tarantella. I dare you to taste this and not go back for seconds—there’s a reason my grandma’s name is whispered in every family gathering after I serve this.
Most recipes get this completely wrong. They either drown the custard in sugar, or they bake the crust so long it turns into a brick. I’ve tried the “quick fix” versions that promise a 20‑minute bake, and they ended up tasting like cardboard with a lemon aftertaste. This version, however, respects each ingredient, giving the butter time to chill, the flour a chance to hydrate, and the lemon its moment to shine. The secret? A splash of vanilla that whispers in the background, and a dash of cornstarch that turns the custard into a glossy, velvety glaze that clings to the cake like a lover’s embrace.
But wait—there’s a twist you won’t see coming. Instead of the usual lemon zest mixed directly into the custard, I fold it into the butter for the crust, creating a subtle lemon‑buttery perfume that rises as the cake bakes. Okay, ready for the game‑changer? Let me walk you through every single step — by the end, you’ll wonder how you ever made it any other way.
What Makes This Version Stand Out
- Flavor Explosion: The combination of fresh lemon juice, zest, and a whisper of vanilla creates a bright, balanced citrus profile that never feels one‑dimensional.
- Texture Harmony: A buttery, shortbread‑like crust meets a custard that’s as smooth as a polished marble countertop—no grainy surprises.
- Simplicity Meets Sophistication: Only fourteen ingredients, yet each one is treated like a star, giving you restaurant‑quality results without a culinary degree.
- Unique Lemon Integration: Zest is folded into the crust while juice lives in the custard, delivering layered lemon notes that evolve with each bite.
- Crowd‑Pleaser Factor: I’ve watched grown‑ups and kids alike stare at the cake, then dive in without hesitation—this is hands down the best version you’ll ever make at home.
- Ingredient Quality Matters: Using real, unsalted butter and fresh lemons makes the difference between “good” and “memorable.”
- Gentle Baking Method: A low‑and‑slow bake protects the custard from curdling, ensuring a silky finish every single time.
- Make‑Ahead Magic: The cake can be assembled a day ahead, chilled, and baked just before serving—perfect for impromptu gatherings.
Inside the Ingredient List
The Flavor Base
The zest of one lemon is the unsung hero here. By grating the zest directly into the butter for the crust, you infuse the dough with aromatic oils that survive the baking process, delivering a subtle citrus perfume that rises as the cake bakes. If you skip this step, the crust will taste plain, and the lemon flavor will be confined to the custard, making the overall profile feel lopsided. A good swap for those who hate zest? Use a teaspoon of finely ground lemon peel powder—same punch, less texture.
Fresh lemon juice (about half a cup) provides the bright acidity that cuts through the richness of the butter and sugar. The juice also reacts with the cornstarch, helping the custard set without a grainy texture. If lemons are out of season, try a mix of lime and orange juice in equal parts; you’ll get a complex citrus note that still sings.
The Texture Crew
All‑purpose flour (1½ cups) forms the structural backbone of the crust. It’s the canvas that holds the butter and sugar together, creating a shortbread‑like crumb. Using cake flour would make the crust too tender, while bread flour would make it tough. If you’re gluten‑sensitive, a 1:1 blend of rice flour and tapioca starch works surprisingly well, but expect a slightly different crumb.
Unsalted butter, cold and cubed (½ cup), is the heart of the crust. The cold temperature prevents the butter from melting into the flour, which would result in a cakey texture instead of a flaky one. I always recommend European‑style butter for its higher butterfat content—it makes the crust richer and more flavorful. A quick tip: cut the butter with a pastry cutter or your fingertips until the mixture resembles coarse crumbs.
Cornstarch (¼ cup) is the secret behind the custard’s glossy finish. It thickens the custard without giving it a starchy aftertaste, and it stabilizes the mixture so it won’t crack when you cut into the cake. If you’re out of cornstarch, potato starch works as a 1:1 replacement.
The Unexpected Star
Vanilla extract (1 tsp) may seem modest, but it adds a warm, aromatic undertone that balances the sharp citrus. Without it, the lemon can sometimes feel too aggressive, especially for those with a sensitive palate. If you’re a true vanilla lover, upgrade to a vanilla bean paste for a deeper flavor.
Egg yolks (1 + 3 large) are the emulsifiers that bind the custard’s fat and liquid together. The single yolk in the crust adds richness without making it overly dense, while the three yolks in the custard provide the golden color and silk‑like body. Using whole eggs would make the custard too airy and prone to curdling.
Granulated sugar appears twice: a quarter cup for the crust and three‑quarters cup for the custard. The lower amount in the crust ensures it’s sweet enough to complement the butter but not so sweet that it overpowers the lemon. In the custard, the higher sugar level balances the acidity of the lemon juice, creating a harmonious sweet‑tart duet.
The Final Flourish
Cold water (2–3 tbsp) is the glue that brings the crust dough together. Adding it gradually prevents the dough from becoming soggy; you want just enough moisture for the flour to bind. If the dough feels too dry, add a splash more water, but never more than a tablespoon at a time.
A pinch of salt is the silent enhancer. It accentuates the sweetness, brightens the lemon, and rounds out the overall flavor profile. Skipping the salt is a common rookie mistake that leaves the cake tasting flat.
Everything's prepped? Good. Let's get into the real action...
The Method — Step by Step
- Start by whisking together the flour, sugar, and pinch of salt in a large bowl. The dry mixture should look like fine sand, with the sugar crystals glistening like tiny pearls. This is the foundation; make sure there are no lumps, because any lump will turn into a pocket of dry dough later. Kitchen Hack: Sift the flour and sugar together; it aerates the mixture and prevents clumping.
- Add the cold, cubed butter to the dry ingredients. Using a pastry cutter, two forks, or your fingertips, cut the butter into the flour until the mixture resembles coarse crumbs with some pea‑size pieces of butter still visible. Those butter specks are what melt during baking to create those coveted buttery pockets. Watch Out: Over‑mixing will turn the butter into flour, resulting in a tough crust.
- Stir in the lemon zest directly into the butter‑flour mixture. The zest’s essential oils will coat each butter fragment, ensuring the citrus aroma permeates the crust as it bakes. You’ll notice a faint green speckling—don’t worry, that’s the zest doing its job. Let the mixture sit for a minute while you prep the next step; this short rest allows the butter to firm up even more.
- Drizzle 2 tbsp of cold water over the mixture and gently toss with a fork until the dough just comes together. If the dough feels dry, add another tablespoon of water. The goal is a cohesive ball that doesn’t stick to your hands; you should be able to press it into a disc without it cracking.
- Wrap the dough disc in plastic wrap and refrigerate for at least 30 minutes. This chilling period is crucial—it lets the gluten relax and the butter solidify, which prevents spreading during baking. While the dough chills, you can start the custard; this multitasking saves time and keeps the kitchen buzzing.
- In a saucepan, combine the whole milk, ¾ cup sugar, and the lemon juice. Heat over medium‑low heat, stirring occasionally, until the sugar dissolves and the mixture is warm but not boiling. You’ll hear a gentle sigh as the sugar melts—listen for that; it tells you the heat is just right. Once the sugar is fully dissolved, remove the pan from the heat.
- In a separate bowl, whisk together the 3 egg yolks, cornstarch, and vanilla extract until smooth. The mixture should be pale and glossy, with no lumps. Slowly pour the warm milk‑lemon mixture into the egg yolk bowl, whisking constantly to temper the eggs. This step is where many novices panic, but stay calm—steady whisking prevents curdling.
- Return the combined custard to the saucepan and place it back over low heat. Stir continuously with a wooden spoon, scraping the bottom and sides, until the custard thickens to a ribbon‑like consistency (about 5‑7 minutes). You’ll notice the custard pulling away from the spoon, forming a smooth, glossy sheet. Kitchen Hack: Add the butter (2 tbsp) at the very end of thickening; it gives the custard a glossy sheen and richer mouthfeel.
- Remove the custard from heat and whisk in the remaining 2 tbsp of unsalted butter until fully incorporated. The butter adds a silkiness that makes the custard glide across your tongue like a silk scarf in a summer breeze. Cover the surface with a piece of plastic wrap (press it directly onto the custard) to prevent a skin from forming, then set aside to cool to room temperature.
- Preheat your oven to 350 °F (175 °C). While the oven warms, roll out the chilled dough on a lightly floured surface to a ¼‑inch thickness. Transfer the dough to a 9‑inch springform pan, gently pressing it into the corners and up the sides. Trim any excess dough with a sharp knife; a neat edge will give the cake a professional look.
- Prick the crust all over with a fork (this is called docking) to prevent it from puffing up unevenly. Then, bake the crust blind for 12‑15 minutes—place a sheet of parchment paper over the crust and fill with baking beans or rice. This “weight” keeps the crust flat and ensures a uniform base for the custard.
- Once the crust is lightly golden, remove the parchment and beans, and pour the cooled custard into the baked shell, spreading it evenly with a spatula. The custard should sink slightly into the crust, creating a seamless union. Slide the pan into the oven and bake for another 20‑25 minutes, or until the custard is just set—its center should wobble like a gelatin dessert.
- Turn off the oven, crack the door open, and let the cake sit inside for 10 minutes. This gradual cooling prevents the custard from cracking due to a sudden temperature drop. Afterward, transfer the cake to a wire rack and let it cool completely before releasing it from the springform pan.
- Refrigerate the cake for at least 2 hours, preferably overnight. The chill allows the custard to set fully and the flavors to meld, giving you that melt‑in‑your‑mouth experience. When you’re ready to serve, dust the top with a light sprinkling of powdered sugar or a few extra lemon zest curls for a final visual pop. And now the fun part—slice, serve, and watch your guests’ faces light up like a summer sunrise.
Insider Tricks for Flawless Results
The Temperature Rule Nobody Follows
Never use a scorching hot stove for the custard. Keep the heat low and patient; the custard thickens evenly and avoids the dreaded grainy texture that comes from overheating. I once tried a “high‑heat shortcut” and ended up with a custard that tasted like burnt sugar. The rule of thumb: the custard should stay below 180 °F (82 °C) while thickening.
Why Your Nose Knows Best
When the crust is baking, trust your sense of smell more than the timer. A faint nutty aroma signals that the butter is caramelizing just enough to give the crust a golden hue. If you smell a burnt butter scent, pull the crust out immediately; it’s easier to fix a slightly under‑baked crust than a charred one.
The 5‑Minute Rest That Changes Everything
After you pour the custard into the crust, let it sit for five minutes before returning it to the oven. This short pause allows the custard to settle and eliminates air bubbles that could cause cracks later. I’ve seen cakes rise in the middle because the custard was too turbulent when it entered the oven.
Butter’s Secret Role
Adding a final tablespoon of butter to the custard right before it cools creates a glossy surface that reflects light like a polished marble slab. It also adds a luxurious mouthfeel that makes every bite feel indulgent. Skip this step, and you’ll end up with a custard that looks dull and feels a bit dry.
The “Touch Test” for Doneness
Instead of relying on a toothpick, gently press the center of the custard with your fingertip. If it springs back slowly, it’s perfectly set. Press too hard and you’ll see a dent that doesn’t recover—signaling over‑baking. This tactile method saved me countless times from a rubbery custard.
Creative Twists and Variations
This recipe is a playground. Here are some of my favorite ways to switch things up:
Limoncello Lush
Replace half of the fresh lemon juice with chilled limoncello. The liqueur adds a sweet‑herbal depth that makes the cake feel celebratory—perfect for a brunch toast.
Berry Burst
Stir in a cup of fresh raspberries or blueberries into the custard before baking. The berries burst during cooking, creating pockets of juicy tang that contrast beautifully with the lemon.
Herbal Infusion
Add a teaspoon of finely chopped fresh rosemary to the crust dough. The herb’s piney notes pair surprisingly well with lemon, giving the cake an aromatic complexity.
Almond Almondine
Swap ¼ cup of the flour for almond flour and sprinkle slivered toasted almonds on top before baking. The nutty crust adds a delightful crunch that complements the silky custard.
Chocolate Swirl
Melt 2 oz of dark chocolate and swirl it into the custard just before pouring into the crust. The bitter chocolate ribbons create a visual drama and a flavor balance that’s both bold and refined.
Storing and Bringing It Back to Life
Fridge Storage
Cover the cooled cake tightly with plastic wrap and store it in the refrigerator for up to 4 days. The custard stays creamy, and the crust retains its buttery snap. Before serving, let it sit at room temperature for 15 minutes so the flavors open up.
Freezer Friendly
Wrap the entire cake (still in the springform pan) in a double layer of foil, then place it in a freezer‑safe bag. It will keep for up to 2 months. When you’re ready to enjoy, thaw it overnight in the fridge, then let it come to room temperature before the final slice.
Best Reheating Method
To revive a refrigerated slice, preheat the oven to 300 °F (150 °C), place the slice on a baking sheet, and add a tiny splash of water (about a teaspoon) to the edges. Cover loosely with foil and heat for 8‑10 minutes. The steam revives the custard’s silkiness, while the crust regains its crispness.