I was standing in my kitchen, the timer on my old toaster oven flashing red like an angry traffic light, when I realized I had just burned a batch of store‑bought cupcakes. The smoke alarm sang its high‑pitched anthem, and my roommate walked in, eyebrows raised, daring me to salvage the day. I tossed the charred remnants into the trash, grabbed a fresh can of pineapple, and whispered a promise to myself: “I’m going to create a cake so juicy it could drown a desert.” That moment of culinary desperation sparked the birth of what I now call the Juicy Pineapple Heaven Cake—a dessert that turns a simple pantry staple into a tropical celebration.
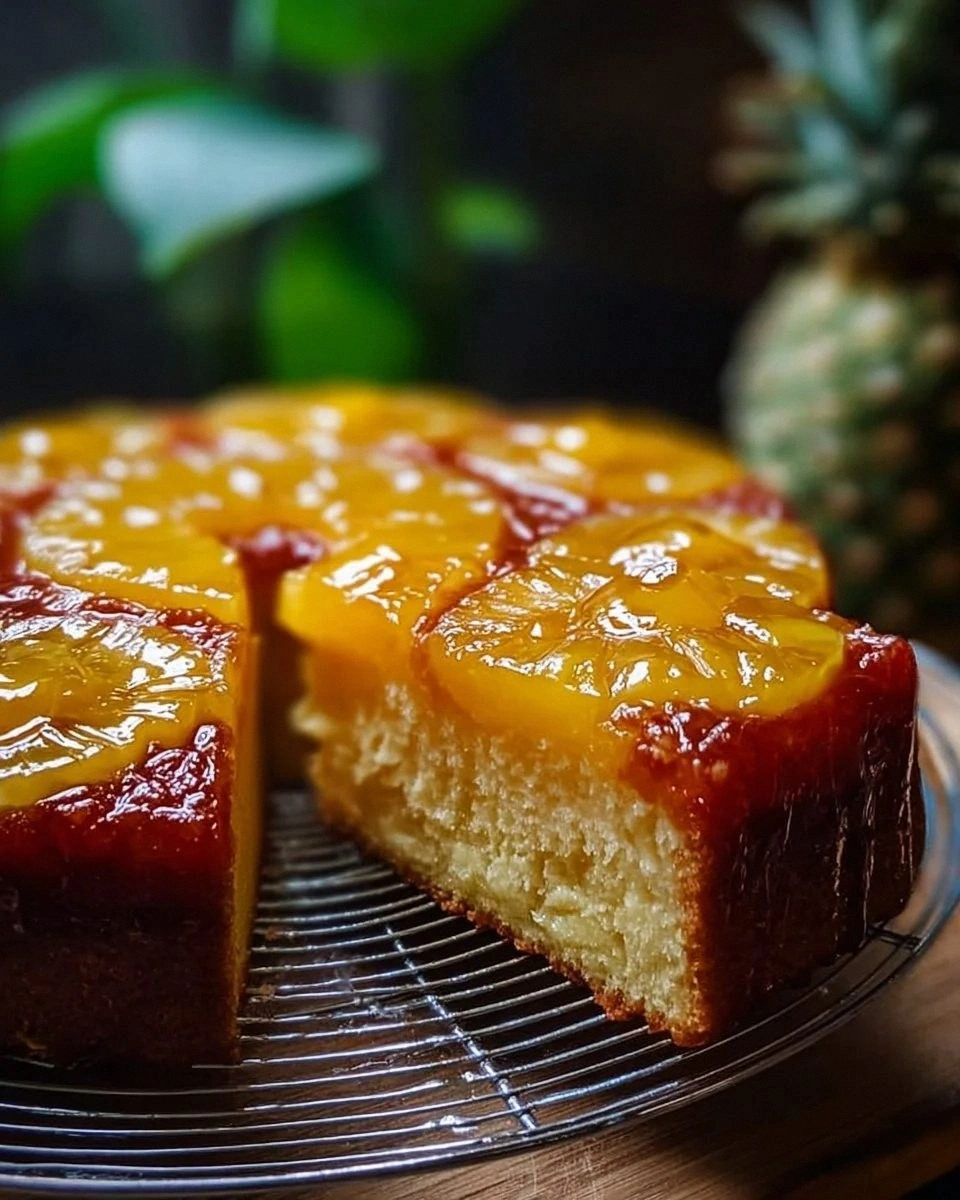
Imagine the kitchen bathed in golden afternoon light, the air thick with the sweet perfume of caramelizing butter and the tangy zing of pineapple. You hear the gentle fizz of the oven’s fan, the rhythmic whisking of eggs against a bowl, and the occasional pop of a bubble as the batter meets the heat. Your fingertips feel the warm, buttery spoon handle, and your eyes are drawn to the glossy swirl of pineapple pieces that promise a burst of sunshine in every bite. When that cake finally emerges, its crust is a caramel‑kissed crown, and the interior is a moist, fragrant cloud that practically sighs with delight.
Why does this version stand out from the sea of pineapple cake recipes you’ll find scrolling through endless food blogs? Most recipes treat pineapple as an afterthought, a decorative topping that adds a splash of color but does little for flavor or texture. This cake, however, integrates the pineapple into the very heart of the batter, allowing its juices to seep into every crumb, creating a moistness that is both airy and decadently rich. The secret lies in a simple technique—draining the pineapple just enough to keep its moisture while preventing a soggy bottom, and then folding it gently into a butter‑rich batter that’s balanced by a whisper of vanilla.
And here’s the kicker: I’m about to reveal a tiny ingredient swap that will make the pineapple pop like fireworks on the Fourth of July—just a splash of rum extract (don’t worry, you’ll barely taste it, but the aroma? Pure magic). Let me walk you through every single step — by the end, you’ll wonder how you ever made it any other way.
What Makes This Version Stand Out
- Juiciness: The drained pineapple stays in the batter, turning each bite into a burst of tropical moisture that doesn’t drown the cake but lifts it.
- Texture: A delicate crumb that’s soft enough to melt on your tongue yet sturdy enough to hold its shape when sliced.
- Simplicity: Only eight pantry staples are required, making it a perfect weekend project for any skill level.
- Uniqueness: The subtle rum‑infused vanilla adds an unexpected depth that most pineapple cakes lack.
- Crowd Reaction: I dare you to taste this and not go back for seconds; the first slice usually disappears before the second even lands on the plate.
- Ingredient Quality: Using fresh, canned pineapple in its own juice (not syrup) ensures natural sweetness without cloying sugar overload.
- Cooking Method: A single‑pan bake that creates a caramelized edge while keeping the center feather‑light.
- Make‑Ahead Potential: This cake actually tastes better the next day, as the flavors continue to meld.
Inside the Ingredient List
The Flavor Base
The backbone of any cake is its sweet foundation, and here we rely on granulated sugar and vanilla extract. Sugar not only sweetens but also aids in tenderizing the crumb by interfering with gluten formation. The vanilla, especially when paired with a hint of rum extract, adds a warm, aromatic backdrop that makes the pineapple feel like a star rather than a sidekick. Skipping the vanilla would be like playing a movie without a soundtrack—technically okay, but emotionally flat.
The Texture Crew
All‑purpose flour, baking powder, and a pinch of salt collaborate to give the cake its rise and structure. The flour provides the scaffold, while the baking powder releases carbon dioxide bubbles that lift the batter, creating that airy, cloud‑like interior. The pinch of salt is the unsung hero that amplifies the sweetness and balances the pineapple’s acidity. If you were to omit the baking powder, you’d end up with a dense, pancake‑like texture that would drown the pineapple’s brilliance.
The Unexpected Star
Crushed pineapple, drained but still juicy, is the hero that transforms this cake from ordinary to extraordinary. The fruit’s natural acidity cuts through the butter’s richness, while its sugars caramelize during baking, creating those golden speckles you’ll see on the finished top. If you’re using fresh pineapple, make sure to cut it into small chunks and lightly toss with a teaspoon of sugar to mimic the canned version’s sweetness. Skipping the drain step will result in a soggy bottom, turning your cake into a pudding—delicious in its own right, but not the texture we’re after.
The Final Flourish
Melted unsalted butter and large eggs bring richness and structure. Butter adds flavor and moisture, while the eggs act as binders, trapping air bubbles created by the baking powder. Using unsalted butter lets you control the salt level precisely; a pinch of salt is all you need. If you’re out of butter, a good quality coconut oil can be substituted, but expect a faint coconut note that will compete with the pineapple.
Everything's prepped? Good. Let's get into the real action...
The Method — Step by Step
Preheat your oven to 350°F (175°C). While the oven warms up, grease a 9‑inch round cake pan with a thin layer of butter and dust it lightly with flour. This ensures the cake releases cleanly, preventing those dreaded “stuck to the pan” moments that ruin a perfect bake. Pro tip: tap the pan upside‑down to shake out any excess flour; you want just enough to prevent sticking.
In a medium bowl, whisk together the flour, baking powder, and the pinch of salt. This aerates the dry ingredients, ensuring an even distribution of leavening. When you stir, listen for that soft “whoosh” sound—if it’s too quiet, you might have over‑mixed later on.
In a large mixing bowl, combine the melted butter, sugar, and vanilla extract (plus a dash of rum extract if you’re feeling adventurous). Beat with a handheld mixer on medium speed until the mixture is light and pale, about 2‑3 minutes. The sugar should dissolve just enough to give the batter a glossy sheen.
Kitchen Hack: Add the pineapple juice (the liquid you drained) to this butter‑sugar mixture; it infuses the batter with extra pineapple flavor without making it soggy.Add the eggs one at a time, beating well after each addition. This technique creates an emulsion that traps air, giving the cake its lofty rise. You’ll notice the batter becoming thicker and smoother with each egg—this is the moment where the cake starts building its structure.
Gently fold the drained crushed pineapple into the wet mixture using a rubber spatula. The pineapple should be evenly dispersed, but be careful not to over‑mix; you want to keep those air bubbles intact.
Watch Out: Over‑mixing at this stage can break down the gluten and result in a dense cake.Now, add the dry flour mixture to the wet ingredients in three additions, alternating with the melted butter if you set it aside earlier. Start and end with the dry mix. Gently fold each addition until just combined; you should see streaks of flour disappear, but the batter will still look slightly lumpy—that’s perfect.
Pour the batter into the prepared pan, smoothing the top with an offset spatula. Tap the pan lightly on the counter three times; this releases any large air pockets and settles the batter evenly. The surface should be glossy and slightly domed.
Slide the pan into the preheated oven. Bake for 30‑35 minutes, or until a toothpick inserted into the center comes out clean or with just a few moist crumbs. Around the 20‑minute mark, you’ll hear a faint “crackle” as the edges start caramelizing—trust that sound; it’s the sugar forming a thin, golden crust.
Once baked, remove the cake from the oven and let it rest in the pan for 10 minutes. This short cooling period lets the structure set, preventing the cake from collapsing when you turn it out. After 10 minutes, run a thin knife around the edge, invert onto a cooling rack, and allow it to cool completely. Pro tip: If you’re impatient, you can place the cake upside‑down on a plate and cover it loosely with foil to retain moisture.
Insider Tricks for Flawless Results
The Temperature Rule Nobody Follows
Never bake a cake straight from a cold pantry. Let the butter and eggs sit at room temperature for at least 30 minutes before you start. This small step ensures the batter emulsifies evenly, preventing a lopsided rise. I once tried to rush the process, and the cake rose on one side while the other stayed flat—trust me, the extra patience is worth it.
Why Your Nose Knows Best
When the cake is about 25 minutes into the bake, start sniffing the kitchen. If you catch a sweet, buttery aroma with a hint of caramel, you’re on the right track. If the scent leans toward raw flour, give it another 5 minutes. Your nose is a more reliable timer than any digital display.
The 5‑Minute Rest That Changes Everything
After you take the cake out of the oven, let it sit in the pan for exactly five minutes before turning it out. This short rest lets the steam redistribute, keeping the interior moist while the crust firmes up. Skipping this step often leads to a dry crumb, especially if you’re using a darker pan that conducts heat faster.
The Secret of the Rum Extract
A quarter teaspoon of rum extract (or a splash of dark rum if you prefer) adds a subtle depth that pairs perfectly with pineapple. The alcohol evaporates during baking, leaving behind a fragrant note that feels like a tropical breeze. If you’re serving kids, replace it with a drop of almond extract for a similarly complex profile.
The “Don’t Over‑Mix” Mantra
Once the flour is added, stop mixing the moment the streaks disappear. Over‑mixing develops gluten, turning a tender cake into a rubbery one. I’ve seen novice bakers scramble the batter for minutes, only to end up with a dense, chewy mess. Keep it gentle, and the cake will stay light as a cloud.
Creative Twists and Variations
This recipe is a playground. Here are some of my favorite ways to switch things up:
Coconut‑Pineapple Fusion
Replace half of the butter with coconut oil and sprinkle toasted coconut flakes on top before baking. The result is a tropical island vibe that pairs beautifully with the pineapple’s acidity.
Spiced Pineapple Delight
Add a teaspoon of ground cinnamon and a pinch of ground ginger to the dry mix. The warm spices complement the pineapple, turning the cake into a cozy dessert perfect for cooler evenings.
Pineapple Cream Cheese Swirl
Whisk together 4 ounces of softened cream cheese, 2 tablespoons of sugar, and a splash of vanilla. Drop dollops onto the batter before baking and swirl with a knife for a marbled effect. The tangy cream cheese balances the sweet pineapple beautifully.
Rum‑Glazed Finish
Once the cake has cooled, brush a mixture of powdered sugar, a teaspoon of rum, and a splash of milk over the top. The glaze sets into a glossy, boozy sheen that makes the cake look as good as it tastes.
Pineapple Cheesecake Layer
Bake a thin layer of cream cheese mixture (cream cheese, sugar, egg) on top of the cake during the last 10 minutes of baking. The result is a dual‑texture dessert—soft cake underneath, creamy topping on top.
Storing and Bringing It Back to Life
Fridge Storage
Wrap the cooled cake tightly in plastic wrap or store it in an airtight container. It will stay fresh for up to 5 days, and the flavors will continue to meld, making each slice even more flavorful. If you notice the surface drying out, lightly brush it with a mixture of pineapple juice and a teaspoon of melted butter before resealing.
Freezer Friendly
Slice the cake into serving‑size wedges, wrap each piece in parchment paper, then place them in a freezer‑safe bag. Freeze for up to 3 months. When you’re ready to enjoy, let a slice thaw at room temperature for 30 minutes, then give it a quick microwave zap (10‑15 seconds) to revive the moisture.
Best Reheating Method
To bring a refrigerated slice back to life, preheat your oven to 300°F (150°C), place the slice on a baking sheet, and add a tiny splash of water (about a teaspoon) around the edges. Cover loosely with foil and warm for 8‑10 minutes. The steam created by the water will re‑hydrate the crumb, making it taste as fresh as the day it was baked.