I was standing in my kitchen, staring at a half‑empty glass of store‑bought kombucha that tasted like a carbonated candy‑wrapper, when my roommate dared me to make something “actually good” with nothing but water, sugar, and a handful of mysterious grains. The challenge was simple, the stakes were high, and the only thing louder than the ticking clock was the buzzing of my curiosity. I could hear the faint fizz of the kombucha fizzing in the background, smell the sweet‑sour tang of the fruit I’d been chewing, feel the cool glass against my palm, and taste the lingering after‑taste of regret for not trying something new sooner. That moment sparked a kitchen experiment that turned into a probiotic powerhouse I’m now convinced is the best version you’ll ever make at home.
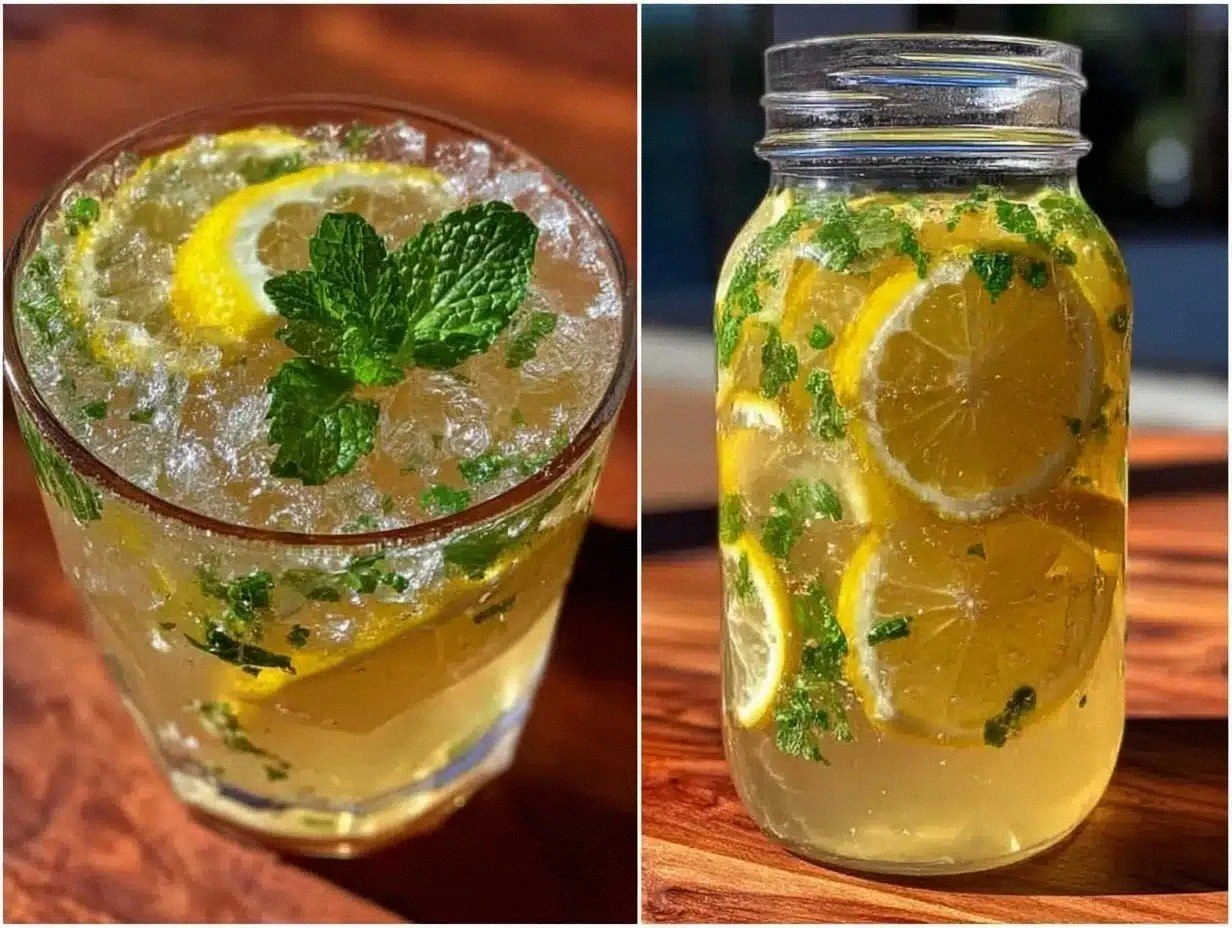
Picture this: a clear glass pitcher filled with a lightly effervescent, slightly sweet liquid that glistens like sunrise on a lake. The aroma is subtle—just a whisper of fermented fruit and a hint of sugar that makes you want to inhale deeper, as if you’re about to discover a secret garden hidden in a bottle. When you take the first sip, the texture slides over your tongue with a silk‑smoothness that feels like a gentle hug from the inside, while the probiotics dance on your palate, leaving a clean, refreshing finish. It’s the kind of hydration that not only quenches thirst but also gives your gut a high‑five, and trust me, your body will thank you.
Most water kefir recipes out there either over‑complicate the process with exotic ingredients or under‑deliver on flavor, ending up as a bland, flat drink that feels more like a science experiment than a tasty treat. I’ve cracked the code by balancing the sugar‑to‑grain ratio, choosing the purest water, and adding a second‑fermentation boost that turns this humble beverage into a flavor‑filled celebration. The secret? A tiny pinch of patience, a splash of creativity, and the confidence to let the grains work their magic without interference. I dare you to taste this and not go back for seconds.
Okay, ready for the game‑changer? I’m about to walk you through every single step—by the end, you’ll wonder how you ever made it any other way. From selecting the perfect grains to mastering the subtle art of second‑fermentation, I’ll spill the beans, the sugar, and the science. Stay with me here — this is worth it.
What Makes This Version Stand Out
- Taste: The balance of sweetness and tang is calibrated so that each sip feels like a gentle kiss from a summer orchard, not a sugar rush that crashes.
- Texture: A natural, light fizz that tickles the palate, thanks to the live cultures creating carbon dioxide in a controlled way.
- Simplicity: Only six ingredients, no fancy equipment, and a total hands‑off time of under an hour.
- Uniqueness: The optional fruit‑infused second fermentation adds a burst of flavor that most “basic” recipes completely miss.
- Crowd Reaction: Guests often ask for the “secret recipe” because the drink feels both familiar and exotic at the same time.
- Ingredient Quality: Using spring water and organic cane sugar lets the natural microbes shine without unwanted chemicals.
- Method: A two‑stage fermentation that maximizes probiotic growth while preserving a clean, refreshing taste.
- Make‑Ahead Potential: You can prep a batch on Sunday, store it in the fridge, and have a probiotic boost ready for the entire week.
Inside the Ingredient List
The Living Base
Water kefir grains are the heart and soul of this drink. These gelatinous clusters of bacteria and yeast feast on sugar, turning it into lactic acid, carbon dioxide, and a host of beneficial probiotics. If you skip them, you’ll end up with a sweet sugary water that’s about as exciting as a plain soda. I source my grains from a trusted online fermenting community where growers guarantee they’re active and contaminant‑free. Pro tip: look for grains that are plump, translucent, and slightly rubbery; if they look shriveled, they’re probably on their last legs.
The Pure Hydration
Filtered or spring water is non‑negotiable. Chlorine in tap water can sabotage the delicate microbes, turning a lively fermentation into a dead‑end. I always run my water through a carbon filter or grab a bottle of spring water from the store. If you’re lucky enough to have a reverse‑osmosis system, that works even better because it strips away minerals that could compete with the grains for nutrients. The result is a clean canvas that lets the kefir’s flavors shine.
The Sweet Fuel
Organic cane sugar is the food that powers the grains. It dissolves quickly, providing an easily digestible carbohydrate source. You can swap in raw sugar or evaporated cane juice if you prefer a richer, molasses‑like note, but steer clear of artificial sweeteners—they’ll starve the microbes and may even kill them. I always measure the sugar by volume to keep the ratio consistent; too much sugar can lead to over‑fermentation and a wine‑like tang.
The Flavor Boosters
Fresh or dried fruit is optional but wildly transformative. During the second fermentation, the fruit releases natural sugars and aromatic compounds that the kefir grains then subtly ferment, creating a nuanced flavor profile. Lemon zest adds a bright citrus punch, ginger slices bring a warm, spicy undertone, and raisins contribute a mellow, raisin‑like sweetness. If you’re feeling adventurous, try a handful of berries or a few mint leaves for a garden‑fresh twist. Remember, the fruit is not just for taste; it also feeds the microbes a second time, boosting probiotic density.
The Vessel & Tools
A glass jar with a breathable cloth cover is essential. Glass won’t react with the acidic environment, and the cloth allows carbon dioxide to escape while keeping insects out. Plastic or wooden spoons are safe choices because metal can leach into the brew and upset the grain’s delicate balance. I keep a spare jar on hand for the second fermentation so the flavors can develop without interference. When you’re ready to store the finished kefir, a clean, airtight bottle keeps the fizz alive for days.
Everything's prepped? Good. Let's get into the real action...
The Method — Step by Step
- Gather Your Gear. Place your glass jar on a clean countertop, lay the breathable cloth over the opening, and secure it with a rubber band. This simple setup keeps out dust while letting the kefir breathe. I always give the jar a quick rinse with hot water to sterilize it—no soap, just heat. The moment you hear the cloth rustle as you tighten the band, you know you’re officially in fermentation mode.
- Mix Water and Sugar. In a separate pitcher, combine 4 cups of filtered or spring water with ¼ cup of organic cane sugar. Stir with your plastic or wooden spoon until the sugar vanishes completely. You’ll notice a faint sparkle as the sugar crystals dissolve—think of it as the first hint of the magic to come. Once dissolved, let the mixture cool to room temperature if you heated it; grains hate sudden temperature shocks.
- Add the Grains. Sprinkle ¼ cup of water kefir grains into the cooled sugar‑water mixture. Give it a gentle swirl—no vigorous shaking, just enough to distribute the grains evenly. The grains should look like tiny, translucent cauliflower florets floating like islands. If any grains cling to the bottom, use your wooden spoon to coax them up; they need to be fully immersed to start feeding.
- First Fermentation. Cover the jar with the cloth, secure it, and place the jar in a dark, room‑temperature spot (around 68–75 °F or 20–24 °C). Let it sit for 24–48 hours. During this window, the grains will feast on the sugar, producing a light fizz and a subtle tang. I like to give the jar a gentle shake once after 12 hours to redistribute the grains—this prevents them from clumping and ensures even fermentation.
- Strain the Kefir. After 24–48 hours, use a non‑metal strainer to separate the grains from the liquid. Transfer the liquid to a clean bottle for storage or the next step. The grains go back into the jar, ready for a new batch—this is where the cycle begins again. I keep a small bowl of fresh sugar water ready so the grains never go hungry while I’m prepping the second batch.
- Second Fermentation (Flavor Time). If you want a flavored kefir, now’s the moment to add fresh fruit, dried raisins, ginger slices, or lemon zest to the bottled kefir. Seal the bottle loosely (or use a swing‑top bottle) and let it sit at room temperature for another 12–24 hours. During this period, the added fruit releases its natural sugars, giving the kefir a gentle secondary fizz and a burst of flavor. I love the way a handful of sliced strawberries turns the drink a soft pink and adds a fragrant, summery note.
- Refrigerate and Enjoy. Once the flavor has developed to your liking, tighten the bottle cap fully and pop it into the fridge. Cold temperatures slow down the fermentation, preserving the taste and fizz for up to a week. When you’re ready to drink, give the bottle a gentle swirl—no shaking, just a graceful twirl—to re‑distribute the carbonation. Serve chilled, and watch as your friends marvel at the probiotic goodness you’ve conjured.
- That’s it — you did it. But hold on, I’ve got a few more tricks that’ll take this to another level. From tweaking the grain‑to‑sugar ratio to experimenting with exotic fruit blends, the possibilities are endless. Stay tuned for insider tips that will make every batch better than the last.
Insider Tricks for Flawless Results
The Temperature Rule Nobody Follows
Your kitchen’s ambient temperature is the silent director of fermentation. Keep the jar in a spot that stays between 68 °F and 75 °F; anything cooler will slow the microbes, and anything hotter can cause off‑flavors. If you live in a colder climate, a cupboard with a small incandescent bulb works wonders. I once left a batch on a windowsill during a chilly March morning and ended up with a barely fermented drink that tasted like sweet water—lesson learned: temperature is not optional.
Why Your Nose Knows Best
Before you even taste the kefir, trust your sense of smell. A mildly sour, yeasty aroma signals that the grains are doing their job. If you detect a sharp alcoholic whiff, the fermentation has gone too far. I always give the jar a quick sniff after 24 hours; it’s a fast, reliable checkpoint that saves me from a batch that could taste like a cheap wine.
The 5‑Minute Rest That Changes Everything
After straining, let the kefir sit uncovered for five minutes before sealing the bottle. This short pause lets excess CO₂ escape, preventing over‑pressurization and potential bottle explosions. It also gives the liquid a moment to settle, resulting in a clearer final product. I once sealed a bottle too early, and the fizz exploded all over my fridge—never again.
Grain Care 101
If you’re not planning to make a new batch immediately, store the grains in a sugar‑water solution in the fridge. Change the solution every week to keep the microbes active. Some enthusiasts even freeze grains for long‑term storage, but I’ve found that a cold, sugary bath preserves potency better than freezing, which can damage the delicate cell walls.
Flavor Layering Like a Pro
Don’t limit yourself to a single fruit in the second fermentation. Combine citrus zest with a handful of berries for a multi‑dimensional flavor profile. The key is to keep the total fruit volume under ½ cup per liter, otherwise the sugars can overwhelm the kefir and push it toward an alcoholic finish. I once tried a full cup of mango puree and ended up with a drink that tasted more like a tropical wine than a probiotic refresher—balance is everything.
Creative Twists and Variations
This recipe is a playground. Here are some of my favorite ways to switch things up:
Citrus Sunrise
Add strips of orange zest and a splash of freshly squeezed lemon juice during the second fermentation. The result is a bright, tangy drink that feels like sunrise in a glass. Perfect for brunches where you want something lively yet gentle.
Spiced Autumn
Drop a cinnamon stick and a few cloves into the bottle for a warm, comforting twist. The spices infuse slowly, giving the kefir a subtle heat that’s perfect for cooler evenings. Pair it with a slice of whole‑grain toast for a cozy snack.
Berry Blast
Toss in a handful of mixed berries—strawberries, blueberries, and raspberries—after the first fermentation. The berries release natural pectin, creating a slightly thicker mouthfeel that’s almost smoothie‑like. This variation is a hit with kids who love a hint of fruit without added sugars.
Herbal Zen
Add a few sprigs of fresh mint or basil during the second fermentation for an herbaceous lift. The herbs don’t just flavor the drink; they also contribute subtle antimicrobial properties that keep the brew fresh longer. I love sipping this after a yoga session.
Tropical Breeze
Combine diced pineapple, a slice of fresh ginger, and a splash of coconut water for a vacation‑in‑a‑glass experience. The pineapple’s acidity balances the ginger’s spice, while coconut water adds electrolytes—great for post‑workout recovery.
Storing and Bringing It Back to Life
Fridge Storage
Transfer the finished kefir into airtight glass bottles and store them in the refrigerator. It will keep its fizz and probiotic potency for up to 7 days. For the best texture, let the bottle sit upright for a few minutes before opening to allow any sediment to settle.
Freezer Friendly
If you’ve made a large batch, you can freeze the kefir in ice‑cube trays. Once frozen, pop the cubes into a sealed bag and store for up to three months. Thaw in the fridge and give it a gentle stir before drinking; the texture will be slightly thicker, making it perfect for smoothies.
Best Reheating Method
When you want to enjoy a warm version, pour a serving into a saucepan, add a tiny splash of water (about a tablespoon per cup), and warm over low heat. The added water creates steam that revives the kefir’s lively mouthfeel without killing the beneficial bacteria. Avoid boiling—heat above 115 °F (46 °C) can diminish the probiotic count.