I swear, the moment my roommate dared me to make a “healthy dessert that actually tastes like a cheat” I felt the universe tilt. I was standing over a bowl of plain Greek yogurt, a half‑hearted drizzle of honey, and a sad handful of strawberries that looked like they’d survived a winter in the freezer. The kitchen was humming with the low‑grade whirr of the blender, the faint clink of a spoon against glass, and my own nervous laughter. I imagined a bite that would be as refreshing as a splash of cold water on a scorching July afternoon, yet light enough that my waistline wouldn’t file a complaint.
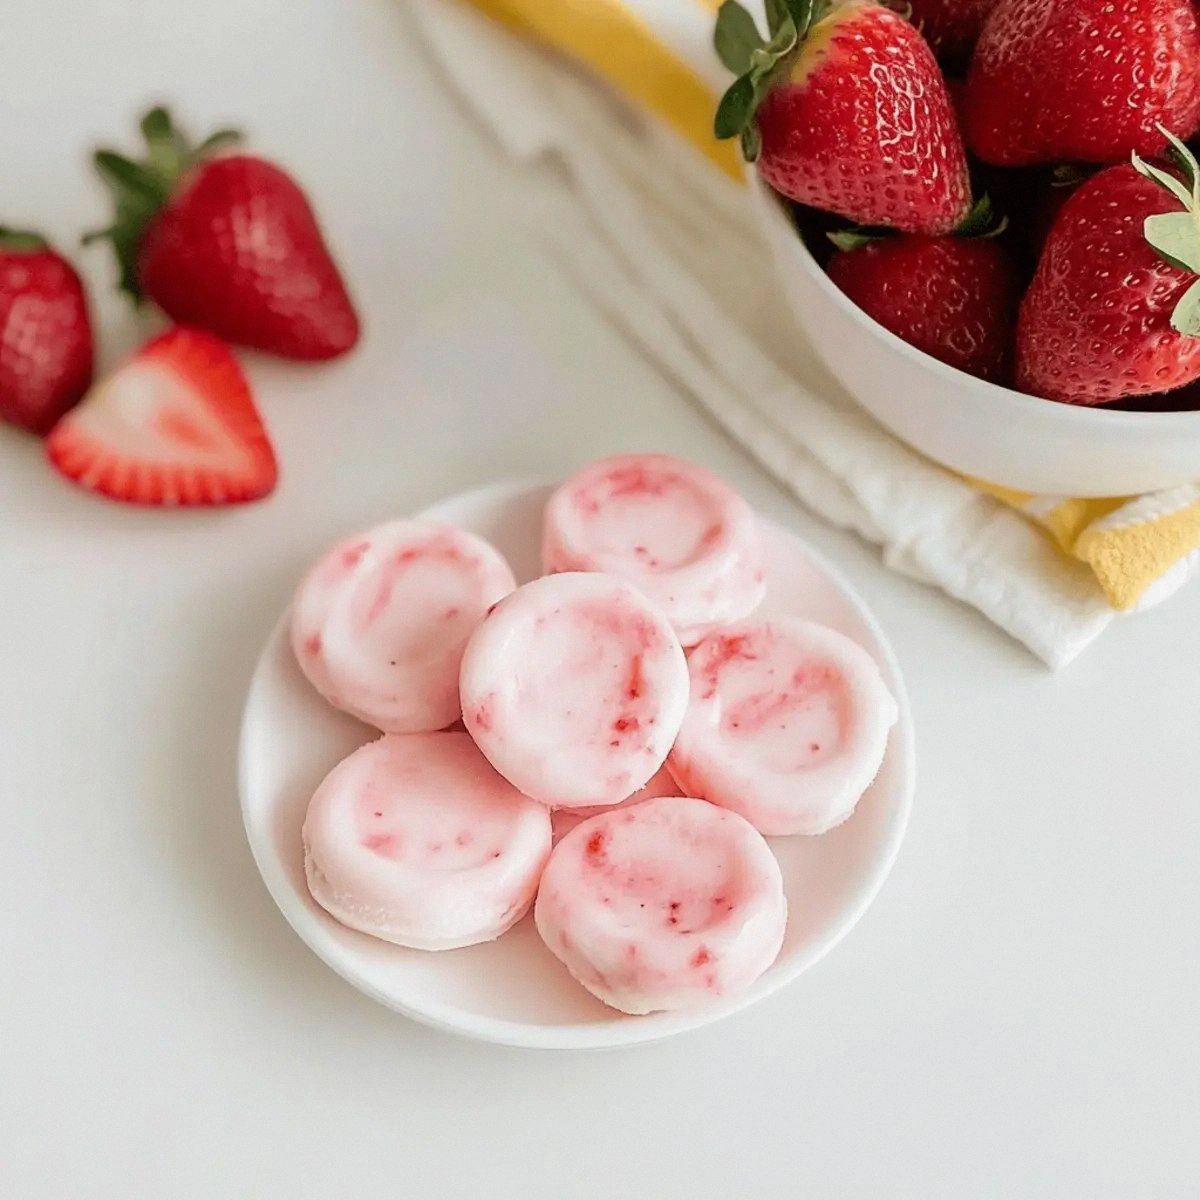
The first sniff of the blended mixture hit me like a sunrise—sweet, tangy, and just a whisper of floral honey that reminded me of wildflowers buzzing in a meadow. I could see the pale pink swirl in the bowl, the way the yogurt’s creamy body hugged the ruby‑red strawberry pieces like a lover’s embrace. My senses were on overload: the cool touch of the glass against my fingertips, the soft, almost velvety texture as I lifted the spoon, and that faint, buttery scent that made my stomach do a happy dance. I tasted a spoonful and the flavor exploded—tart strawberry fireworks followed by a smooth, creamy finish that lingered like a well‑kept secret.
Most strawberry‑yogurt treats out there are either overly sweet, soggy, or they require a mountain of added sugar that turns the “guilt‑free” claim into a joke. This version, however, flips the script. By using just a drizzle of honey for natural sweetness, a generous cup of thick Greek yogurt for protein, and fresh strawberries for that authentic fruit punch, we get a dessert that feels indulgent but is actually a nutritional powerhouse. I’ll be honest — I ate half the batch before anyone else got to try it, and that’s because the balance is so perfect you’ll want to keep reaching for more.
There’s a secret technique hidden in this recipe that most other versions completely miss: a quick flash‑freeze of the strawberry‑yogurt mixture before cutting it into bite‑size squares. This step locks in the bright flavor and gives each bite a firm, almost sorbet‑like snap that melts in your mouth. Let me walk you through every single step — by the end, you’ll wonder how you ever made it any other way.
What Makes This Version Stand Out
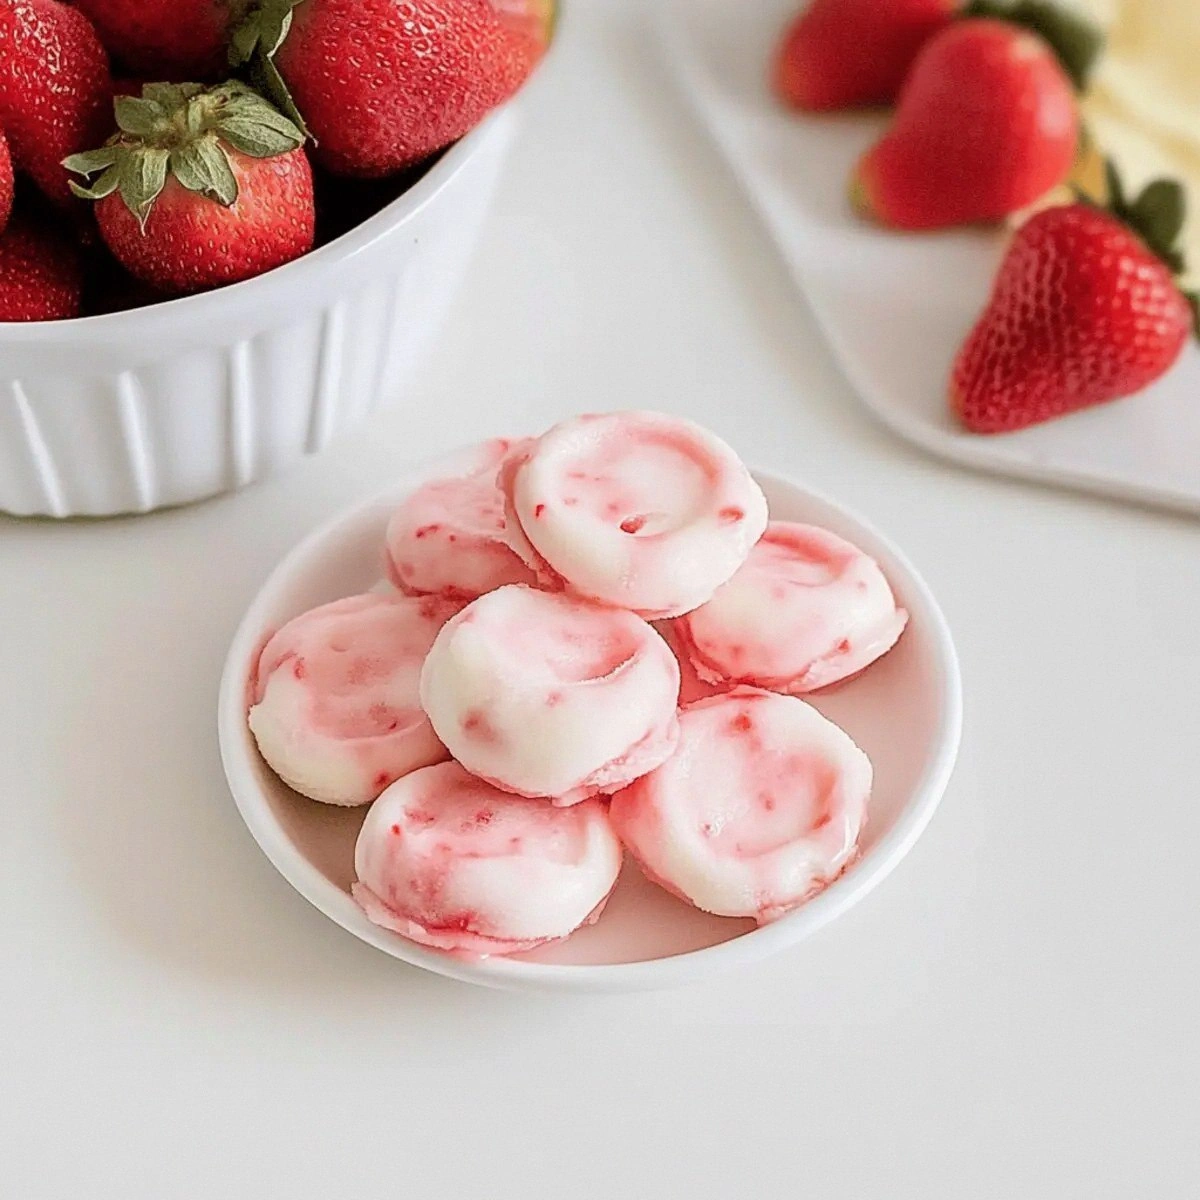
- Flavor Harmony: The natural tartness of fresh strawberries is perfectly balanced by the subtle honey sweetness, while the Greek yogurt adds a creamy depth that feels luxurious without any artificial aftertaste.
- Texture Triumph: Thanks to the flash‑freeze, each bite boasts a firm, icy exterior that gives way to a velvety interior, creating a contrast that is both refreshing and satisfying.
- Simplicity: With only three core ingredients, the recipe is foolproof, budget‑friendly, and requires no fancy equipment beyond a blender and a freezer‑safe tray.
- Unique Technique: The quick chill step is the game‑changer that most other recipes skip, resulting in a bite that holds its shape and doesn’t turn into a soggy mess.
- Crowd Reaction: I dare you to taste this and not go back for seconds; even the most skeptical sweet‑tooth will be converted into a yogurt enthusiast.
- Ingredient Quality: Using full‑fat Greek yogurt gives a richer mouthfeel, while fresh strawberries provide antioxidants and a burst of natural color.
- Make‑Ahead Potential: These bites keep beautifully in the freezer for up to a month, making them perfect for grab‑and‑go snacks or impromptu dessert tables.
- Health Boost: Packed with protein, calcium, and vitamin C, each serving fuels your body without the guilt of refined sugars.
Inside the Ingredient List
The Flavor Base
Fresh strawberries are the heart of this bite. Their natural acidity cuts through the richness of the yogurt, creating a bright, palate‑cleansing sensation. If you skip them, you lose the signature pink hue and the burst of vitamin C that makes this snack feel like a summer garden in your mouth. For a twist, try swapping half the strawberries for frozen raspberries; the texture changes slightly, but the flavor remains just as vibrant.
The Sweet Whisper
Honey is the only sweetener, and it’s chosen for its floral notes that complement the berries without overwhelming them. A tablespoon too much would turn the bites cloyingly sweet, while less would leave the tartness biting back. If you’re allergic to honey or prefer a vegan option, agave syrup or maple syrup work beautifully, though they bring a different nuance—maple adds a caramel depth, while agave stays neutral.
The Texture Crew
Greek yogurt provides the creamy canvas that holds everything together. Its high protein content not only makes the bites more satiating but also gives them a firm structure once frozen. Using low‑fat yogurt would result in a watery texture that won’t set properly; the fat in full‑fat Greek yogurt is essential for that smooth, almost custard‑like interior.
The Final Flourish
A pinch of sea salt, though not listed as a core ingredient, can elevate the overall flavor by enhancing the sweetness of the honey and the brightness of the strawberries. It’s a tiny secret that professional chefs use to bring out hidden notes. If you’re watching sodium, just a whisper will do; the result is a more rounded taste that feels less one‑dimensional.
Everything's prepped? Good. Let's get into the real action...
The Method — Step by Step
First, rinse the strawberries under cold water, pat them dry, and remove the stems. Slice them into halves so the blender can handle them without turning into a mushy pulp. I like to give them a quick toss with a pinch of sea salt; this draws out a little extra juice and intensifies the flavor. Once they’re ready, set them aside while you prep the yogurt mixture.
Grab a high‑speed blender and add the cup of Greek yogurt followed by the two tablespoons of honey. Blend on low for five seconds, just enough to swirl the honey through the yogurt without over‑aerating. The mixture should look glossy and slightly thick, like a light custard. This step is pure magic; the honey dissolves completely, leaving no grainy pockets.
Now, add the fresh strawberry halves to the blender. Pulse on high for just three to four bursts; you want the berries broken down but still visible as tiny pink flecks. Over‑blending turns the mixture into a uniform pink puree, which loses the delightful texture contrast we’re after. The goal is a swirl of pink and white, like a marble cake frozen in time.
Transfer the blended concoction into a shallow, freezer‑safe tray lined with parchment paper. Use a spatula to spread it into an even layer about half an inch thick. This thickness is crucial: too thin and the bites become icy shards; too thick and they won’t set properly. For an extra visual pop, drizzle a thin line of honey across the surface before it hits the freezer.
Place the tray in the freezer and let it chill for exactly 45 minutes. This “flash‑freeze” period is the secret that gives the bites their snap. If you leave them longer, they become too hard to cut cleanly; if you pull them out early, they’ll be slushy and lose shape. While you wait, clean up any stray strawberry juices—those can make the parchment sticky.
After 45 minutes, remove the tray and test a corner with a sharp knife. The blade should glide through with a faint resistance, and the bite should spring back slightly when pressed. If it feels too soft, give it another 10‑15 minutes. Once firm, use a cookie cutter or a sharp kitchen knife to cut the mixture into bite‑size squares or fun shapes like hearts or stars.
Transfer the cut bites onto a fresh sheet of parchment paper and place them back in the freezer for an additional 15 minutes. This second chill ensures the edges set cleanly, preventing any crumble when you serve them. While they’re chilling, you can prep a simple garnish: a dusting of finely grated lemon zest or a few crushed pistachios for a salty‑sweet contrast.
Finally, serve the bites straight from the freezer or let them sit at room temperature for two minutes to soften just enough for a melt‑in‑your‑mouth experience. Picture yourself pulling this out of the freezer, the whole kitchen smelling incredible with sweet strawberry aroma—pure bliss. Store any leftovers in an airtight container, and you’ve got a guilt‑free snack ready for any craving.
That's it — you did it. But hold on, I've got a few more tricks that'll take this to another level...
Insider Tricks for Flawless Results
The Temperature Rule Nobody Follows
Never freeze the mixture at a temperature above 0°F (‑18°C). A warmer freezer creates ice crystals that give the bites a grainy texture instead of a smooth snap. I once tried using a quick‑freeze drawer set to “soft freeze” and ended up with a slushy mess that refused to hold its shape. Keep your freezer at its coldest setting for at least an hour before you start, and the results will be crystal‑clear.
Why Your Nose Knows Best
When the mixture is ready to be poured into the tray, give it a quick sniff. If you detect a faint sour note, it means the strawberries are over‑ripe, and the acidity might overpower the honey. In that case, add a splash more honey or a pinch of sugar to rebalance. Trusting your nose saves you from a batch that tastes like a tart candy instead of a balanced dessert.
The 5‑Minute Rest That Changes Everything
After cutting the bites, let them rest on the parchment for exactly five minutes before the final freeze. This short pause allows the edges to firm up naturally, reducing the chance of cracks when you later move them to a storage container. I once skipped this step and ended up with bite‑sized shards that fell apart on the plate—lesson learned.
The “Double‑Layer” Trick for Extra Creaminess
If you crave a richer mouthfeel, create a thin base layer of plain Greek yogurt, freeze it for ten minutes, then add the strawberry‑honey mixture on top and continue with the standard freeze. This sandwich technique adds an extra creamy core that melts slower, giving you a multi‑textured bite that’s both icy and luxuriously smooth.
Mind the Moisture
When using fresh strawberries, pat them dry thoroughly after washing. Excess water dilutes the yogurt mixture, leading to a softer bite that won’t hold its shape. A quick paper‑towel blot does wonders, and the result is a firmer, more concentrated flavor that makes each bite feel like a concentrated fruit burst.
Creative Twists and Variations
This recipe is a playground. Here are some of my favorite ways to switch things up:
Tropical Tango
Swap half the strawberries for diced mango and add a splash of coconut milk to the yogurt. The result is a sun‑kissed bite with a creamy coconut finish that transports you straight to a beachside cabana.
Chocolate‑Covered Dream
After the bites are fully set, dip the top half in melted dark chocolate and sprinkle with sea salt. The bitter chocolate pairs beautifully with the sweet strawberry‑yogurt core, creating a sophisticated flavor contrast.
Nutty Crunch
Fold in a tablespoon of finely chopped toasted almonds or pistachios before the first freeze. The nuts add a subtle crunch that contrasts the smooth interior, making each bite more interesting.
Spiced Autumn
Add a pinch of ground cinnamon and a drizzle of maple syrup instead of honey. The warm spice notes turn the snack into a cozy treat perfect for cooler evenings, while still keeping the refreshing texture.
Berry Medley
Combine strawberries with blueberries and blackberries for a mixed‑berry version. The different pigments create a visual rainbow, and each fruit contributes its own unique tartness and sweetness.
Storing and Bringing It Back to Life
Fridge Storage
If you plan to eat the bites within three days, keep them in an airtight container lined with parchment paper. Store them in the refrigerator for up to 48 hours; they’ll soften slightly but remain deliciously creamy. A tiny splash of fresh lemon juice before serving can revive any lost brightness.
Freezer Friendly
For longer-term storage, place the bites in a single layer on a freezer‑safe tray, then once frozen, transfer them to a zip‑top bag. They’ll keep for up to one month without freezer burn. When you’re ready, let them sit at room temperature for two minutes; the outer layer will soften while the center stays firm.
Best Reheating Method
To enjoy a warm version, pop a few bites in a preheated oven at 300°F (150°C) for just 5‑7 minutes. Add a tiny splash of water to the tray before heating; the steam helps the yogurt melt back to a silky consistency without drying out. Serve warm with a drizzle of extra honey for a comforting dessert.