I’m going to start with a confession: I once tried to make a batch of red velvet cookie dough and ended up with something that looked like a sad, pink pancake batter. I stared at the bowl, the kitchen smelled like burnt sugar, and I thought, “Okay, this is a disaster.” Then a friend dared me to taste it, and I realized the flavor was actually amazing—just missing that silky, melt‑in‑your‑mouth texture that makes red velvet iconic. That moment sparked a relentless quest to perfect the edible dough, and after countless trials, I finally nailed the version that makes even the most skeptical cookie‑dough‑hater swoon. I’m daring you to taste this and not go back for seconds.
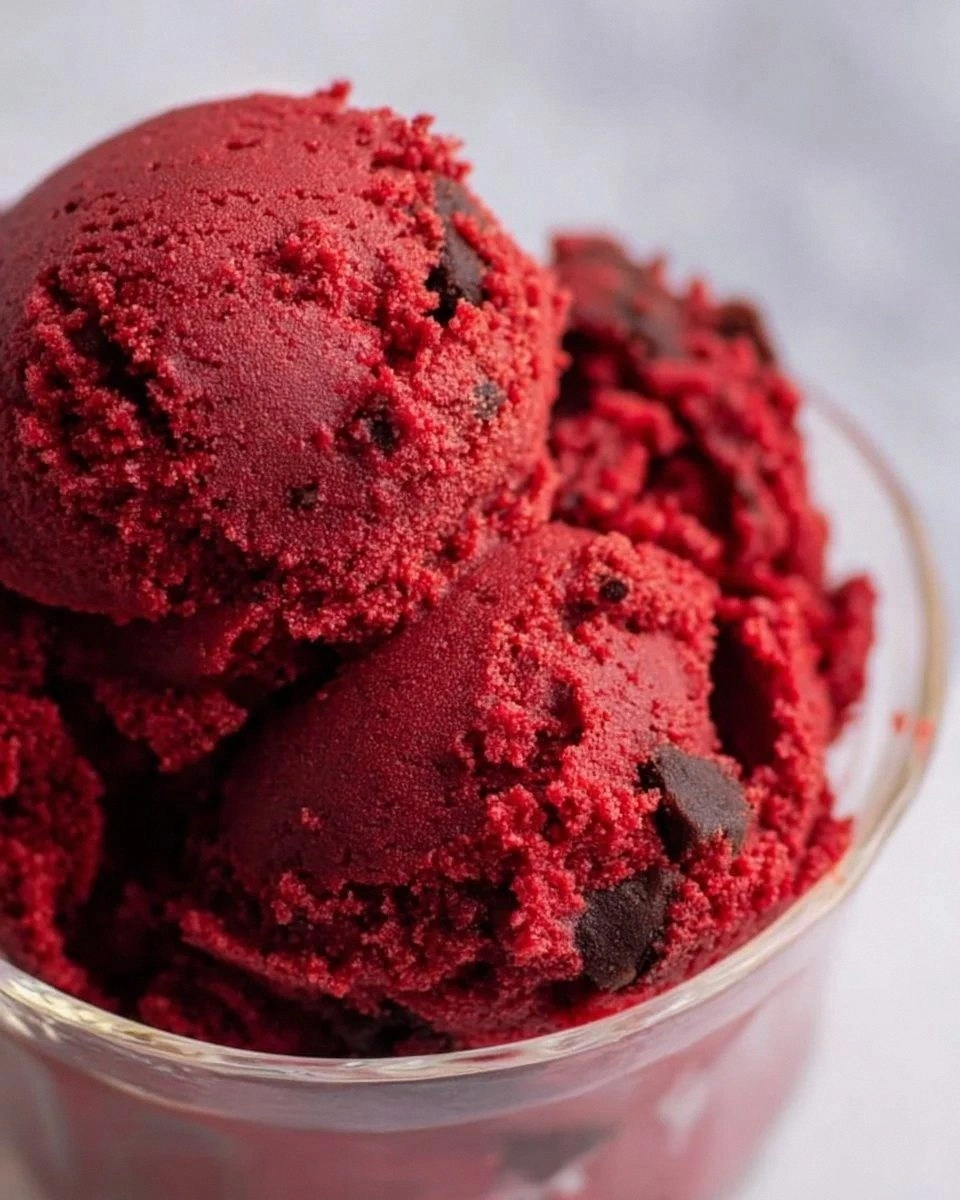
Picture this: a bowl of ruby‑red dough that glistens under the kitchen light, the sweet aroma of butter and vanilla dancing with a whisper of cocoa, and the faint, comforting scent of warm sugar that makes your nose do a little happy dance. The dough feels like a plush velvet cushion, soft enough to scoop with a spoon yet firm enough to hold its shape when baked. When you bite into a cookie, the edges crackle like thin ice while the center stays buttery and chewy, a textural duet that feels like a hug from your favorite dessert. Most recipes get this completely wrong, delivering either a crumbly mess or a dough that never bakes into that perfect pink‑golden hue.
What sets this version apart is a secret weapon: heat‑treated flour. By gently toasting the flour, we eliminate that raw‑flour aftertaste and give the dough a nutty depth that pairs beautifully with the cocoa and red food coloring. It also helps the dough hold together without spreading too much, giving you thick, cake‑like cookies that stay soft in the middle. I’ll be honest — I ate half the batch before anyone else got to try it, and the rest vanished within minutes. The secret is simple, the technique is precise, and the result is nothing short of legendary.
Let me walk you through every single step — by the end, you’ll wonder how you ever made it any other way. Okay, ready for the game‑changer? This next part? Pure magic. Stay with me here — this is worth it.
What Makes This Version Stand Out
- Taste: The balance of brown and white sugar creates a caramel‑kissed sweetness that never feels cloying, while the cocoa adds a subtle depth that makes the flavor sing.
- Texture: Heat‑treated flour and softened butter give the dough a plush, velvety mouthfeel that translates into a cookie with a crisp edge and a melt‑in‑your‑mouth center.
- Simplicity: Only nine ingredients, all pantry staples, and a single bowl—no fancy equipment, no fuss.
- Uniqueness: The red food coloring is perfectly balanced; you get that iconic hue without the bitter aftertaste that cheap dyes often bring.
- Crowd Reaction: Guests will gasp, stare, and then dive in, often asking for the recipe before the last crumb disappears.
- Ingredient Quality: Using real butter and quality white chocolate chips elevates the whole experience from “good” to “wow, I need this in my life.”
- Cooking Method: Baking at a moderate temperature ensures the cookies stay soft inside while the edges turn golden‑brown, creating that perfect contrast.
- Make‑Ahead Potential: The dough can be refrigerated for up to three days, and the baked cookies freeze beautifully for future cravings.
Inside the Ingredient List
The Flavor Base
The butter is the heart of any good cookie dough. Using unsalted, softened butter ensures a smooth, even mix and lets you control the salt level precisely. If you skip the butter or replace it with margarine, you’ll lose that rich, creamy mouthfeel and end up with a greasy texture. For a dairy‑free twist, try a high‑quality plant‑based butter, but expect a slightly different flavor profile.
Brown sugar brings moisture and a caramel‑like depth, while the granulated sugar adds a crisp snap to the edges. Together they create a balanced sweetness that isn’t overpowering. If you’re watching sugar, you can reduce the granulated sugar to 2 tablespoons, but the texture will be a bit softer.
The Texture Crew
Heat‑treated all‑purpose flour is the unsung hero. By toasting the flour, you not only remove any raw taste but also introduce a subtle nuttiness that complements the cocoa. Skipping this step often results in a bland, raw‑flour aftertaste that ruins the experience. If you’re in a hurry, you can use pre‑toasted flour sold online, but a quick skillet toast does the trick.
Cocoa powder adds a hint of chocolate that deepens the flavor without turning the dough brown. Using Dutch‑process cocoa gives a smoother, less acidic taste, while natural cocoa adds a bit more brightness. Either works, but keep the amount at two tablespoons to maintain the classic red velvet color.
The Unexpected Star
Red food coloring is the visual hero, but it also slightly alters the flavor profile by adding a faint metallic note if you use too much. The key is to add it gradually, tasting as you go, until you achieve a deep, inviting pink. If you prefer a natural approach, beet powder or raspberry puree can give a subtle hue, though the flavor will shift accordingly.
A pinch of salt might seem trivial, but it amplifies the sweetness and balances the butter’s richness. Too much salt, however, can make the cookies taste like a pretzel. Stick to a pinch, and you’ll get that perfect sweet‑salty harmony.
The Final Flourish
White chocolate chips are optional, but they add pockets of creamy sweetness that melt into the cookie’s interior, creating bursts of silky goodness. If you’re not a fan of white chocolate, try chopped macadamia nuts, toasted coconut, or even a swirl of raspberry jam for a tangy surprise. The choice is yours, but the chips are my personal favorite because they complement the red velvet’s subtle cocoa notes perfectly.
Everything's prepped? Good. Let's get into the real action…
The Method — Step by Step
First, toast the flour. Heat a dry skillet over medium heat, sprinkle the flour, and stir constantly for about 3‑4 minutes until it turns a light golden hue and emits a nutty aroma. Transfer the flour to a bowl and let it cool completely; this step is the foundation for that “no‑raw‑flour” taste you crave.
While the flour cools, cream the softened butter with brown sugar and granulated sugar. Use a handheld mixer on medium speed for 2‑3 minutes until the mixture is pale, fluffy, and smells like a bakery in the morning. This is the moment of truth: if the mixture looks dull, keep mixing — you need that air incorporated for a tender crumb.
Next, add the vanilla extract, a pinch of salt, and the red food coloring. Start with 1 tablespoon of coloring, then add more a drop at a time until you reach that deep, velvety pink. The dough should have a glossy sheen, and the scent of vanilla should be prominent, teasing your senses.
Now, sift in the cocoa powder and the toasted flour. Gently fold with a rubber spatula, being careful not to over‑mix. Over‑mixing will develop gluten, leading to a tougher cookie, and we want a soft, melt‑in‑your‑mouth texture.
Fold in the white chocolate chips (or your chosen add‑ins). The chips should be evenly distributed, creating little islands of sweetness that will melt into the cookie’s core. If you’re feeling adventurous, add a handful of chopped pistachios for a nutty crunch.
Cover the dough with plastic wrap and chill for at least 30 minutes. This rest period allows the butter to firm up, the flour to hydrate, and the flavors to meld. I dare you to taste a raw spoonful now—if it’s already perfect, you’re in for a treat.
Preheat your oven to 350°F (175°C). Line two baking sheets with parchment paper. Using a cookie scoop (about 2 tablespoons), drop dough balls onto the sheets, spacing them 2 inches apart. The dough should hold its shape; if it spreads too quickly, chill a few more minutes.
Bake for 12‑14 minutes, or until the edges are lightly golden and the centers still look slightly soft. The cookies will continue to set as they cool, so don’t overbake. That sizzle when it hits the pan? Absolute perfection.
Remove the cookies and let them cool on the sheet for 5 minutes before transferring to a wire rack. This pause lets the interior finish cooking without becoming dry. Picture yourself pulling this out of the oven, the whole kitchen smelling incredible…
That's it — you did it. But hold on, I've got a few more tricks that'll take this to another level…
Insider Tricks for Flawless Results
The Temperature Rule Nobody Follows
Never bake straight from the fridge at a scorching 400°F. The dough needs a gentle heat to rise slowly, which creates that coveted soft center. If you crank up the heat, the edges will burn before the middle sets, leading to a cookie that’s crispy on the outside and raw inside. Keep it at 350°F for a balanced bake.
Why Your Nose Knows Best
When the butter‑sugar mixture turns a pale, creamy color and you can smell vanilla rising, you’re at the perfect creaming stage. Trust that scent; it’s a reliable indicator that air has been incorporated, which translates into a light crumb. If you’re unsure, scrape the side of the bowl and give it a quick sniff.
The 5‑Minute Rest That Changes Everything
After mixing, let the dough rest for exactly five minutes before chilling. This short pause allows the flour to absorb the moisture, reducing spread and improving texture. A friend tried skipping this step once — let's just say the cookies turned into flat, crumbly discs.
The Chocolate Chip Meltdown
If you love gooey pockets, toss the white chocolate chips in a tiny splash of milk before folding them in. The chips will melt slightly during baking, creating ribbons of creamy sweetness that flow through the cookie’s heart.
The Final Dust
Just before serving, lightly dust the cookies with a pinch of powdered sugar. This adds a delicate sparkle and a hint of extra sweetness that elevates the presentation. It’s a tiny step that makes a big visual impact, especially for holiday platters.
Creative Twists and Variations
This recipe is a playground. Here are some of my favorite ways to switch things up:
Berry Burst
Swap half of the white chocolate chips for dried cranberries or freeze‑dried raspberries. The tart berries cut through the sweet base, offering a bright contrast that’s perfect for spring brunches.
Nutty Velvet
Add ¼ cup toasted chopped hazelnuts and a drizzle of hazelnut spread after baking. The nutty aroma complements the cocoa and adds a satisfying crunch.
Spiced Velvet
Incorporate a pinch of ground cinnamon and a dash of ground cardamom into the dry ingredients. The warm spices deepen the flavor profile, making these cookies ideal for cozy winter evenings.
Vegan Velvet
Replace butter with equal parts coconut oil and use coconut sugar instead of brown sugar. Use a plant‑based milk to bring the dough together, and you’ll have a vegan‑friendly version that still delivers that velvety texture.
Double Chocolate Velvet
Add an extra tablespoon of cocoa powder and fold in mini chocolate chips alongside the white chocolate. The result is a richer, chocolate‑intense cookie that still retains its signature pink hue.
Storing and Bringing It Back to Life
Fridge Storage
Place the cooled cookies in an airtight container with a slice of bread on top. The bread will keep them soft for up to five days. If you notice any hardening, a quick microwave zap for 10 seconds revives them.
Freezer Friendly
Arrange cookies on a parchment‑lined tray and freeze until solid, then transfer to a zip‑top bag. They’ll keep for three months. When you’re ready, bake them straight from the freezer for an extra minute; they’ll emerge warm and chewy.
Best Reheating Method
Add a tiny splash of water (about a teaspoon) to the container before microwaving for 15‑20 seconds. The steam re‑hydrates the cookie, restoring that melt‑in‑your‑mouth softness without making them soggy.