I was in the middle of a chaotic Sunday brunch when the kitchen turned into a chocolate catastrophe. My attempt at a simple caramel drizzle ended up a sticky, uneven mess that tasted like burnt sugar. That night, I stared at the ruined batch, my jaw tightening, and whispered, “There has to be a better way.” The next morning, I set out to create the ultimate chocolate caramel that would not only redeem my kitchen blunder but also become a showstopper for every gathering.
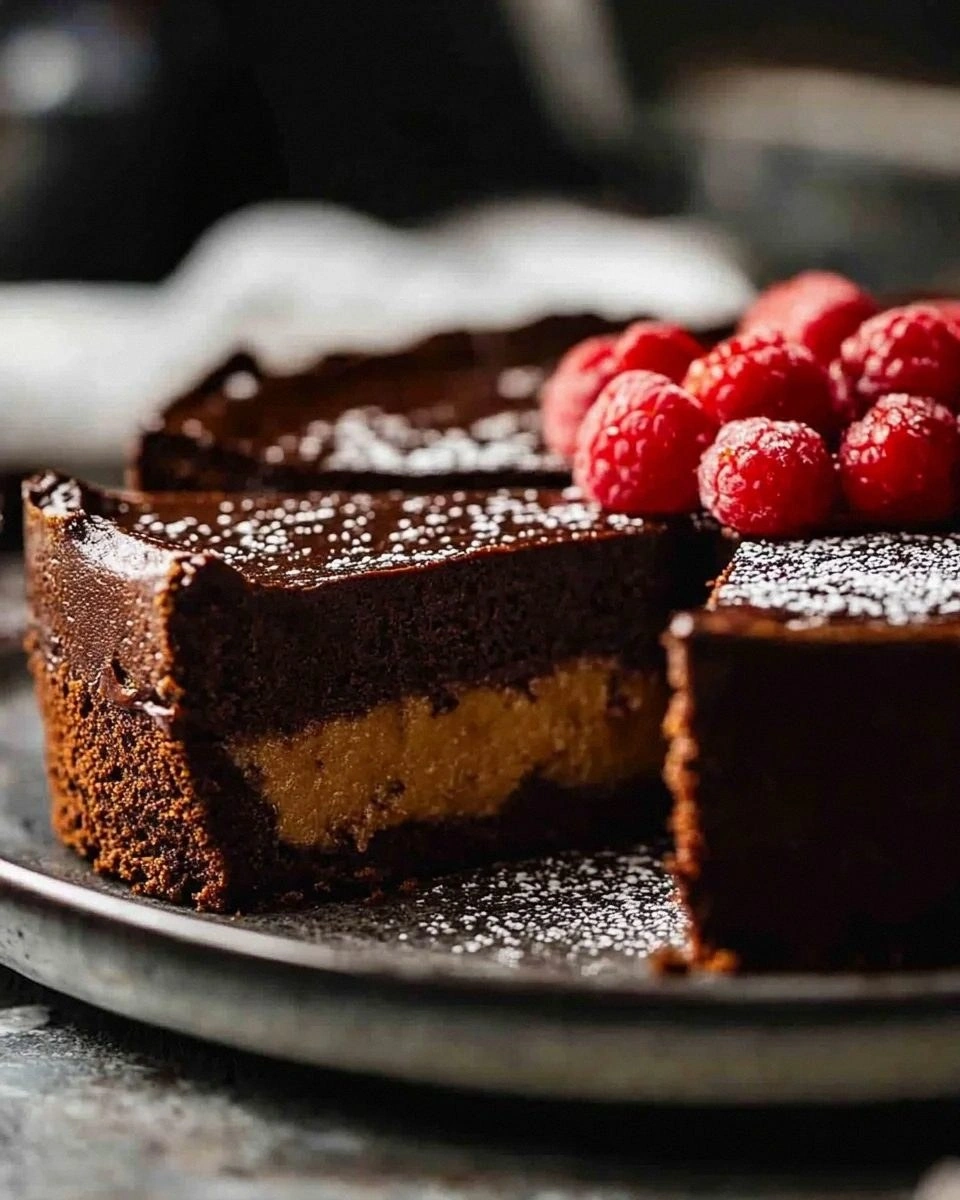
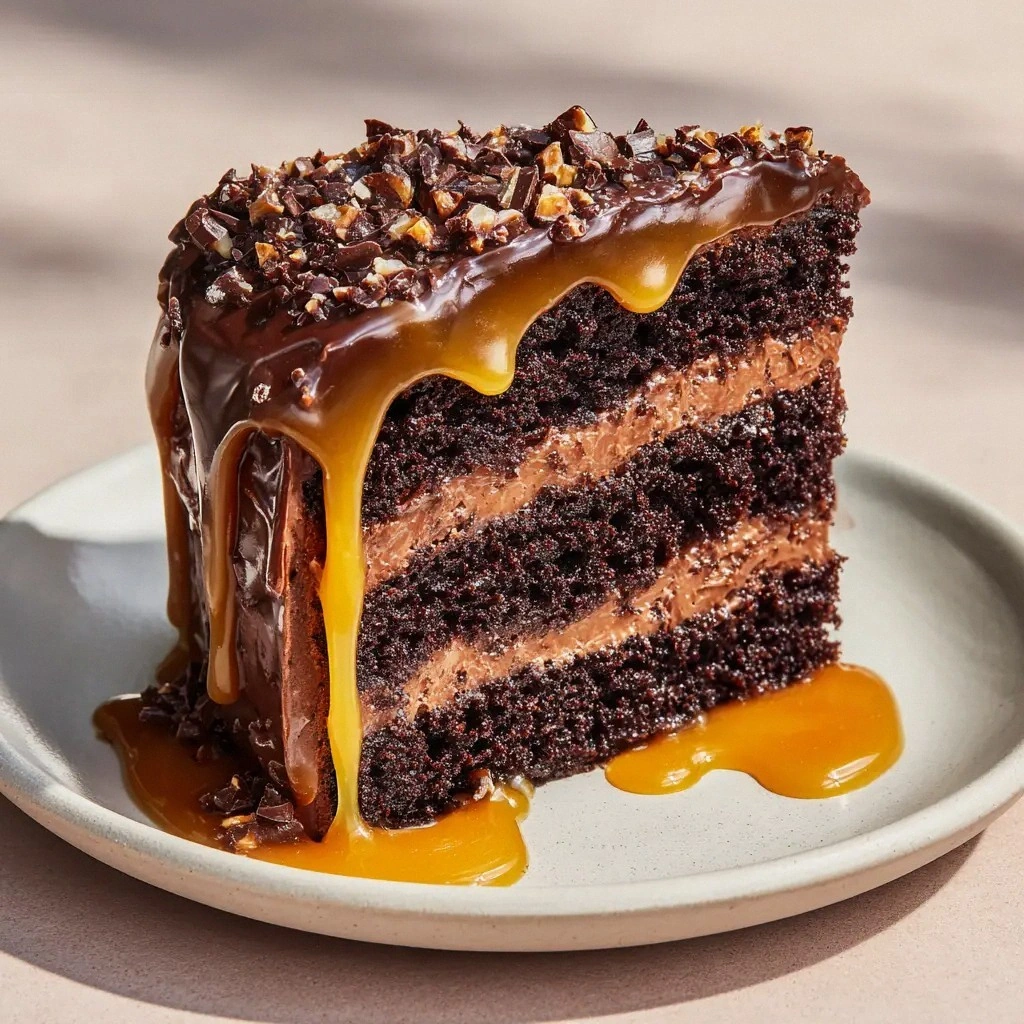
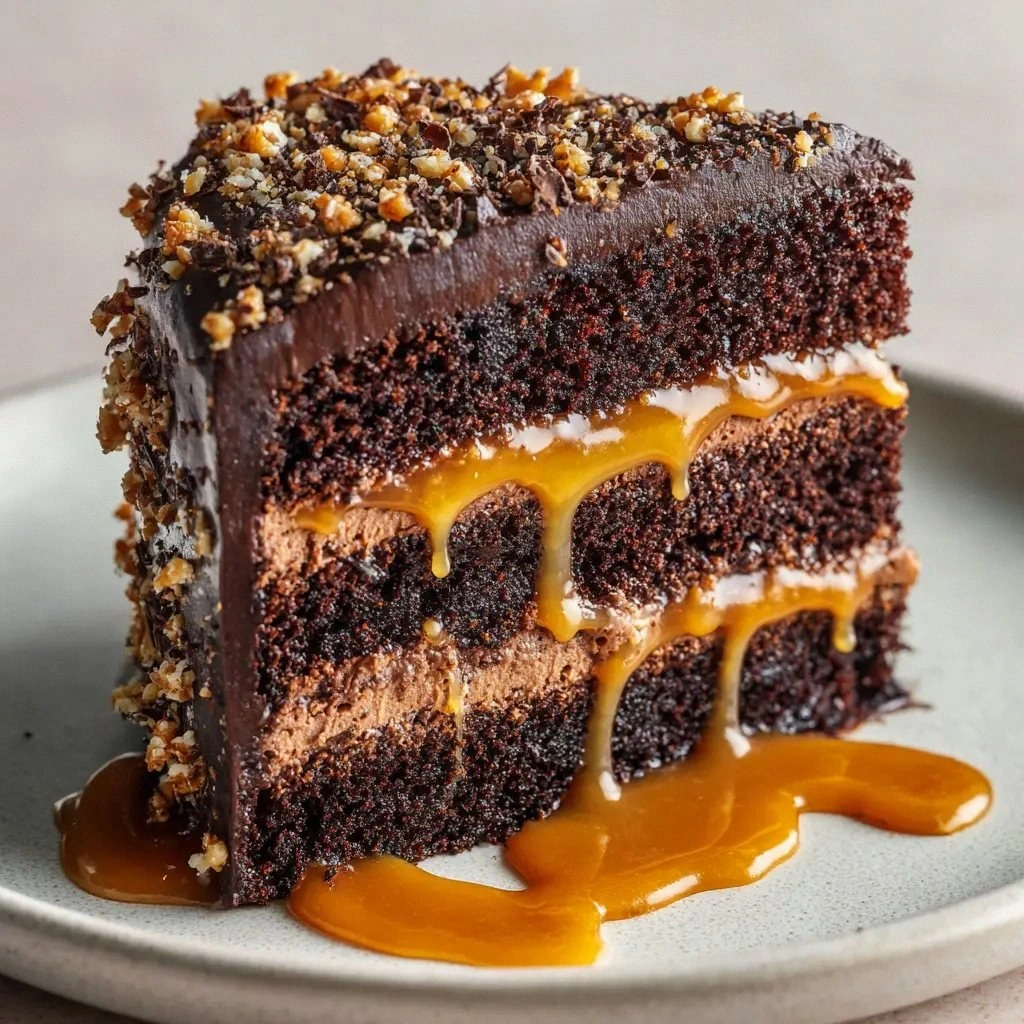
Picture this: a glossy dark chocolate glaze that clings to a buttery crumbly base, the caramel swirling like molten lava, and toffee bits that crunch with each bite. The aroma that fills the air is a heady mix of roasted cocoa, caramelized sugar, and a hint of espresso—an invitation that even the most skeptical dessert lover can’t resist. The texture is a paradoxical harmony—soft and moist inside, with a glossy, slightly crisp top that gives way to a satisfying crunch.
What makes this version stand out is not just the combination of flavors, but the meticulous layering of techniques that elevate each component. I’ve refined the caramel so it’s silky yet firm, the chocolate so rich it melts in the mouth, and the toffee bits so perfectly toasted that they add a subtle caramelized crunch. The result is a dessert that feels like a chocolate lover’s dream and a caramel connoisseur’s delight, all wrapped in one irresistible package.
You might think chocolate and caramel are a match made in heaven, but the trick lies in balancing the sweetness and depth of flavor. In this recipe, I introduce a bold twist: a splash of espresso in the caramel and a hint of sea salt in the chocolate glaze. This subtle complexity turns an ordinary sweet treat into a multi‑dimensional experience that will have guests asking for seconds. I dare you to taste this and not go back for seconds.
If you’ve ever struggled to get caramel to set just right, you’re not alone—and I’ve got the fix. By controlling the temperature and using the right ratio of butter to sugar, I achieved a caramel that’s glossy, silky, and holds its shape perfectly when poured over the cake. The secret? A precise balance of heat and patience that transforms a simple sugar syrup into a luxurious, buttery glaze.
This isn’t just another recipe; it’s a culinary revelation. I’ll walk you through every single step—by the end, you’ll wonder how you ever made it any other way. Picture yourself pulling this out of the oven, the whole kitchen smelling incredible, and the first bite revealing layers of caramel, chocolate, and crunch. That moment, my friend, is pure magic.
What Makes This Version Stand Out
- Flavor: The caramel is infused with espresso, giving it a depth that pairs perfectly with the dark cocoa.
- Texture: A glossy chocolate glaze overlays a buttery cake that holds a crunchy toffee layer.
- Ingredient Quality: I use premium dark cocoa and unsalted butter for maximum flavor extraction.
- Make‑Ahead Potential: The cake can be assembled a day early; the glaze and caramel set well and keep fresh.
- Visual Appeal: The glossy finish and toffee crunch make this dessert Instagram‑ready.
- Audience: Perfect for both casual family nights and formal dessert tables.
- Time Efficiency: While the components are rich, the overall prep stays under an hour.
- Adaptability: Swap the espresso for vanilla or a splash of liqueur for a different twist.
Alright, let’s break down exactly what goes into this masterpiece…
Inside the Ingredient List
The Flavor Base
The foundation of this dessert starts with a buttery cake batter that’s enriched with buttermilk and a splash of espresso. The buttermilk adds acidity that tenderizes the flour, giving the cake a tender crumb. Espresso not only deepens the chocolate flavor but also balances the sweetness of the caramel. If you skip the espresso, you’ll lose that subtle bitterness that cuts through the richness.
Swap espresso for cold brewed coffee for a milder flavor, or use a flavored syrup for a unique twist. When choosing coffee, go for a medium roast; it provides a balanced bitterness without overpowering the chocolate. A high‑quality espresso also ensures the caramel doesn’t taste burnt or overly bitter.
The Texture Crew
The toffee bits and micro chocolate chips are the texture heroes of this recipe. Toffee bits provide a satisfying crunch that contrasts with the smooth caramel, while micro chocolate chips melt into the glaze, creating pockets of molten chocolate. If you can’t find micro chips, regular chocolate chips work, but the melt will be slightly thicker.
To keep the toffee from clumping, toast them lightly in a dry skillet until golden. This step releases their natural oils and enhances their caramel flavor. If you prefer a sweeter crunch, add a pinch of sea salt to the toffee before toasting.
The Unexpected Star
A dash of sea salt is the unsung hero that elevates the chocolate glaze. Salt balances sweetness and intensifies chocolate notes, turning an ordinary glaze into a gourmet experience. If you’re watching sodium, a tiny pinch is enough—less is more.
Sea salt also provides a subtle crunch on the surface, giving each bite a textural surprise. If you prefer a finer finish, use flaky salt; it dissolves instantly and adds a delicate sparkle to the glaze.
The Final Flourish
The final touch is a glossy chocolate glaze that coats the cake like velvet. It’s made by combining dark cocoa, heavy cream, and a touch of butter, creating a silky coating that hardens just enough to hold the caramel. This glaze not only adds flavor but also creates a protective layer that keeps the cake moist.
If you want a lighter finish, reduce the amount of heavy cream to one tablespoon. The glaze will be thinner but still glossy, offering a different mouthfeel. Remember, the glaze sets quickly, so work fast once it’s poured over the cake.
Everything’s prepped? Good. Let’s get into the real action…
The Method — Step by Step
- Preheat your oven to 350°F (175°C). While the oven warms, grease a 9-inch springform pan and line the bottom with parchment. This step ensures a clean release and a perfect shape. If you forget, the cake may stick and tear when you remove it.
- Mix dry ingredients. In a large bowl, whisk together flour, sugar, cocoa, baking soda, baking powder, and salt. The dry mix should be uniform; this prevents pockets of flour that can make the cake dense. Use a whisk to ensure the cocoa is fully incorporated.
- Combine wet ingredients. In a separate bowl, whisk together buttermilk, vegetable oil, eggs, and espresso. The mixture should be smooth and slightly frothy. This creates a moist batter that carries the espresso flavor throughout.
- Fold wet into dry. Add the wet mixture to the dry and stir until just combined. Overmixing can toughen the cake. The batter should be thick but pourable.
- Pour batter into pan. Transfer the batter to the prepared pan, smoothing the top with a spatula. Tap the pan gently on the counter to release any air bubbles. This ensures an even rise.
- Bake the cake. Place the pan in the oven and bake for 30–35 minutes. The cake should rise and develop a slight crust. Test with a toothpick; it should come out clean or with a few crumbs.
- Cool and assemble. Let the cake cool in the pan for 10 minutes, then invert onto a wire rack. While it cools, prepare the caramel: combine sugar, butter, heavy cream, and a pinch of salt in a saucepan over medium heat. Stir until the sugar dissolves, then let it simmer until it reaches 320°F (160°C). This is the moment of truth—watch the color shift to amber.
- Layer the caramel. Once the cake is cool, spread a thin layer of caramel over the top. Sprinkle toasted toffee bits evenly. The toffee will sit in the caramel, creating pockets of crunch. Let the caramel set for 5 minutes.
- Prepare the chocolate glaze. In a small saucepan, whisk cocoa, heavy cream, butter, and sea salt over low heat until smooth. The glaze should be glossy but pourable. Pour over the caramel layer, letting it pool in the corners. The glaze will set into a glossy, slightly crisp shell.
- Chill. Refrigerate the cake for at least 1 hour to allow the caramel and glaze to set fully. The result is a cake that holds its shape and offers a satisfying crunch.
That’s it— you did it. But hold on, I’ve got a few more tricks that’ll take this to another level…
Insider Tricks for Flawless Results
The Temperature Rule Nobody Follows
Maintaining the correct caramel temperature is crucial. If you go too hot, the caramel will burn and taste bitter. If it’s too low, it won’t set. Use a candy thermometer and aim for 320°F (160°C). I’ve learned that a steady, low heat gives the best texture.
Why Your Nose Knows Best
When the caramel starts to turn amber, your nose will detect a deep, nutty aroma. That’s the cue to stop the heat. Don’t rely solely on the timer; your senses are your best friend in the kitchen.
The 5-Minute Rest That Changes Everything
After pouring the caramel, let it sit for 5 minutes before adding the toffee. This brief rest allows the caramel to thicken slightly, preventing the toffee from sinking too deep. A friend once skipped this step and the toffee sank, ruining the crunch.
Micro Chocolate Chips vs. Regular
Micro chocolate chips melt into the glaze more quickly, creating a smoother finish. If you’re using regular chips, pre‑melt them in the glaze to avoid clumping. The result is a glossy, uniform coating.
The Secret to a Crispy Top
Once the glaze sets, place the cake under a broiler for 1–2 minutes to crisp the top. Watch it closely; you want a golden sheen, not a burnt crust. This trick adds a delightful crunch that pairs with the caramel.
The Quick Chill Trick
If you’re short on time, place the cake in the freezer for 10 minutes after glazing. This quickly sets the glaze and caramel, allowing you to serve immediately.
Creative Twists and Variations
This recipe is a playground. Here are some of my favorite ways to switch things up:
Nutty Crunch
Add chopped pecans or walnuts to the caramel layer for an extra crunch. The nuts pair well with the chocolate glaze and add a buttery flavor.
Citrus Zest
Stir in a tablespoon of orange zest into the caramel. The citrus brightens the richness and adds a subtle brightness that cuts through the sweetness.
Spiced Caramel
Infuse the caramel with a pinch of cinnamon and a dash of cayenne pepper. The heat and spice create a warm, comforting flavor profile.
Minty Madness
Add a teaspoon of peppermint extract to the glaze. The mint contrasts nicely with the chocolate, giving a refreshing aftertaste.
Alcoholic Twist
Replace the heavy cream in the glaze with a splash of dark rum or bourbon. The alcohol adds depth and a subtle smoky note.
Vegan Version
Use coconut milk instead of heavy cream, and swap butter for coconut oil. The result is a plant‑based version that still delivers rich flavor.
Storing and Bringing It Back to Life
Fridge Storage
Store the cake in an airtight container in the refrigerator for up to 5 days. The caramel and glaze will stay firm, and the cake will stay moist. Before serving, let it sit at room temperature for 15 minutes to soften slightly.
Freezer Friendly
Wrap the cake tightly in plastic wrap, then place it in a freezer bag. It will keep for up to 3 months. When ready to serve, thaw in the refrigerator overnight and let it come to room temperature.
Best Reheating Method
To reheat, place the cake on a baking sheet and warm in a 350°F oven for 5 minutes. Add a tiny splash of water to the pan before reheating; it steams the cake back to perfection, keeping the caramel from drying out.