It started with a kitchen catastrophe that turned into a culinary revelation. I had just bought a bag of flour, a bag of potatoes, and a jar of mint chutney from the local market, craving something spicy and comforting. I decided to make samosas, but the dough kept sticking, the filling was too dry, and the chutney was bland. I laughed at my own culinary misfortune, then remembered my friend’s dare: “I dare you to taste this and not go back for seconds.” That challenge sparked a quest to create the ultimate vegetable samosa, one that would make even the most skeptical taste buds dance.
Picture this: a golden, flaky pastry that crackles as you bite into it, revealing a vibrant medley of potatoes, peas, carrots, and aromatics, all wrapped in a crisp, buttery shell. The aroma of cumin, coriander, and fresh mint wafts through the kitchen, mingling with the sizzling sound of oil. The first bite delivers a burst of earthy sweetness, a gentle heat, and the cool, herbaceous finish of mint that lingers on the palate. Every element—from the crunch of the pastry to the tender, seasoned filling—works in harmony, creating a sensory experience that feels like a warm hug wrapped in crispness.
What makes this version stand out from every other recipe out there is not just the flawless execution, but the intentional layering of flavors and textures that elevate the humble samosa to a gourmet delight. I’ve fine‑tuned the dough to be light yet sturdy, the filling to balance heat and sweetness, and the chutney to add that refreshing minty zing. The result is a dish that feels both comforting and adventurous, a crowd‑pleaser that will have your guests asking for the recipe after the first bite. And there’s a secret ingredient that most recipes overlook: a splash of yogurt in the filling that keeps it moist and adds a subtle tang.
I’ll be honest—when I first baked a batch, I ate half of it before anyone else could even taste a single samosa. The crispy edges shatter like thin ice, and the filling melts in your mouth like velvet. Picture yourself pulling this out of the oven, the whole kitchen smelling incredible, and the anticipation building as you plate each golden piece. Let me walk you through every single step—by the end, you’ll wonder how you ever made it any other way.
What Makes This Version Stand Out
- Taste: The filling balances sweet, savory, and herbaceous notes with a subtle kick, creating a flavor profile that’s both familiar and exciting.
- Texture: The pastry achieves a light, flaky exterior that gives way to a moist, hearty filling, offering a satisfying contrast in every bite.
- Simplicity: Despite its complexity, the recipe uses pantry staples and a few fresh ingredients, making it approachable for home cooks.
- Uniqueness: The yogurt infusion in the filling keeps the samosas moist and adds a tang that sets this version apart from classic recipes.
- Crowd Reaction: Friends and family rave about the crispness and the burst of minty freshness, making it a hit at gatherings.
- Ingredient Quality: Fresh mint, high‑quality cumin, and crisp vegetables elevate the overall taste.
- Cooking Method: A two‑step process—pre‑bake the dough, then fry the filled parcels—ensures perfect results every time.
- Make‑Ahead Potential: The dough can be prepared days in advance, and the samosas can be fried just before serving for maximum freshness.
Alright, let's break down exactly what goes into this masterpiece...
Inside the Ingredient List
The Flavor Base
The foundation of any great samosa starts with the dough. A simple mixture of all‑purpose flour, a pinch of salt, a splash of water, and a tablespoon of oil creates a pliable, non‑sticky base. The dough needs to be rolled thin enough to crisp up but thick enough to hold the filling. If you skip the oil, the pastry becomes tough and chewy. For a lighter texture, add a teaspoon of baking powder; this gives the dough a subtle lift and a more airy bite.
The Texture Crew
Potatoes, peas, and carrots form the heart of the filling. Boil the potatoes until just tender, then mash them slightly; this ensures the filling stays together. The peas add a pop of color and a sweet crunch, while the carrots bring earthiness and subtle sweetness. If you’re short on carrots, substitute with finely diced sweet potato for an extra layer of flavor. Keep the vegetables in a bowl with a drizzle of oil and a pinch of salt to prevent oxidation and preserve their vibrant hues.
The Unexpected Star
Fresh mint and cilantro are the unsung heroes that elevate this dish. The mint provides a bright, cooling counterpoint to the heat of the spices, while the cilantro adds a fresh, almost citrusy note. If you’re not a fan of cilantro, swap it for basil or parsley—each will bring its own unique aroma. The key is to chop the herbs finely so they release their oils and flavors during frying.
The Final Flourish
A splash of yogurt in the filling keeps the mixture moist, prevents it from drying out during frying, and adds a subtle tang that balances the richness of the oil. If you prefer a dairy‑free version, use a tablespoon of coconut milk or a splash of soy sauce. The yogurt also helps the spices bind together, creating a cohesive filling that doesn’t fall apart. Remember to season the filling with cumin, coriander, turmeric, chili powder, and garam masala; each spice layer contributes to the dish’s depth.
Everything's prepped? Good. Let's get into the real action...

The Method — Step by Step
- Step 1: Prepare the Dough. In a large bowl, combine 2 cups of flour with 1 tsp of salt. Gradually add 1/2 cup of water, stirring until a smooth dough forms. Add 3 tbsp of oil and knead until the dough is soft and elastic. Cover with a damp cloth and let it rest for 20 minutes; this relaxes the gluten and makes rolling easier.
- Step 2: Cook the Vegetables. In a skillet, heat 1 tbsp of oil over medium heat. Add 1 finely chopped onion and sauté until translucent. Stir in 3 minced garlic cloves, 1 tbsp grated ginger, and 1 tsp ground cumin. Cook for 2 minutes until fragrant. Add 2 cups diced potatoes, 1 cup diced carrots, and 1 cup frozen peas. Season with 1 tsp ground coriander, 1/2 tsp turmeric, 1/2 tsp chili powder, and 1/2 tsp garam masala. Cook for 10 minutes, stirring occasionally, until the vegetables are tender and the spices are well‑incorporated.
- Step 3: Finish the Filling. Remove the skillet from heat. Add 1 tbsp lemon juice, 1 cup chopped fresh mint, 1/2 cup chopped cilantro, 1 sliced green chili, and 2 tbsp yogurt. Mix thoroughly until the mixture is moist and the herbs are evenly distributed. Taste and adjust salt if needed. Set aside; the filling should be thick enough to hold its shape when wrapped.
- Step 4: Shape the Samosas. Divide the rested dough into 12 equal portions. Roll each portion into a circle about 6 inches in diameter. Cut each circle in half to form two semi‑circles. Place a spoonful of filling near the center of each half. Fold the dough over to create a triangle, sealing the edges by pressing them together and then crimping with a fork. Ensure the seams are tight to prevent leakage during frying.
- Step 5: Heat the Oil. In a deep pan, heat 4 cups of oil to 180°C (350°F). To test if the oil is ready, drop a small piece of dough; it should sizzle and rise to the surface within 30 seconds. If it sinks, the oil isn’t hot enough—wait a bit longer.
- Step 6: Fry the Samosas. Carefully slide a few samosas into the hot oil, ensuring they have space to expand. Fry for 4–5 minutes per side, turning gently, until they achieve a golden‑brown color. The edges should be crisp and the filling should steam inside. Avoid overcrowding; this keeps the oil temperature steady.
- Step 7: Drain and Cool. Remove the samosas with a slotted spoon and place them on a paper towel-lined plate to absorb excess oil. Let them cool for 5 minutes before serving. This step is crucial to maintain crispness and prevent sogginess.
- Step 8: Serve with Mint Chutney. While the samosas are still warm, serve them with a generous dollop of mint chutney. The cool, herbaceous sauce contrasts beautifully with the hot, spicy pastry, creating a harmonious balance of flavors.
That's it — you did it. But hold on, I've got a few more tricks that'll take this to another level...
Insider Tricks for Flawless Results
The Temperature Rule Nobody Follows
Maintaining a steady oil temperature is crucial. If the oil is too hot, the pastry will brown too quickly and become hard; if it's too cool, the samosas will absorb excess oil and become greasy. Use a thermometer to keep the oil between 180°C and 190°C. If you don’t have a thermometer, test it by dropping a small piece of dough; it should sizzle and rise to the surface in about 30 seconds.
Why Your Nose Knows Best
Smell the spices before adding them to the filling. The aroma of cumin and coriander should be unmistakable. If the smell is muted, the spices are likely old and won’t provide the depth of flavor. Fresh spices bring a brighter, more vibrant taste that elevates the entire dish.
The 5‑Minute Rest That Changes Everything
After frying, let the samosas rest on a wire rack for 5 minutes. This allows excess steam to escape, keeping the edges crisp. I once skipped this step and ended up with soggy samosas that fell apart on the plate. The rest period is simple but essential for that perfect crunch.
The Secret Yogurt Infusion
Adding yogurt to the filling not only keeps it moist but also introduces a subtle tang that balances the richness of the oil. If you’re lactose intolerant, use a dairy‑free yogurt or a splash of coconut milk. The yogurt also helps bind the spices together, creating a more cohesive flavor profile.
The Perfect Fold
When sealing the samosa, use a fork to crimp the edges. This creates a neat seal that prevents leaks. I’ve seen many people just press the dough together, but the fork trick guarantees a tighter seal, especially when the filling is moist.
Creative Twists and Variations
This recipe is a playground. Here are some of my favorite ways to switch things up:
Spicy Chilli Samosas
Add a tablespoon of finely chopped red chilies to the filling and a dash of cayenne pepper. The extra heat will turn these into a fiery delight that pairs well with a cool yogurt dip.
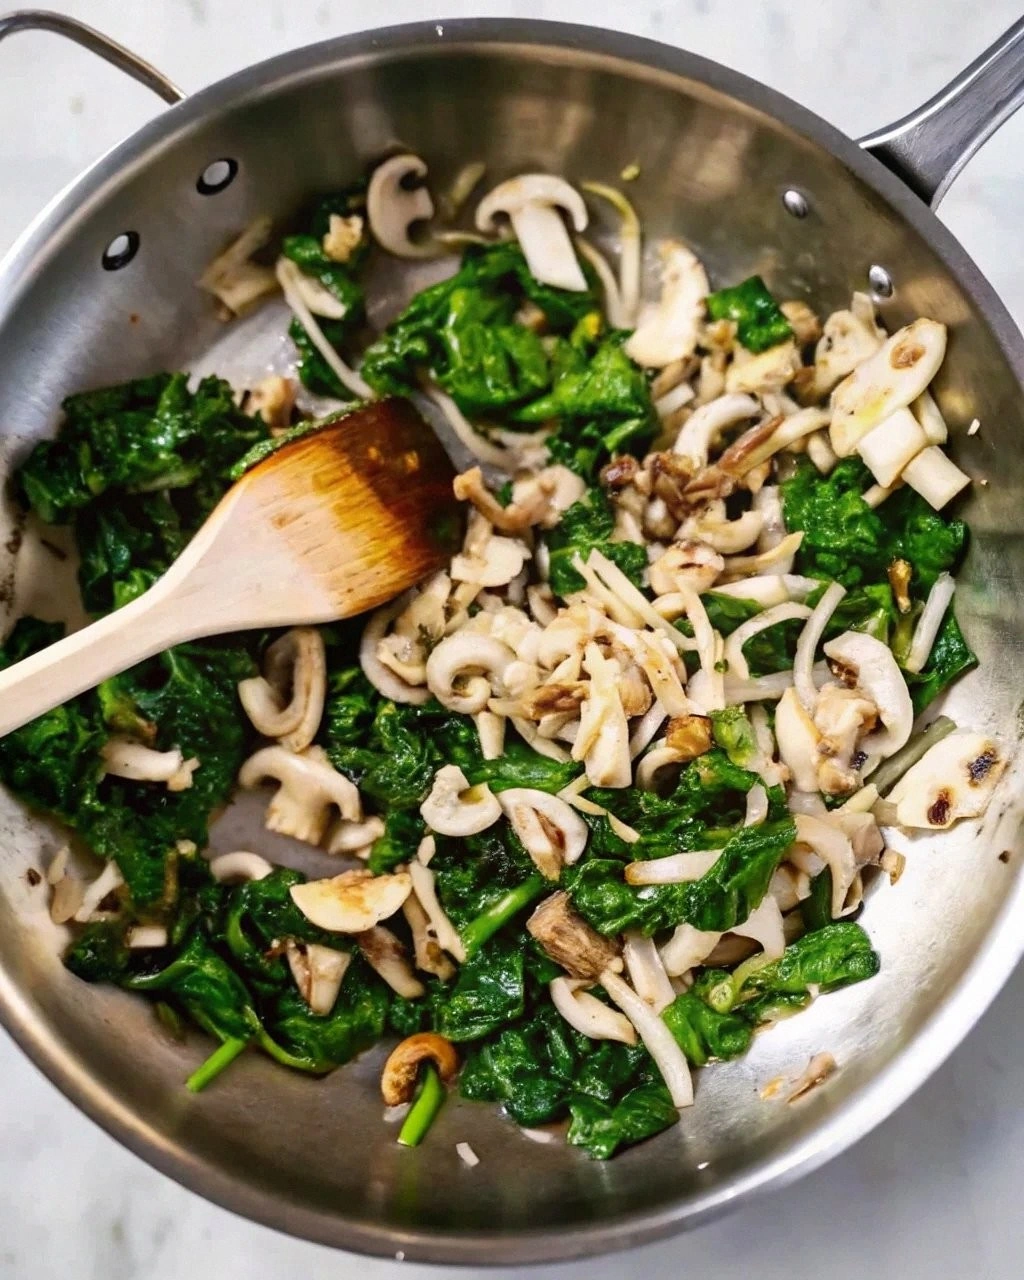
Mushroom & Spinach Samosas
Replace potatoes and carrots with sautéed mushrooms and spinach. The earthy flavor of mushrooms complements the fresh herbs, creating a vegetarian option that’s both hearty and flavorful.
Cheesy Samosas
Stir in 1/2 cup of shredded mozzarella or paneer into the filling. The melted cheese adds a creamy richness that balances the spice and makes the samosas extra indulgent.
Sweet Potato Samosas
Swap the regular potatoes for diced sweet potatoes, and add a pinch of cinnamon for a subtle warmth. The natural sweetness of sweet potatoes pairs wonderfully with the mint chutney.
Grilled Samosas
For a healthier version, bake the assembled samosas in a preheated oven at 200°C (400°F) for 20 minutes, flipping halfway. The result is a crispy exterior with a slightly lighter, less oily finish.
Lemon‑Garlic Samosas
Add a teaspoon of lemon zest and a minced garlic clove to the filling. The citrusy brightness cuts through the richness and adds a zesty kick that’s perfect for summer gatherings.
Storing and Bringing It Back to Life
Fridge Storage
Cool the fried samosas completely, then store them in an airtight container in the refrigerator for up to 3 days. The pastry will stay crisp, but the filling may soften slightly.
Freezer Friendly
Place the cooled samosas on a parchment‑lined tray and freeze until solid. Transfer them to a freezer bag and keep them for up to 2 months. When ready to eat, bake at 180°C (350°F) for 10 minutes or microwave for 45 seconds to revive the crispness.
Best Reheating Method
To reheat, preheat a skillet over medium heat and lightly oil it. Place the samosas in the skillet and cover with a lid for 2 minutes. The steam helps restore moisture while the heat crisps the exterior. Add a tiny splash of water before reheating to create steam, which keeps the pastry from drying out.