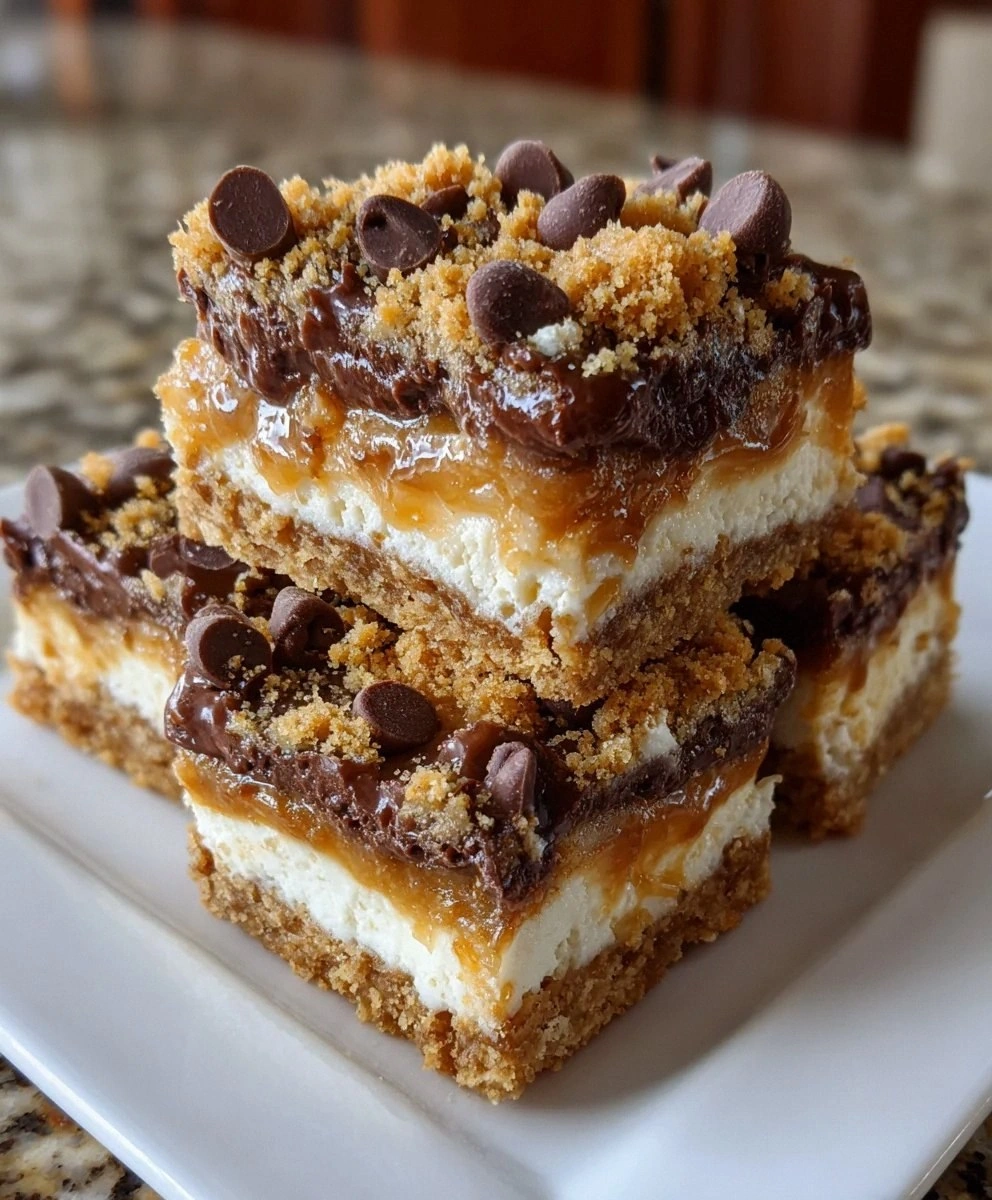
Picture this: I’m standing in my kitchen at 2 a.m., the clock ticking like a metronome, and a sudden craving for something so chocolatey it could convince a vegan to convert. I tried to salvage a half‑baked brownie, but it crumbled like dry sand, and the frosting turned into a glossy nightmare that clung to the spoon like a bad hair day. That disaster sparked a dare from my roommate—“Make a cake that even the most stubborn sweet‑tooth can’t resist.” I accepted, armed with butter, cocoa, and a whole lot of stubbornness, and what emerged was nothing short of a revelation.
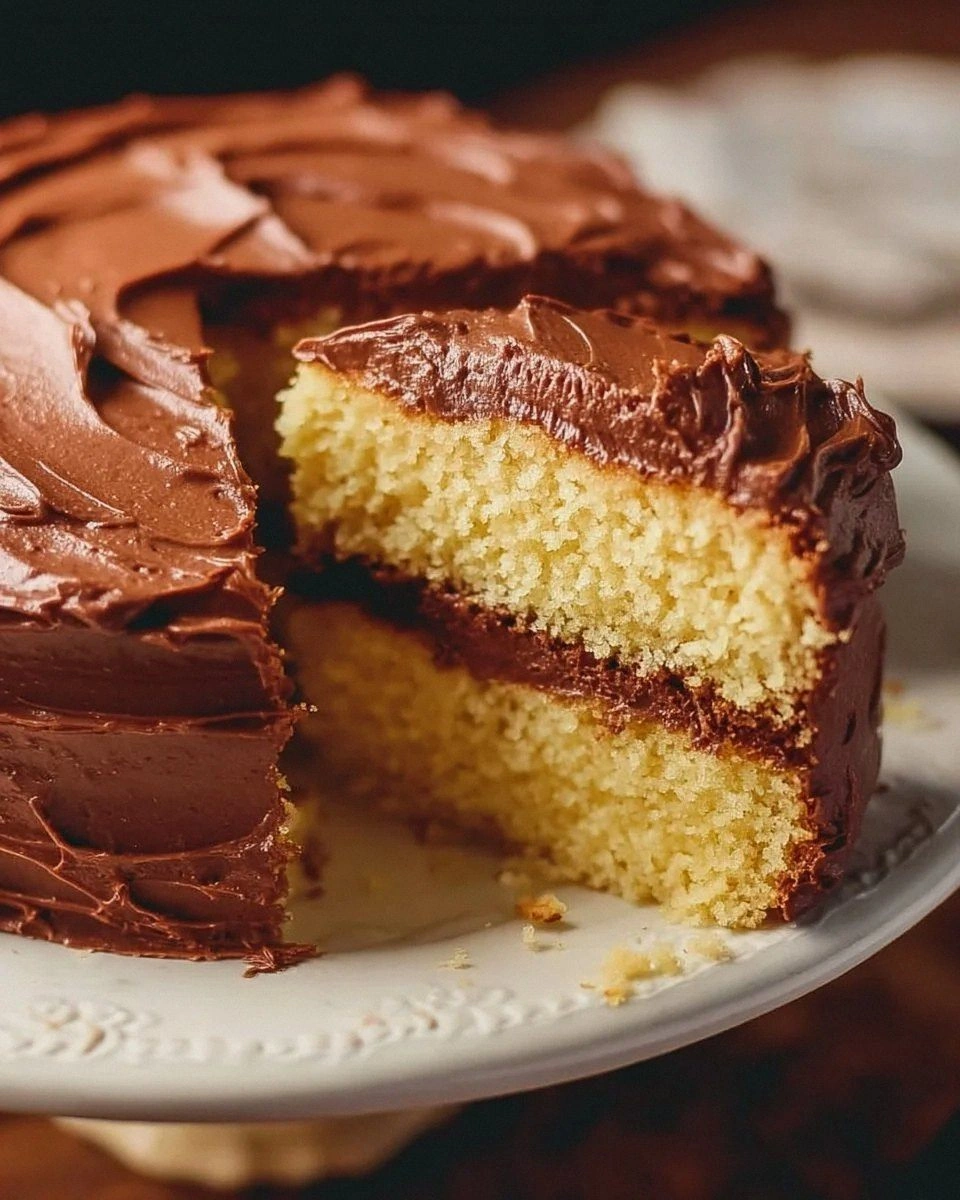
The moment the batter hit the bowl, the kitchen filled with the sweet, buttery perfume of melted butter meeting sugar—an aroma that makes your nose do a little happy dance. As the whisk whirred, the mixture transformed from a gritty slurry into a silky, glossy river of chocolatey goodness, each swirl promising a crumb that would melt in your mouth like butter on a hot skillet. When the cake finally rose in the oven, the edges pulled away in perfect, golden arches, and the top developed a subtle sheen that hinted at the velvety frosting waiting to cascade over it. The first bite? A harmonious clash of dense, fudgy cake and a frosting that slides over the palate like a silk scarf on a summer breeze.
What makes this version stand out isn’t just the flavor—though it’s undeniably the best version you’ll ever make at home—but the simplicity of the technique, the balance of ingredients, and a few secret moves that most recipes completely miss. I’m talking about a method that guarantees a tender crumb every single time, a frosting that stays glossy without turning grainy, and a flavor profile that sings louder than a choir of chocolate lovers. And yes, there’s a surprise ingredient that adds depth without anyone ever guessing what it is.
Let me walk you through every single step — by the end, you’ll wonder how you ever made it any other way. Okay, ready for the game‑changer? This next part? Pure magic.
What Makes This Version Stand Out
- Taste: The cake hits you with a deep, cocoa‑rich flavor balanced by a buttery sweetness that never feels cloying.
- Texture: Imagine a crumb so moist it practically sighs when you cut into it, while the frosting stays luxuriously smooth.
- Simplicity: Fewer than ten ingredients and a single bowl keep cleanup to a minimum—no fancy equipment required.
- Uniqueness: A dash of extra cocoa powder in the batter gives a subtle bitterness that elevates the overall profile.
- Crowd Reaction: I dare you to taste this and not go back for seconds; it’s a proven party pleaser.
- Ingredient Quality: Using real unsalted butter and high‑quality cocoa makes a world of difference in flavor depth.
- Cooking Method: The gentle oven temperature and precise mixing order prevent over‑development of gluten, keeping the cake tender.
- Make‑Ahead Potential: The frosting can be whipped up a day ahead, and the cake stores beautifully, making it perfect for last‑minute celebrations.
Inside the Ingredient List
The Flavor Base
First up, the unsalted butter (1 cup, softened). This is the foundation of both the cake and the frosting, providing richness and a tender crumb. If you skip the butter or use margarine, you’ll lose that buttery aroma that makes the whole cake sing. A great tip: choose European‑style butter with a higher butterfat content for an even richer mouthfeel.
The Sweet Symphony
Granulated sugar (2 cups) does more than sweeten; it also helps create the cake’s delicate crumb structure by incorporating air during creaming. Using superfine sugar can speed up the process and give an even finer texture. If you’re watching your sugar intake, you can substitute half with coconut sugar, but expect a slight caramel note.
The Texture Crew
Four large eggs act as the binding agent, adding lift and moisture. Eggs at room temperature blend more easily, preventing a curdled batter. If you’re allergic, a mix of flaxseed “egg” (1 tbsp ground flax + 3 tbsp water) per egg works, though the texture will be slightly denser.
The Unexpected Star
One cup of unsweetened cocoa powder is the secret weapon that gives the cake its deep chocolate personality without bitterness. Opt for Dutch‑processed cocoa for a smoother, richer flavor, or natural cocoa if you prefer a brighter chocolate punch. Skipping this cocoa and using melted chocolate instead will change the texture dramatically, making the cake heavier.
The Final Flourish
The all‑purpose flour (3 cups) provides structure, while the baking powder (1 tbsp) ensures the cake rises evenly. Too much flour can make the cake dry; too little, and it will collapse. For an extra light crumb, you can sift the flour with the cocoa powder before mixing.
Everything's prepped? Good. Let's get into the real action...
The Method — Step by Step
Preheat your oven to 350°F (175°C) and grease a 9‑inch round cake pan with a thin layer of butter, then dust with flour. The pan should feel slick but not greasy—this ensures the cake releases cleanly without sticking. While the oven warms, place a rack in the middle position to promote even heat distribution. That sizzle when the batter hits the pan? Absolute perfection.
In a large mixing bowl, cream together 1 cup of softened unsalted butter and 2 cups of granulated sugar until the mixture turns pale and fluffy, about 3‑4 minutes on medium speed. This is where the magic begins; the sugar crystals create tiny air pockets that later become the cake’s tender crumb. Pro tip: Scrape the sides of the bowl frequently to ensure an even cream.
Add the four large eggs, one at a time, beating well after each addition. The batter should look glossy and slightly thickened. If the mixture looks curdled, keep beating—eventually it will smooth out. This step is crucial; over‑mixing can incorporate too much air, leading to a cake that springs up then collapses.
Stir in 1 tablespoon of vanilla extract, then sift together 3 cups of all‑purpose flour, 1 cup of unsweetened cocoa powder, 1 tablespoon of baking powder, and ½ teaspoon of salt. Gently fold the dry ingredients into the wet mixture using a spatula, turning the bowl over a few times until just combined. Over‑mixing here will develop gluten, resulting in a tougher cake. You’ll know it’s ready when you no longer see streaks of flour.
Pour in 1 cup of whole milk gradually, alternating with the dry ingredients, starting and ending with the flour mixture. The batter should be thick but pourable; if it looks too stiff, add a tablespoon more milk. The milk adds moisture and helps the cocoa dissolve fully, giving that deep chocolate hue.
Transfer the batter to the prepared pan, smoothing the top with an offset spatula. Tap the pan lightly on the counter three times to release any large air bubbles. The surface should be even, with a slight dome in the center—this will flatten as the cake bakes, creating a perfect canvas for the frosting.
Bake for 30‑35 minutes, or until a toothpick inserted into the center comes out with just a few moist crumbs. The edges will start pulling away from the pan, and the top will have a faint crackle—signs that the cake is done. Rotate the pan halfway through for even browning. While the cake bakes, the kitchen will fill with an intoxicating aroma that makes you want to lick the spoon.
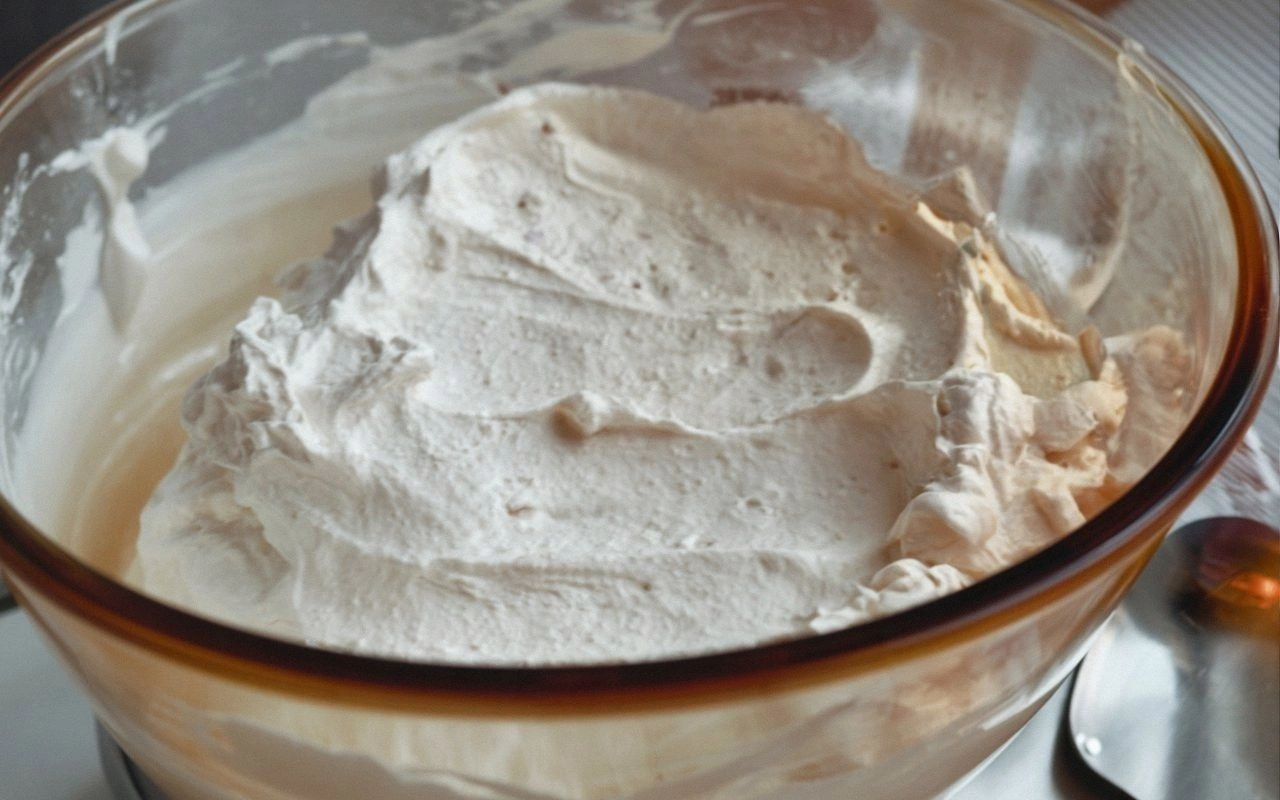
While the cake cools, prepare the frosting. In a medium bowl, beat ½ cup of softened unsalted butter until creamy, then gradually add 2 cups of powdered sugar, whisking after each addition. Add ⅓ cup of whole milk and 1 teaspoon of vanilla extract, beating until the frosting is light and fluffy. If it’s too thick, add a splash more milk; if too runny, add a bit more powdered sugar.
Once the cake has cooled completely on a wire rack (this prevents the frosting from melting), spread the Hershey‑style frosting generously over the top and sides. Use an offset spatula to create smooth swirls or a rustic, rustic look—your call. For an extra touch, sprinkle a pinch of cocoa powder on top for a matte finish.
That's it — you did it. But hold on, I've got a few more tricks that'll take this to another level...
Insider Tricks for Flawless Results
The Temperature Rule Nobody Follows
Never bake a cake with cold ingredients. Let butter, eggs, and milk sit at room temperature for at least 30 minutes before you start. This ensures a uniform batter and prevents lumps. I once tried to rush the process and ended up with a dense, uneven crumb—lesson learned.
Why Your Nose Knows Best
The moment the cake starts to smell toasty, you’re close to the perfect bake. Trust that aromatic cue more than the timer. If you open the oven and the scent is still faint, give it a few more minutes; if the aroma is strong and the edges are golden, it’s time to test.
The 5‑Minute Rest That Changes Everything
After removing the cake from the pan, let it rest on the rack for five minutes before unmolding. This short pause lets steam settle, preventing the cake from cracking or sliding apart. I used to flip it out immediately and the top would sometimes split—now I always wait.
Frosting Temperature is Key
Frosting that’s too warm will slide off; too cold and it’ll be crumbly. Aim for a room‑temperature frosting that feels light to the touch. If you’re in a hot kitchen, pop the bowl in the fridge for a quick chill, then give it a brief whip before spreading.
Slice Like a Pro
Use a hot, dry knife to cut each slice. Dip the blade in hot water, wipe dry, and slice. This technique gives clean cuts without dragging the frosting, preserving that smooth finish on each piece.
Creative Twists and Variations
This recipe is a playground. Here are some of my favorite ways to switch things up:
Espresso Boost
Replace 1 tbsp of the cocoa powder with 1 tbsp of finely ground espresso. The coffee deepens the chocolate flavor, creating a mocha‑like experience that coffee lovers adore.
White Chocolate Swirl
Gently fold ½ cup of melted white chocolate into the batter before baking. The ribbons of white chocolate add a sweet contrast and a visual surprise when the cake is sliced.
Nutty Crunch
Stir in ½ cup of toasted chopped hazelnuts or almonds into the batter for a pleasant crunch that pairs beautifully with the smooth frosting.
Fruit Infusion
Add ¼ cup of raspberry puree to the frosting for a tangy twist. The fruit’s acidity cuts through the richness, offering a balanced bite.
Spiced Holiday
Mix ½ tsp of ground cinnamon, a pinch of nutmeg, and a dash of ground cloves into the dry ingredients for a warm, festive flavor perfect for winter gatherings.
Storing and Bringing It Back to Life
Fridge Storage
Cover the cake loosely with plastic wrap and store it in the refrigerator for up to 5 days. The frosting stays soft, and the cake retains moisture. Before serving, let it sit at room temperature for 20‑30 minutes.
Freezer Friendly
Wrap the cooled cake tightly in a double layer of foil, then place it in a freezer‑safe bag. It freezes beautifully for up to 3 months. Thaw overnight in the fridge, then let it come to room temperature before frosting again.
Best Reheating Method
When you want a warm slice, microwave a piece for 10‑15 seconds, but first drizzle a tiny splash of water over the top. The steam revives the crumb and keeps the frosting from melting into a puddle.