Picture this: it’s a frosty December evening, the kind where the wind whistles through the trees like a choir of mischievous elves, and you’re standing in a kitchen that smells like a candy‑store after a snowstorm. I was halfway through untangling a knot of holiday lights when a sudden craving hit me—something sweet, minty, and so creamy it could melt the heart of even the Grinchiest guest. I grabbed the nearest pot, threw in a handful of powdered sugar, and—well, let’s just say the first batch turned into a sticky mess that clung to the spoon like a stubborn snowdrift. I dared myself to keep going, because I knew the perfect peppermint treat was just a whisk away.
Fast forward a few frantic minutes, and the kitchen was filled with the kind of aroma that makes you want to hug the person who invented peppermint oil. The scent was a perfect marriage of sugary sweetness and crisp mint, the way a fresh pine forest meets a sugar‑cane field on a winter night. My taste buds were already dancing, and the texture? Imagine biting into a cloud that’s been brushed with velvet—creamy, melt‑in‑your‑mouth, and just the right amount of bite to keep you coming back for seconds. I’ll be honest — I ate half the batch before anyone else got a chance to try it, and that’s a confession I’m not ashamed to make because it was that good.
Most peppermint candy recipes out there either end up too hard, too chalky, or they completely miss that luxurious creaminess that makes you want to close your eyes and sigh. The secret? A precise balance of powdered sugar, a whisper of butter, and a can of sweetened condensed milk that turns the mixture into a glossy, silky base. Then comes the peppermint extract—just enough to give a bold punch without overpowering the buttery richness. And here’s the kicker: a splash of food coloring that turns the whole thing into a festive, jewel‑tone masterpiece that looks as good as it tastes.
Now, I’m about to walk you through every single step—by the end, you’ll wonder how you ever made peppermint treats any other way. I dare you to taste this and not go back for seconds. Ready? Let’s dive in, because this next part? Pure magic.
What Makes This Version Stand Out
- Texture: The blend of powdered sugar and condensed milk creates a melt‑in‑your‑mouth creaminess that rivals store‑bought truffles, while still holding its shape.
- Flavor: Peppermint extract is used at its peak potency, delivering a bold, refreshing bite that doesn’t get lost in the sweetness.
- Simplicity: Only five ingredients, all pantry staples, mean you can whip this up on a whim without a trip to the specialty store.
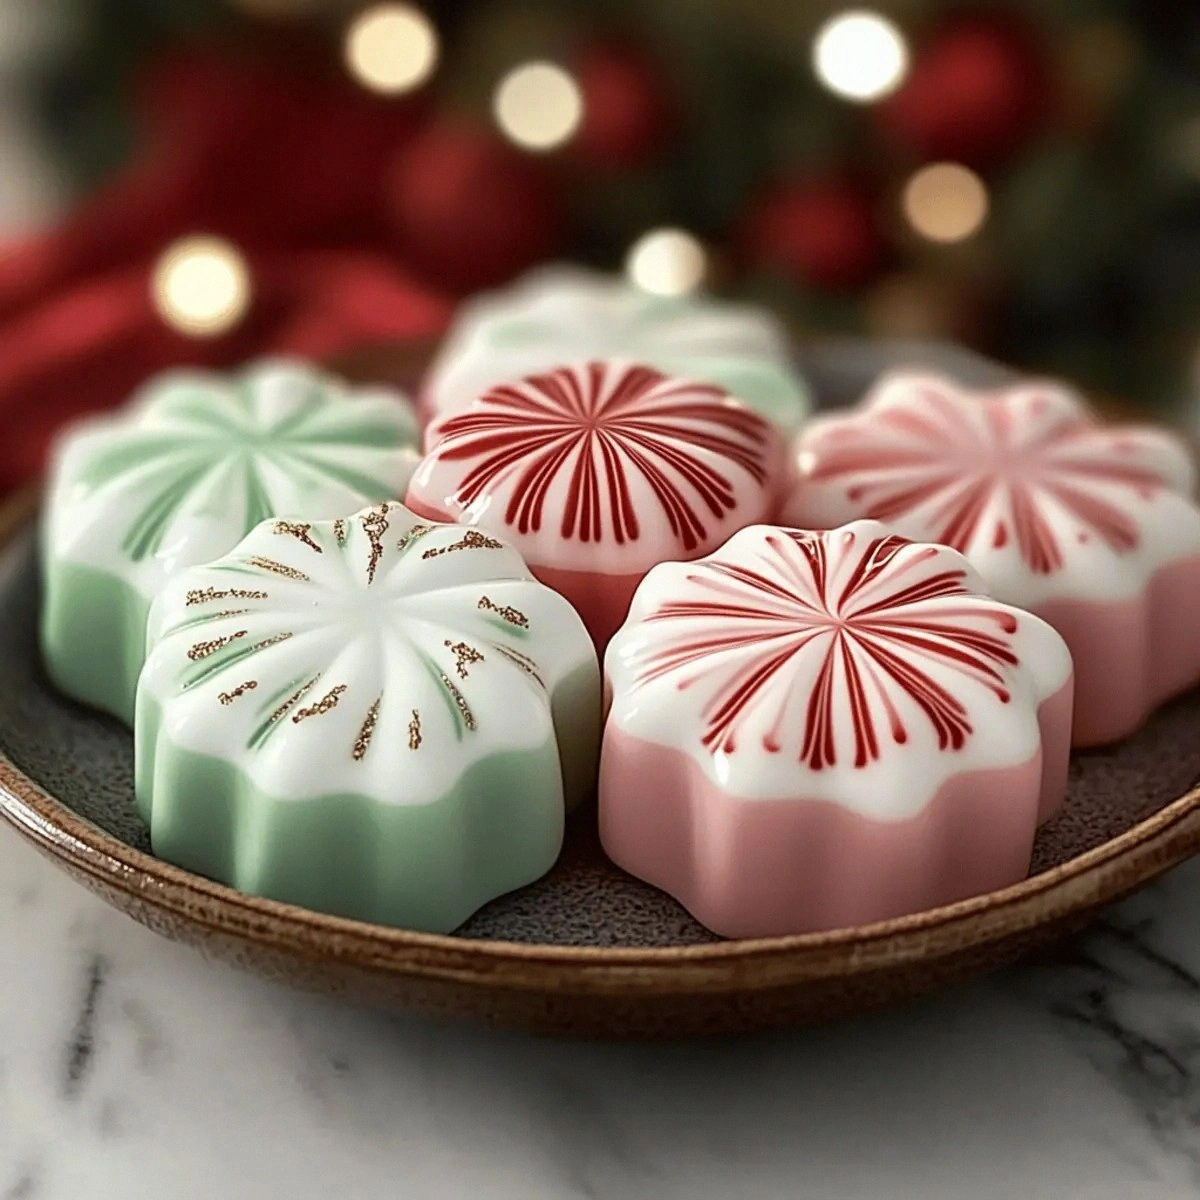
- Visual Appeal: A dash of food coloring turns each peppermint into a glossy, jewel‑like gem that screams holiday cheer.
- Crowd Reaction: Guests often claim they’ve never tasted anything like it, and the “wow” factor is instant—perfect for parties.
- Ingredient Quality: Using real unsalted butter and premium peppermint extract makes a world of difference in depth of flavor.
- Method: The gentle stovetop cooking technique prevents graininess, ensuring a silky finish every time.
- Make‑Ahead Potential: These candies keep beautifully for weeks, so you can prep them ahead of holiday gatherings.
Inside the Ingredient List
The Flavor Base
Powdered sugar is the silent hero here. It dissolves effortlessly into the warm butter and condensed milk, creating that silky, melt‑away feel. If you skimp on it, you’ll end up with a gritty texture that feels more like a sugar scrub than a candy. For the best results, sift the sugar twice to eliminate any lumps that could survive the cooking process.
Unsalted butter brings richness without the interference of extra salt, which could mute the peppermint’s brightness. The butter should be at room temperature, but not melted, so it emulsifies smoothly with the condensed milk. If you’re out of butter, a high‑quality margarine works, but expect a slight change in flavor depth.
The Texture Crew
Sweetened condensed milk is the magic wand that turns this mixture into a glossy, buttery canvas. Its thick, caramel‑like consistency binds the powdered sugar, preventing the candy from becoming grainy. Skipping this ingredient or substituting with regular milk will result in a runny batter that never sets.
Food coloring is purely aesthetic, but it adds a festive punch that makes these peppermint candies Instagram‑ready. Use gel colors for a more intense hue without adding extra liquid. If you prefer a classic white peppermint, simply omit the coloring and enjoy the pure, snow‑white look.
The Unexpected Star
Peppermint extract is where the bold claim lives: this is hands down the best version you’ll ever make at home. A teaspoon is enough to give a punchy, cooling sensation without overwhelming the sweet base. If you accidentally add too much, the candy can become harsh—so measure carefully and trust the recipe.
For a milder flavor, you can swap half of the extract for crushed peppermint candy (like candy canes). This adds texture and a subtle crunch, but be mindful that it also introduces additional sugar.
The Final Flourish
All these ingredients come together in a simple, one‑pot method that keeps cleanup to a minimum. The real secret is timing: you want the mixture to thicken just enough to hold its shape when dropped onto parchment, but not so thick that it becomes difficult to pipe.
Everything's prepped? Good. Let's get into the real action...

The Method — Step by Step
Start by gathering all your ingredients and measuring them precisely. I like to line a large baking sheet with parchment paper because the candies will stick like little snowflakes if you don’t. This is the moment of truth—if your measurements are off, the whole batch can go sideways. Pro tip: use a kitchen scale for the powdered sugar to ensure consistency.
Place a medium‑sized saucepan over low heat and add the unsalted butter. As it melts, listen for that gentle sizzle; it should be quiet, not a roar. When the butter is fully melted, stir in the sweetened condensed milk. The mixture will become glossy and start to bubble faintly—this is exactly what you want.
Kitchen Hack: Keep the heat low and stir constantly to avoid scorching the milk; a silicone spatula works best for scraping the bottom.Gradually whisk in the powdered sugar, a cup at a time. The mixture will puff up and look like a snow‑laden hill. Keep whisking until the sugar is fully incorporated and the batter becomes thick enough to hold a spoonful without dripping. If you see any lumps, increase the whisking speed—those are the enemy of a smooth candy.
Now, add the peppermint extract. I pour it in a slow, steady stream while stirring, letting the aroma fill the kitchen. The scent should be sharp, like a winter breeze, and you’ll feel a tiny tingle on your nose—if you don’t, add a few more drops, but be careful not to overdo it.
Time for color! Add a few drops of your chosen food coloring and stir until the hue is evenly distributed. The mixture should turn a deep, festive red or a bright, candy‑cane green, depending on your choice. If the color looks too pale, add another drop; remember, a little goes a long way.
Turn off the heat and let the batter sit for about two minutes. This short rest allows the mixture to thicken just enough for piping. Watch Out: If you skip this rest, the candy will be too runny and will spread into a sticky mess on the parchment.
Watch Out: Over‑cooking the mixture will cause it to become grainy and hard; keep the temperature low and the time short.Transfer the thickened mixture into a piping bag fitted with a large star tip. If you don’t have a piping bag, a sturdy zip‑top bag with a corner snipped off works just fine. Pipe small, bite‑size mounds onto the prepared parchment, spacing them about an inch apart. The peaks should be slightly rounded, like tiny snow‑capped hills.
Let the piped candies sit at room temperature for 10‑15 minutes, then pop the tray into the refrigerator for another 20 minutes. This chilling step firms them up without making them hard. You’ll notice the edges pulling away from the parchment— that’s the signal they’re ready.
Once set, gently lift each peppermint candy with a thin spatula and transfer to an airtight container. Store them in a cool, dry place, and they’ll stay soft and creamy for up to two weeks. If you want that extra melt‑in‑your‑mouth feel, let them sit at room temperature for a few minutes before serving.
That's it — you did it. But hold on, I've got a few more tricks that'll take this to another level. Stay with me here — this is worth it.
Insider Tricks for Flawless Results
The Temperature Rule Nobody Follows
The key to a perfectly smooth peppermint candy is never to let the mixture boil. Keep the heat on low, and pull the pan off the stove the moment the batter thickens enough to coat the back of a spoon. I once let it boil for a minute longer, and the texture turned grainy, like sand in a candy shop. Trust the low‑heat method, and you’ll get that velvety finish every single time.
Why Your Nose Knows Best
When the peppermint extract hits the batter, your nose will tell you if the flavor is strong enough. If you catch a faint, cool breeze of mint, you’re good to go. If the scent feels weak, add another half‑teaspoon and give it a quick stir. Your palate will thank you later, and you’ll avoid the dreaded “meh” flavor.
The 5‑Minute Rest That Changes Everything
After you turn off the heat, let the mixture rest for exactly five minutes. This short pause lets the sugar fully hydrate, preventing a gritty mouthfeel. Skipping this rest is a common mistake that leads to a chalky finish. I swear by this, and my friends always comment on the silkiness.
Cool‑Down Trick for Perfect Shape
Before piping, chill the mixing bowl and the piping tip for about 10 minutes. The cold surface helps the batter hold its shape, so you get those perfect, uniform peaks. If the batter is too warm, it will spread and lose its iconic peppermint silhouette.
Storage Savior
When you store the candies, place a thin sheet of parchment between layers. This prevents them from sticking together and preserves that pristine, glossy finish. A single piece of wax paper won’t cut it—use parchment for the best results.
Creative Twists and Variations
This recipe is a playground. Here are some of my favorite ways to switch things up:
Chocolate‑Dipped Peppermints
After the candies have set, dip half of each peppermint in melted dark chocolate. The contrast of bitter chocolate with cool mint creates a sophisticated flavor duo that wow’s any adult crowd.
Coconut‑Infused Version
Swap half of the powdered sugar for finely shredded coconut and add a splash of coconut milk to the butter mixture. You’ll get a tropical twist that pairs surprisingly well with the mint.
Spicy Peppermint
For a bold kick, add a pinch of cayenne pepper to the batter before piping. The heat amplifies the mint’s cooling sensation, delivering a flavor rollercoaster that’s perfect for adventurous eaters.
White Chocolate Swirl
Stir in a handful of melted white chocolate after the batter has thickened. The buttery sweetness melds with the peppermint, creating a luxurious swirl that looks as good as it tastes.
Berry‑Burst Peppermints
Fold in freeze‑dried raspberry powder into the batter for a subtle fruity note and a gorgeous pink hue. The tartness of the berries balances the candy’s sweetness beautifully.
Storing and Bringing It Back to Life
Fridge Storage
Place the candies in an airtight container and store them in the refrigerator for up to two weeks. The cool environment keeps them firm without drying them out. If you notice a slight hardening, let them sit at room temperature for 5 minutes before serving.
Freezer Friendly
These peppermint treats freeze exceptionally well. Layer them between sheets of parchment and store in a zip‑top freezer bag for up to three months. When you’re ready to enjoy, transfer a few to the fridge to thaw slowly.
Best Reheating Method
To revive that melt‑in‑your‑mouth texture, place the candies on a plate, add a tiny splash of water (about a teaspoon), and microwave for 5‑7 seconds. The steam generated re‑hydrates the candy, giving you that fresh‑out‑of‑the‑oven feel.