Picture this: you’re standing in a kitchen that smells like burnt sugar and disappointment, because your last attempt at a homemade chocolate dessert collapsed into a sad, soggy mess. The moment you realize the chocolate base was too thin, the cocoa powder clumped into an unappetizing paste, and the final product was a beige swamp that could have been served as a side dish, you’re ready to give up. But then a friend challenges you to make a no‑churn chocolate treat that doesn’t require a blender, a freezer, or a fancy ice‑cream maker. I stared at the empty fridge, rolled my eyes, and thought, “Why not? I’ll make the best version of this that I’ve ever seen.”
I’m talking about a dessert that’s thick, creamy, and packed with that rich, velvety chocolate flavor you crave, yet it’s as simple as whisking a few ingredients together. The texture is like a decadent mousse that you can scoop with a spoon, not a liquid that drips off the spoon. The aroma is an irresistible chocolate–peanut butter blend that makes the whole kitchen feel like a cozy, indulgent hide‑away. And the best part? No churn, no churn, no churn. I dare you to taste this and not go back for seconds.
What makes this version stand out is the blend of classic no‑churn techniques with a bold peanut butter twist that elevates the flavor profile beyond the usual chocolate fudge. I’ve spent months experimenting with ratios, and this final formula is hands down the best version you’ll ever make at home. Picture yourself pulling this out of the fridge, the whole kitchen smelling incredible, and every bite delivering a symphony of chocolate and peanut butter that lingers on your palate. If you’ve ever struggled with making a smooth, no‑churn dessert, you’re not alone — and I’ve got the fix. Let me walk you through every single step — by the end, you’ll wonder how you ever made it any other way.
What Makes This Version Stand Out
- Flavor Depth: The combination of heavy cream and sweetened condensed milk creates a silky base that carries the cocoa and peanut butter to new heights. The result is a dessert that feels luxurious yet approachable.
- Texture Mastery: By whisking the cream to soft peaks before folding in the other ingredients, you lock in air that keeps the ice cream light and prevents it from turning icy.
- Ingredient Simplicity: No fancy gadgets or exotic ingredients—just pantry staples you already have at home. That makes this recipe a perfect go‑to for any kitchen.
- Peanut Butter Power: Peanut butter adds a subtle nutty sweetness that balances the bitterness of cocoa, creating a harmonious flavor profile that satisfies both chocolate lovers and peanut butter aficionados.
- Crowd‑Pleaser Factor: The chocolate–peanut butter combo is a guaranteed crowd‑pleaser at parties, family gatherings, or a quiet night in. Most recipes get this completely wrong. Here’s what actually works.
- Make‑Ahead Potential: Prepare it up to 24 hours in advance; the flavors meld beautifully, making it a stress‑free dessert option for busy days.
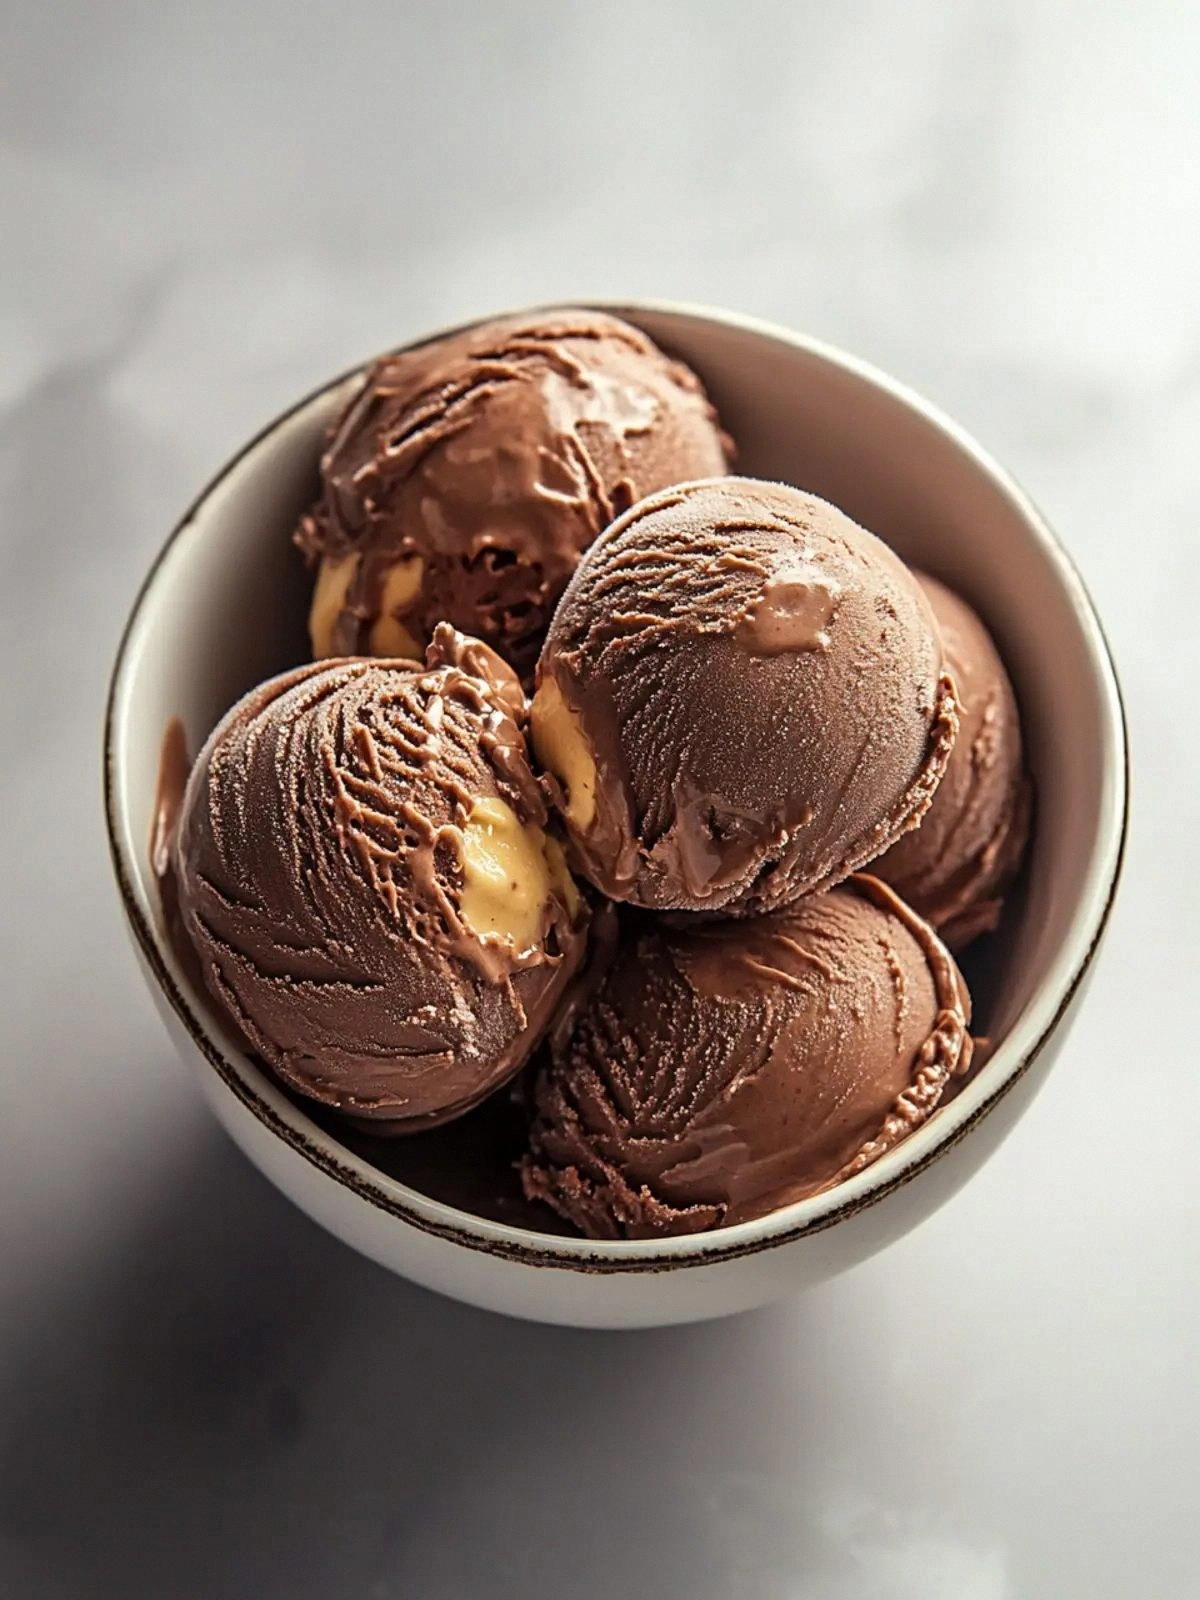
- Visual Appeal: The final product looks like a glossy, chocolate‑laden scoop with a glossy glaze of peanut butter, topped with crunchy peanuts and chocolate shavings.
- Versatility: Add a splash of espresso for an extra kick, or swap peanut butter for almond butter for a different nutty twist.
Alright, let’s break down exactly what goes into this masterpiece. And if you’re ready to level up, keep reading because the next section reveals the secret to each component.
Inside the Ingredient List
The Flavor Base
Heavy cream is the backbone of this dessert. It provides richness and a silky mouthfeel that balances the intense chocolate flavor. Skipping it would result in a thin, watery consistency that fails to hold its shape. If you’re looking for a lighter version, try substituting half the cream with whole milk, but expect a denser texture.
The Sweetener
Sweetened condensed milk does more than sweeten; it thickens the mixture and adds a caramelized nuance that pairs beautifully with cocoa. If you’re avoiding dairy, a full‑fat coconut milk sweetened with a touch of maple syrup can mimic the same creaminess. However, be cautious with the syrup; too much can make the dessert overly sweet.
The Unexpected Star
Peanut butter is the unexpected star that turns a classic chocolate dessert into a flavor explosion. Its natural oils create a velvety texture, while the nutty undertones cut through the chocolate’s richness. For a vegan version, use a plant‑based peanut butter that contains no added sugars.
The Final Flourish
Chocolate shavings and chopped peanuts add crunch and a visual pop that makes each bite a multi‑sensory experience. If you prefer a smoother finish, reduce the peanuts to a sprinkle or omit them entirely. The shavings, however, provide a delightful contrast to the creamy interior.
Everything’s prepped? Good. Let’s get into the real action.
The Method — Step by Step
- Start by chilling a medium mixing bowl and the whisk or electric beaters in the fridge for at least 10 minutes. Cold equipment keeps the cream from warming too quickly, which is essential for achieving soft peaks. If you’re in a hurry, you can skip this step, but be prepared for a slightly denser result.
- Pour the heavy cream into the chilled bowl. Using an electric mixer on medium speed, whisk until the cream forms soft peaks. The peaks should hold their shape for a moment before gently collapsing. This process incorporates air, giving the ice cream its signature lightness.
- In a separate bowl, combine the sweetened condensed milk, cocoa powder, and peanut butter. Stir until the mixture is smooth and the cocoa is fully dissolved. The absence of lumps is key—think of the mixture as a silky sauce that coats the pasta like velvet.
- Gently fold the chocolate‑peanut butter mixture into the whipped cream. Use a spatula and a gentle, folding motion to preserve the air you’ve whipped into the cream. If you over‑whisk, the mixture can become too thick and lose its smoothness.
- Add the chopped peanuts and chocolate shavings to the mixture. Fold them in just enough to distribute evenly without breaking the peanuts into crumbs. The crunch should be audible when you bite—like a subtle snap.
- Pour the mixture into a freezer‑safe container, such as a glass loaf pan or a silicone mold. Smooth the top with a spatula and tap the container lightly on the counter to release any air bubbles. The smooth surface ensures an even freeze.
- Cover the container with a lid or plastic wrap to prevent ice crystals from forming. Place it in the freezer for at least 4 hours, or until the mixture is firm but still scoopable. If you’re short on time, the dessert can be ready in 2 hours, but the flavors will develop fully after a longer freeze.
- When you’re ready to serve, let the dessert sit at room temperature for 5 minutes to soften slightly. This small step makes scooping easier and allows the flavors to fully bloom. Top with a dollop of whipped cream, a drizzle of peanut butter, and a few extra peanuts for that final flourish.
- Enjoy immediately, or store the leftover portions in the freezer for up to one week. When reheating, simply let them sit at room temperature for 10 minutes to soften before scooping. Remember, this dessert is meant to be enjoyed fresh for the best texture.
That’s it — you did it. But hold on, I’ve got a few more tricks that’ll take this to another level.
Insider Tricks for Flawless Results
The Temperature Rule Nobody Follows
The secret to a perfectly smooth texture is keeping every component at the right temperature. Cold cream and cold mixing tools lock in air, while warm ingredients like peanut butter can cause the mixture to become too runny. I’ve found that letting the peanut butter sit at room temperature for 10 minutes before mixing works best. This simple step ensures the final product stays creamy and not greasy.
Why Your Nose Knows Best
Trust your nose when it comes to the cocoa. A slightly under‑roasted cocoa powder will taste flat and chalky, whereas a well‑roasted one has a deep, earthy aroma. If you’re unsure, give the cocoa a quick sniff before adding it to the mixture; a pleasant, nutty scent means it’s ready to go.
The 5‑Minute Rest That Changes Everything
After folding the ingredients together, let the mixture sit for five minutes before pouring it into the freezer. This brief rest allows the flavors to meld and the mixture to thicken slightly. I’ve seen this trick reduce the risk of ice crystals forming during freezing.
The Right Whipped Cream Ratio
Using too much whipped cream can dilute the chocolate flavor, while too little can make the dessert too dense. A 1:1 ratio of heavy cream to whipped cream balances richness and lightness. If you’re using a lower‑fat whipped cream, increase the heavy cream proportionally.
The Peanut Butter to Cocoa Balance
Peanut butter and cocoa should be in harmony; too much peanut butter can overwhelm the chocolate, and vice versa. A 1:1 ratio of peanut butter to cocoa powder keeps the flavors balanced. If you prefer a stronger chocolate hit, increase the cocoa by 10-15%.
The Final Garnish Touch
A final drizzle of melted peanut butter over the top before serving adds a glossy finish and intensifies the nutty aroma. For an extra crunch, sprinkle a few chopped nuts on top. This small touch makes the dessert feel like a gourmet treat.
Creative Twists and Variations
This recipe is a playground. Here are some of my favorite ways to switch things up:
Espresso Espresso
Add a tablespoon of instant espresso powder to the chocolate mixture for an extra depth of flavor. The coffee notes pair wonderfully with the peanut butter, creating a mocha‑like experience.
Almond Butter Alternative
Swap peanut butter for almond butter to get a slightly sweeter, nuttier flavor. The texture remains the same, but the almond undertone gives it a Mediterranean twist.
Salted Caramel Swirl
Fold in a swirl of salted caramel sauce before freezing for a sweet‑and‑salty sensation. The caramel adds a glossy sheen and a buttery richness.
Coconut Cream Upgrade
Replace half of the heavy cream with full‑fat coconut cream for a tropical twist. The coconut flavor complements the peanut butter, creating a beach‑inspired dessert.
Minty Fresh
Add a few drops of peppermint extract to the chocolate mixture for a refreshing minty flavor. This variation is perfect for spring or summer celebrations.
Chocolate‑Covered Peanut Butter Cups
After freezing, dip the dessert into melted dark chocolate and let it set. The result is a decadent, bite‑size chocolate‑peanut butter treat that’s perfect for gifting.
Storing and Bringing It Back to Life
Fridge Storage
Store any leftover portions in an airtight container in the fridge for up to 48 hours. The dessert will firm up, but it can be softened at room temperature for 10 minutes before serving.
Freezer Friendly
For longer storage, keep the dessert in a freezer‑safe container for up to one week. Wrap the container tightly with plastic wrap to prevent freezer burn. When ready to serve, let it sit at room temperature for 15 minutes to soften.
Best Reheating Method
To revive a frozen portion, place it in the microwave on low power for 10-15 seconds, then stir. If the texture feels too thick, add a splash of milk or cream to loosen it. A tiny splash of water before reheating can also help steam the dessert back to perfection.