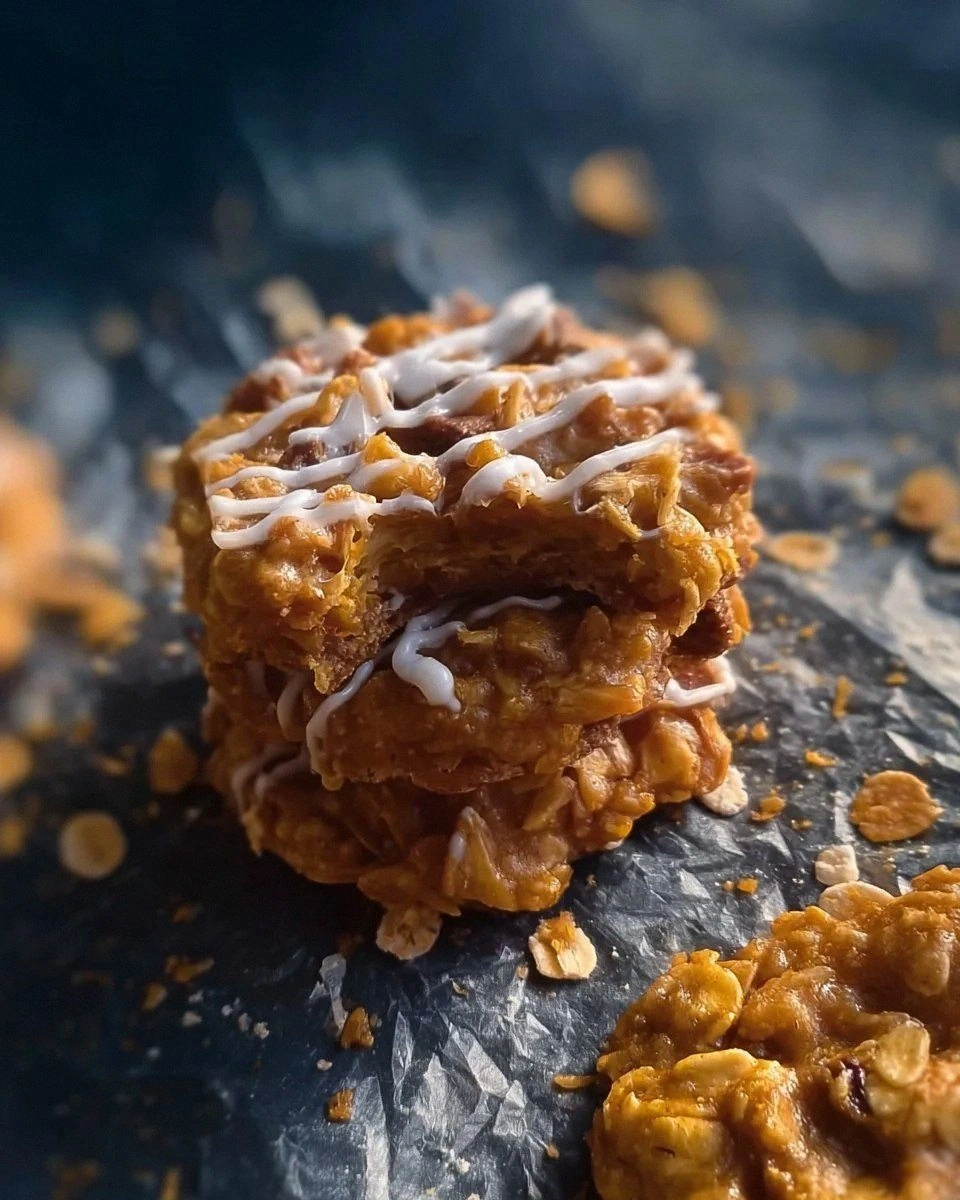
I’ll be honest — I ate half the batch before anyone else got to try it, and that was only after I dared my roommate to a “no‑bake showdown.” The kitchen was a battlefield of clanging bowls, a rogue spoon that kept slipping, and the unmistakable scent of toasted peanuts that made the whole apartment feel like a cozy café at sunrise. The moment I tasted the first bite, I felt that glorious crunch explode like fireworks on the Fourth of July, and the honey‑sweetness wrapped around the peanut butter like a warm blanket on a chilly night. If you’ve ever stared at a pantry full of cornflakes and thought, “There’s got to be a better way to use these,” then this is the answer you’ve been waiting for.
Picture this: a lazy Saturday afternoon, the rain drumming against the windows, and a sudden craving for something that feels both indulgent and guilt‑free. You reach for the peanut butter, the honey, and the cornflakes, and before you know it, you’re whisking together a mixture that looks like a child’s craft project but tastes like a gourmet dessert. The best part? There’s no oven, no mess, and you can make a whole batch in under an hour. I dare you to taste this and not go back for seconds, because the combination of salty, sweet, and buttery crunch is practically engineered to be addictive.
Most recipes get this completely wrong. They either over‑sweeten, use soggy cereal, or end up with a texture that feels more like a soggy pancake than a cookie. I’ve tried a dozen variations, and the secret that finally clicked was the precise balance of honey (or maple syrup) with the peanut butter, plus a gentle crush of cornflakes that preserves their airy bite. The result is a cookie that holds together without any baking, yet feels as satisfying as a freshly baked chocolate chip cookie straight out of the oven. This version stands out because it respects each ingredient’s role and refuses to compromise on flavor or texture.
Let me walk you through every single step — by the end, you’ll wonder how you ever made it any other way. I’ll reveal a technique involving a quick stovetop caramel that most people skip, and a little trick with the chocolate chips that turns a simple topping into a glossy, melt‑in‑your‑mouth crown. Okay, ready for the game‑changer? Keep reading, stay with me, and you’ll be pulling these golden‑brown beauties out of the bowl like a magician pulling a rabbit out of a hat.
What Makes This Version Stand Out
- Taste: The honey‑peanut butter duet creates a sweet‑savory harmony that feels like a classic PB&J, but elevated with a caramelized depth you won’t find in store‑bought snacks.
- Texture: Lightly crushed cornflakes give each bite a crisp, airy crunch that shatters like thin ice, while the peanut butter binds everything together without turning gummy.
- Simplicity: No oven, no fancy equipment — just a saucepan, a spoon, and a bowl. You can whip this up in a dorm room or a tiny apartment kitchen.
- Uniqueness: The optional chocolate chip topping adds a glossy, melty finish that makes the cookies look bakery‑ready, even though they never saw a heat source.
- Crowd Reaction: Friends usually ask for the recipe after one bite, and the “I can’t believe this is no‑bake” gasp becomes a staple conversation starter.
- Ingredient Quality: Using halal‑certified peanut butter and pure honey ensures the flavor shines without any off‑notes, and the cornflakes stay light and airy.
- Method: The quick stovetop caramel locks in flavor, while the cooling step lets the cookies set perfectly without any sogginess.
- Make‑Ahead Potential: Store them in an airtight container and they stay fresh for up to a week, making them an ideal grab‑and‑go snack for busy mornings.
Alright, let's break down exactly what goes into this masterpiece...
Inside the Ingredient List
The Flavor Base
Peanut butter is the heart of this cookie, providing a rich, nutty backbone that pairs perfectly with the natural sweetness of honey. I recommend a creamy or crunchy variety, but make sure it’s halal‑certified so you don’t have to worry about hidden gelatin. If you skip the peanut butter, you lose the buttery mouthfeel that makes each bite melt slowly on the tongue. A great swap for those with nut allergies is sunflower seed butter, which mimics the texture while keeping the flavor profile interesting.
The Sweetener
Honey or maple syrup is the glue that binds everything together, and it also adds a subtle floral or woody note that you just can’t get from refined sugar. Use a raw, unfiltered honey for a deeper flavor, or pure maple syrup if you prefer a caramel‑like nuance. Skipping this ingredient will result in a dry, crumbly mess that refuses to hold shape. If you’re vegan, stick with maple syrup; it’s just as effective and keeps the recipe fully plant‑based.
The Texture Crew
Cornflakes are the secret weapon here. Lightly crushing them ensures each piece retains its airy structure while still being small enough to mingle with the sticky peanut‑honey mixture. The result is a cookie that crunches on the first bite, then softens into a chewy center — a contrast that keeps you reaching for more. If you use regular cereal or over‑crush the flakes, you’ll end up with a dense, soggy bar rather than a delicate cookie.
The Unexpected Star
Vanilla extract may seem like a background player, but its warm, aromatic notes lift the entire flavor profile, turning a simple sweet‑salty snack into something that feels almost dessert‑like. A teaspoon is enough; more than that can overwhelm the delicate balance. If you’re out of vanilla, a pinch of ground cinnamon or a dash of almond extract can provide a similarly comforting aroma.
The Final Flourish
Chocolate chips are optional, but they add a glossy, melty crown that makes the cookies look as good as they taste. Use halal‑certified chips or melt dark chocolate for a richer finish. Skipping them is fine if you prefer a pure peanut‑honey experience, but I promise you’ll miss the surprise snap of chocolate that melts in your mouth. For a twist, try white chocolate chips or chopped nuts for extra texture.
Everything's prepped? Good. Let's get into the real action...
The Method — Step by Step
- Gather Your Tools. You’ll need a medium saucepan, a heat‑proof silicone spatula, a large mixing bowl, and a parchment‑lined baking sheet for cooling. I like to line the sheet with parchment because it prevents the cookies from sticking and makes cleanup a breeze. As you set everything out, take a moment to smell the peanut butter—its nutty aroma should already be making your mouth water. This is the moment of anticipation, the calm before the crunchy storm.
- Warm the Sweet Base. Place the saucepan over low‑medium heat and add the honey (or maple syrup). Stir gently until it becomes a smooth, glossy liquid. When the honey starts to bubble lightly, it’s time to add the peanut butter. This is where the magic begins: the peanut butter will melt into the honey, forming a silky emulsion that coats the back of a spoon like velvet. Keep the heat low; you don’t want a caramel that’s too dark.
- Incorporate Vanilla. Once the peanut butter is fully melted and the mixture is uniform, stir in the vanilla extract. You’ll notice a fragrant cloud rise from the pan—this is the scent that tells your nose the cookies are about to be unforgettable. If you’re using a flavored vanilla (like bourbon‑infused), you’ll get an extra layer of complexity that makes the final product feel gourmet.
- Combine the Cornflakes. Transfer the lightly crushed cornflakes into the large mixing bowl. Pour the warm honey‑peanut mixture over the cornflakes, then use a spatula to fold everything together. The goal is to coat each flake evenly without crushing them into dust. You’ll hear a gentle “whoosh” as the flakes absorb the liquid, and the mixture will start to look like a loose, golden‑brown crumble. This is the point where the texture is set—if you over‑mix, you’ll lose the airy crunch.
- Add Chocolate Chips (Optional). If you’ve chosen to use chocolate chips, sprinkle them over the mixture now and give a quick fold. The residual heat will melt the chips just enough to create a glossy sheen, but not so much that they lose their shape. This step is pure visual magic: you’ll see specks of dark melting into the golden base, creating a marbled effect that’s Instagram‑ready.
- Shape the Cookies. With a spoon or your hands (slightly dampened to prevent sticking), scoop out portions and press them gently into round discs about 2‑inch diameter. The edges should be slightly raised, giving the cookie a dome‑like appearance. If you’re making a large batch, keep the shaped cookies on the parchment and cover them loosely with a clean kitchen towel to retain warmth while you finish the rest.
- Cool and Set. Allow the cookies to sit at room temperature for 10‑15 minutes. As they cool, the honey‑peanut mixture will firm up, binding the cornflakes together. You’ll notice the edges pulling away from the parchment slightly—a visual cue that the cookies are set and ready to be lifted.
- Final Touch. Once the cookies are fully set, give them a quick press with a spatula to flatten them just a touch if you prefer a flatter texture. This is also the perfect moment to drizzle a little extra melted chocolate over the tops for an extra glossy finish. The chocolate will harden quickly, creating a snap‑like crust that adds a satisfying contrast to the soft interior.
- Serve or Store. Transfer the cookies to an airtight container. They’ll stay crisp for up to a week, and the flavors will meld even more deliciously over time. If you’re planning to serve them at a gathering, arrange them on a platter and watch the crowd flock to the bowl. Trust me, you’ll hear the “Can I have another?” chorus before the first bite even hits the plate.
That's it — you did it. But hold on, I've got a few more tricks that'll take this to another level...
Insider Tricks for Flawless Results
The Temperature Rule Nobody Follows
Never, ever let the honey‑peanut mixture boil. Keep the heat low enough that tiny bubbles form around the edges, but the mixture never reaches a rolling boil. If it does, the sugars will caramelize too quickly and turn bitter, ruining the delicate balance. I once let it boil for a second and ended up with a batch that tasted like burnt toast. The rule of thumb: if you can see steam but not hear a vigorous hiss, you’re in the sweet spot.
Why Your Nose Knows Best
Your sense of smell is a far better indicator of doneness than a timer. When the honey‑peanut mixture starts to emit a deep, buttery aroma with a hint of toasted nuts, you know it’s ready to coat the cornflakes. If the scent is still light and floral, give it another minute. Trusting your nose prevents under‑cooked, sticky cookies and over‑cooked, bitter ones.
The 5‑Minute Rest That Changes Everything
After shaping the cookies, let them rest uncovered for exactly five minutes before covering them. This short rest allows the surface to form a thin crust, which makes the final texture crispier. Skipping this step results in a softer, more cake‑like bite that many purists consider a mis‑step. I’ve tried both ways; the five‑minute pause is the difference between “good” and “wow, that’s amazing.”
Avoiding Soggy Cornflakes
The biggest mistake cooks make is adding the cornflakes too early, letting them sit in the hot mixture for too long. This causes the flakes to absorb excess moisture and lose their crunch. The trick is to combine them just before shaping, then work quickly. If you notice the mixture getting too runny, pop the bowl in the fridge for a minute to firm up before shaping.
Chocolate Chip Timing
Add chocolate chips while the mixture is still warm but not hot. This ensures the chips melt just enough to coat the cookies without turning into a pool of chocolate. If you add them when the mixture is too hot, the chips will dissolve completely and you’ll lose that delightful burst of chocolate in every bite.
Storage Savvy
When storing, place a sheet of parchment between layers of cookies. This prevents them from sticking together and preserves the crunch of each individual piece. A common mistake is to stack them directly, which leads to a soggy, clumped mess. The parchment trick is a simple yet powerful way to keep every cookie as fresh as the moment you made it.
Creative Twists and Variations
This recipe is a playground. Here are some of my favorite ways to switch things up:
Coconut Crunch
Swap half of the cornflakes for toasted coconut flakes. The tropical aroma pairs beautifully with the peanut butter, and the extra crunch adds a new dimension. Top with a drizzle of dark chocolate for a beach‑vibes treat.
Spicy Peanut
Add a pinch of cayenne pepper and a dash of smoked paprika to the honey‑peanut mixture. The heat cuts through the sweetness, creating a bold flavor that’s perfect for adventurous eaters. Garnish with a sprinkle of sea salt to enhance the contrast.
Berry Burst
Fold in dried cranberries or chopped dried apricots after mixing the cornflakes. The tart fruit pieces punctuate the sweet base, offering a bright pop of flavor. This variation works great as a snack for kids who love a hint of fruit.
Nutty Delight
Add a handful of chopped almonds or pistachios to the mix for an extra nutty crunch. The additional nuts bring a buttery richness that complements the peanut butter without overwhelming it. Toast the nuts first for an intensified flavor.
Coffee Kick
Stir in a teaspoon of instant espresso powder into the honey‑peanut mixture. The coffee notes deepen the chocolate flavor and give the cookies a subtle mocha undertone. Perfect for a mid‑afternoon pick‑me‑up.
Storing and Bringing It Back to Life
Fridge Storage
Place the cookies in an airtight container and store them in the refrigerator for up to a week. The cool environment keeps the honey from crystallizing and preserves the crunch of the cornflakes. If you notice the cookies have hardened a bit, let them sit at room temperature for 10 minutes before serving.
Freezer Friendly
These cookies freeze beautifully. Lay them in a single layer on a parchment‑lined tray, freeze for 30 minutes, then transfer to a zip‑top freezer bag. They’ll keep for up to three months. When you’re ready to enjoy, pop them in the microwave for 10‑15 seconds or let them thaw naturally; the texture will rebound to its original crispness.
Best Reheating Method
To revive a slightly stale cookie, place it on a microwave‑safe plate, add a tiny splash of water (just a few drops), and microwave for 8‑10 seconds. The steam generated re‑hydrates the crumb without making it soggy, and the honey‑peanut coating regains its glossy sheen. This trick works like a charm for cookies that have been sitting out for a day or two.