I was standing in my kitchen, staring at a half‑melted pot of marshmallows that had decided to cling stubbornly to the bottom like a stubborn toddler refusing to let go of a favorite toy. I’d promised my roommate I’d bring something “quick, sweet, and crowd‑pleasing” to our impromptu movie night, and the only thing I could think of was a snack that could survive the inevitable couch‑crunching chaos. The first attempt? A soggy, gummy mess that tasted like a sad, over‑cooked campfire treat. I was ready to throw in the towel, but then a flash of inspiration struck: what if I combined the nostalgic crunch of cornflakes with the creamy hug of peanut butter and the gooey pull of marshmallows? That night, I discovered the secret to turning a kitchen disaster into a triumph that would make even the most skeptical sweet‑tooth grin.
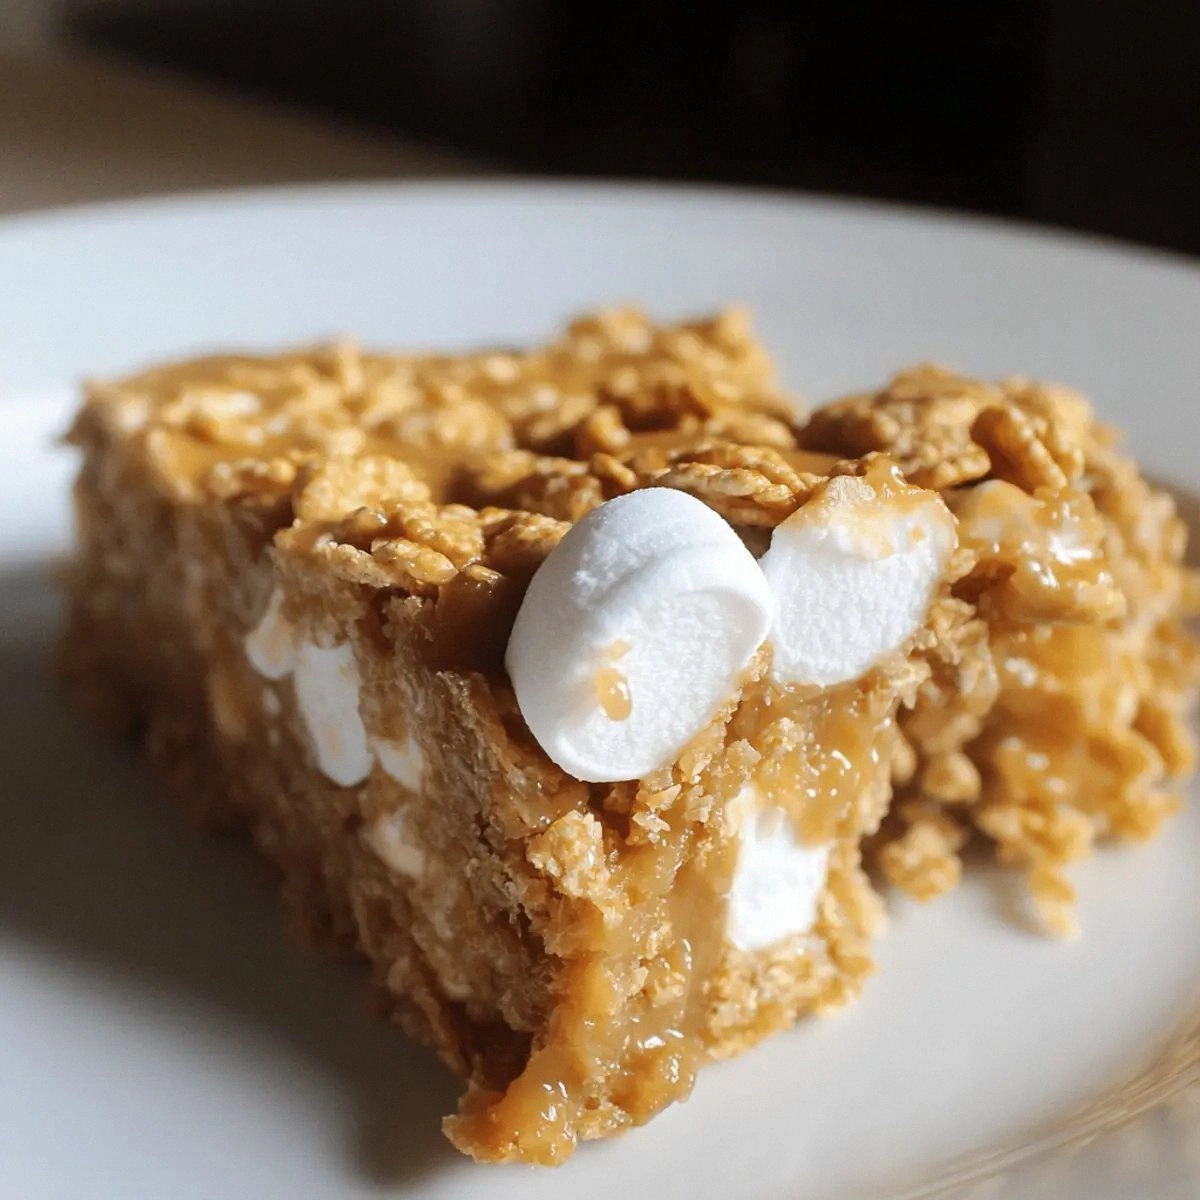
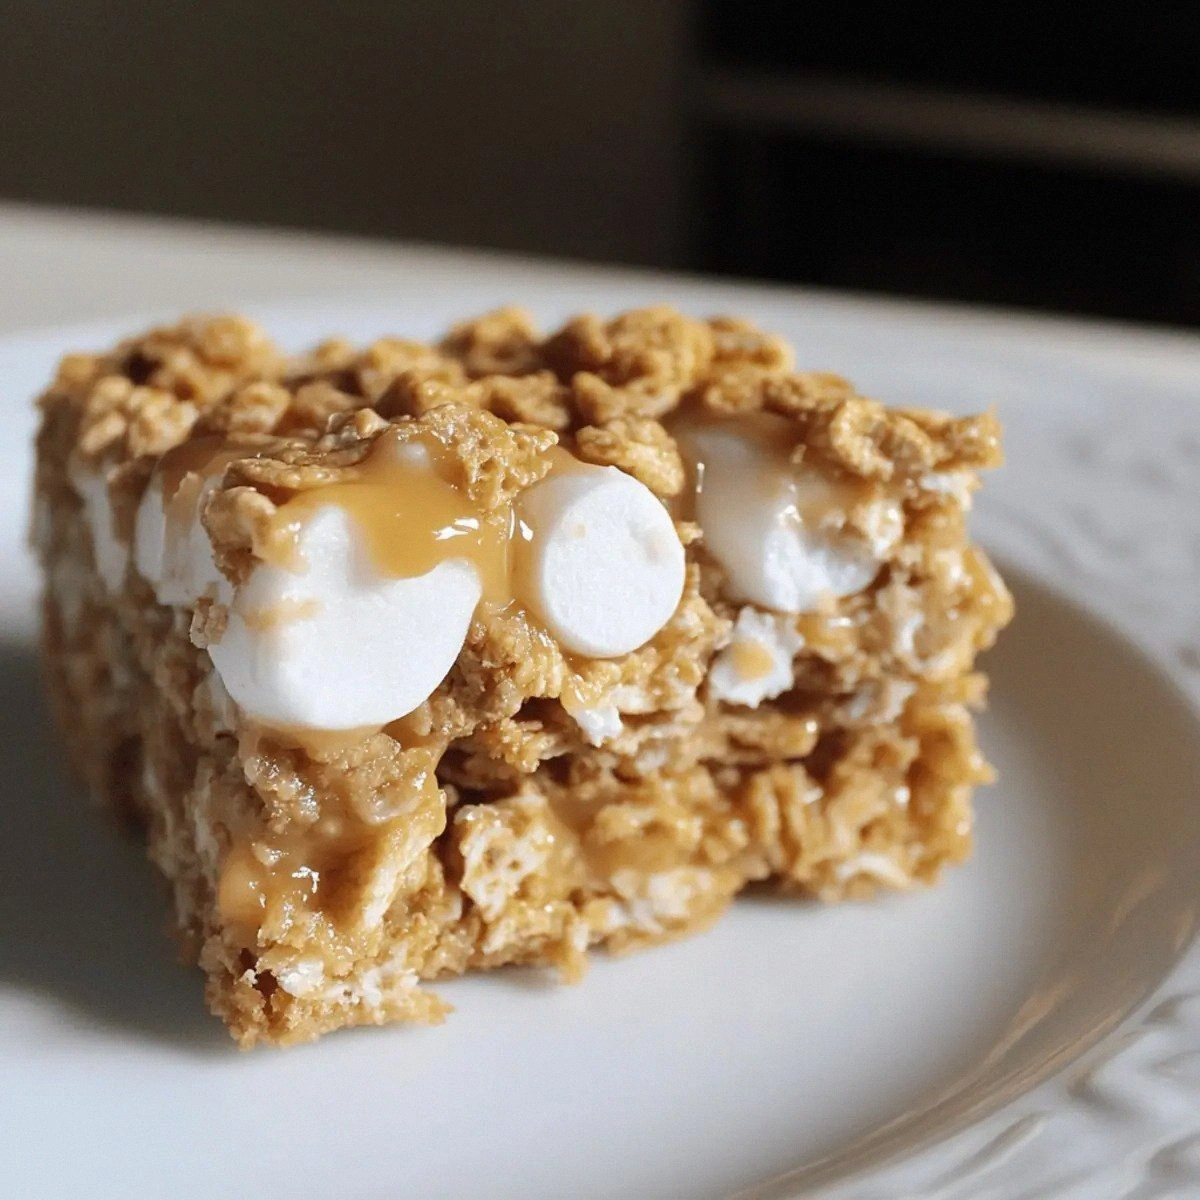
Picture this: the buttery aroma of melted butter swirling around the kitchen, mingling with the sweet perfume of toasted marshmallows, while the peanut butter melts into a glossy river of gold. The cornflakes, once humble breakfast heroes, now sit poised to receive that silky coating, ready to snap and crackle like fireworks in your mouth. When you finally press the mixture into a pan, the edges start to pull away, revealing a glossy, caramel‑kissed surface that promises a perfect chew with every bite. The first bite? A buttery, nutty crunch that gives way to a melt‑in‑your‑mouth marshmallow center—an experience that feels like a hug from your favorite childhood snack, but with a grown‑up twist.
Why does this version stand out from every other “marshmallow‑cornflake” recipe you’ve ever seen on the internet? Most recipes either skimp on the butter, resulting in a dry crumble, or drown the bars in peanut butter, turning them into a soggy slab. My version strikes the perfect balance: a ¼ cup of unsalted butter creates a glossy, buttery base; a full cup of smooth peanut butter adds depth without overwhelming the texture; and the generous 4 cups of mini marshmallows guarantee that every bite pulls apart with that signature, dreamy stretch. The secret weapon? A quick, low‑heat melt that prevents the marshmallows from scorching while allowing the cornflakes to stay crisp.
I’m about to drop a technique that most home cooks overlook: the “steam‑shield” method. By placing a metal colander over the pot and covering it with a lid, you trap a thin layer of steam that gently lifts the marshmallows, ensuring they melt evenly without turning into a caramel nightmare. I dare you to taste this and not go back for seconds—because once you’ve experienced this perfect chew, you’ll never settle for a sub‑par version again. Let me walk you through every single step — by the end, you’ll wonder how you ever made it any other way.
What Makes This Version Stand Out
- Texture: The cornflakes stay crunchy on the outside while the marshmallow interior stays soft and stretchy, creating a dual‑sensory experience that’s both snap and melt.
- Flavor Balance: The salty butter, sweet marshmallows, and nutty peanut butter dance together without any one flavor stealing the spotlight.
- Simplicity: Only four ingredients, no fancy equipment, and a total time under an hour—perfect for busy evenings.
- Make‑Ahead Magic: These bars keep their chew for up to three days in an airtight container, making them ideal for meal‑prep or office snacks.
- Crowd Reaction: Expect the “Wow, what’s in this?” chorus at parties; they’re addictive enough to become the unofficial dessert of any gathering.
- Ingredient Quality: Using real butter and smooth peanut butter (not the oily, grainy kind) elevates the entire bar from “just okay” to “legendary.”
- Cooking Method: The steam‑shield melt prevents scorching, guaranteeing a glossy, evenly‑coated bar every time.
- Versatility: The base is a blank canvas for mix‑ins—think chocolate chips, dried fruit, or a drizzle of honey.
Inside the Ingredient List
The Flavor Base
Unsalted butter is the unsung hero here. Its rich, creamy notes create a glossy coat that helps the cornflakes cling together without turning soggy. If you skip the butter, the bars will crumble like dry toast, and you’ll lose that buttery aroma that makes the kitchen smell like a bakery. For the best flavor, choose a European‑style butter with at least 82% fat; it melts beautifully and adds a subtle depth you won’t get from a low‑fat spread.
The Texture Crew
Mini marshmallows are the heart of the chew. Their tiny size ensures they melt quickly and distribute evenly, creating that coveted stretchy pull. If you opt for regular large marshmallows, you’ll end up with pockets of gooey clumps and an uneven texture. A handy tip: keep a spare bag of marshmallows on hand—you’ll want to add a few extra if the mixture looks a bit dry after the initial melt.
The Unexpected Star
Smooth peanut butter adds a nutty richness that balances the sweet marshmallows and buttery base. It also acts as a natural binder, helping the bars hold together when you cut them. If you’re allergic to peanuts or prefer a different flavor, try almond butter or cashew butter; just make sure it’s smooth, not crunchy, to maintain that silky texture.
The Final Flourish
Cornflake cereal is the crunchy canvas that gives these bars their signature snap. Its light, airy structure absorbs the buttery‑peanut butter mixture without becoming soggy, resulting in a bar that’s crisp on the edges and chewy in the center. If you want a chocolate twist, swap half of the cornflakes for chocolate‑kissed rice cereal, but remember that this will add extra sugar and change the flavor profile.
Everything's prepped? Good. Let's get into the real action…
The Method — Step by Step
Gather a heavy‑bottomed saucepan, a wooden spoon, a 9‑by‑13‑inch baking pan, parchment paper, and a metal colander. I like to line the pan with parchment because it makes lifting the bars out a breeze—no sticky fingers, no broken edges. Set the colander on top of the saucepan, making sure it sits snugly without touching the bottom. This “steam‑shield” will be your secret weapon for an even melt.
Add the ¼ cup of unsalted butter to the saucepan over low heat. As it begins to melt, you’ll hear a gentle sizzle—this is the butter whispering that it’s ready for the next step. Keep the heat low; you want the butter to melt slowly so it doesn’t brown or develop a burnt taste. Once fully melted, remove the pan from heat for a moment to prevent any sudden temperature spikes.
Drop in the 4 cups of mini marshmallows. Immediately cover the saucepan with the lid, trapping steam that will rise through the colander and gently lift the marshmallows. Stir constantly with a wooden spoon, using a folding motion rather than a vigorous whirl; this ensures the marshmallows melt evenly without scorching. You’ll notice the mixture turning from a grainy white to a glossy amber—this is the moment of magic.
When the marshmallows are fully melted and the mixture is glossy, stir in the 1 cup of smooth peanut butter. The peanut butter should melt into the mixture within seconds, creating a velvety swirl of nutty gold. Keep stirring until the peanut butter is completely incorporated—no streaks, no lumps. The aroma at this point is intoxicating; you’ll hear the faint pop of the butter as it emulsifies.
Now it’s time for the cornflakes. Quickly fold in the 4 cups of cornflake cereal, using a gentle hand. The goal is to coat each flake without crushing them; think of it as dressing a salad, not pulverizing it. If you notice the mixture looking a bit dry, drizzle a teaspoon of melted butter over the top and continue folding. The bars should look glossy and slightly clumped together—this is the perfect consistency.
Line the baking pan with parchment paper, leaving an overhang on two sides for easy lift‑out later. Pour the mixture into the pan, spreading it evenly with the back of a spatula. Press down firmly—use the bottom of a flat measuring cup or a piece of parchment‑wrapped board to compact the bars. You’ll feel the mixture resist a bit; that resistance is the butter and peanut butter binding everything together.
Let the bars set at room temperature for about 15 minutes, then transfer the pan to the refrigerator for an additional 20‑30 minutes. This chilling step is crucial: it allows the butter to solidify slightly, giving the bars a clean cut. While you wait, the kitchen will be filled with a sweet, buttery scent that makes you want to peek inside—resist the urge!
After chilling, lift the parchment out of the pan and place it on a cutting board. Using a sharp, non‑serrated knife, cut the slab into 12 even bars. The first cut might be a little stubborn; dip the knife in hot water, wipe it dry, and slice again for a clean edge. Serve immediately or store in an airtight container. That first bite? Pure, chewy bliss that will have you shouting, “I’m never going back to store‑bought!”
That's it — you did it. But hold on, I've got a few more tricks that'll take this to another level. Stay with me here — this is worth it.
Insider Tricks for Flawless Results
The Temperature Rule Nobody Follows
Never melt marshmallows over high heat. A low, steady temperature ensures the sugars don’t caramelize prematurely, which would give a bitter edge. I once tried a quick melt on high, and the result was a burnt, acrid taste that ruined the entire batch. Keep the heat low, and you’ll get that perfect glossy sheen that makes the bars look professional.
Why Your Nose Knows Best
Your sense of smell is the ultimate doneness gauge. When the butter‑marshmallow mixture starts to emit a nutty, toasted aroma, you know it’s ready for the peanut butter. If you rely solely on visual cues, you might under‑mix or over‑mix. Trust that sweet, buttery scent—it’s the culinary equivalent of a green light.
The 5‑Minute Rest That Changes Everything
After pressing the mixture into the pan, let it rest for exactly five minutes before chilling. This short pause lets the butter settle, preventing the bars from cracking when you cut them later. I’ve seen friends rush straight into the fridge and end up with crumbly edges; a five‑minute patience window solves that problem every time.
The “Cool‑Then‑Warm” Flip
If you love a slightly softer center, pull the pan out of the fridge after 20 minutes, let it sit at room temperature for ten minutes, then give it a quick 30‑second blast in a 350°F oven. This gentle warm‑up re‑activates the butter’s melt, creating a melt‑in‑your‑mouth interior while keeping the exterior crisp.
The Secret Ingredient Swap
Add a pinch of sea salt just before folding in the cornflakes. The salt amplifies the peanut butter’s flavor and cuts through the sweetness, delivering a balanced bite. I tried this on a whim during a late‑night snack run, and the reaction was immediate—everyone asked for the “secret.”
Creative Twists and Variations
This recipe is a playground. Here are some of my favorite ways to switch things up:
Chocolate‑Swirl Delight
Melt ½ cup of dark chocolate and drizzle it over the top before the bars set. The bitter chocolate balances the sweet marshmallows, creating a sophisticated flavor that’s perfect for adult gatherings.
Berry Burst Crunch
Fold in ½ cup of dried cranberries or chopped freeze‑dried strawberries along with the cornflakes. The tart berries add a pop of color and a bright, fruity contrast to the rich base.
Nutty Nutmeg Twist
Add ¼ cup of toasted chopped almonds and a pinch of freshly grated nutmeg to the mix. The nutmeg brings a warm, aromatic note that makes these bars feel like a holiday treat.
Coconut Dream
Replace half of the cornflakes with toasted coconut flakes and sprinkle a light dusting of shredded coconut on top before chilling. This gives a tropical vibe and a chewy texture that pairs beautifully with peanut butter.
Spicy Kick
Stir in a pinch of cayenne pepper and a drizzle of honey after the bars have set. The subtle heat paired with sweet honey creates a flavor adventure that will surprise and delight your palate.
Storing and Bringing It Back to Life
Fridge Storage
Place the bars in an airtight container or wrap the parchment tightly with plastic wrap. They’ll stay fresh for up to three days, retaining their chewiness. If you notice a slight hardening of the butter, let them sit at room temperature for five minutes before serving.
Freezer Friendly
These bars freeze beautifully. Separate them with parchment squares, then store in a zip‑top freezer bag. They’ll keep for up to two months. When you’re ready to eat, move them to the fridge for an hour, then let them sit at room temperature for ten minutes.
Best Reheating Method
To revive that fresh‑out‑of‑the‑oven chew, place a single bar on a microwave‑safe plate, sprinkle a tiny splash (about a teaspoon) of water around the edges, and microwave for 10‑15 seconds. The steam generated re‑hydrates the marshmallows, giving you that perfect melt‑in‑your‑mouth texture.