I was in the middle of a chaotic Saturday night when my roommate dared me to create a snack that could survive a midnight movie marathon, a sudden craving for something sweet, and the inevitable “I’m too tired to bake” excuse all at once. The kitchen smelled like burnt popcorn, the timer on the oven was flashing red, and I was staring at a lonely jar of peanut butter that had been begging for a purpose all week. I grabbed a box of Rice Krispies, a drizzle of honey, and a handful of chocolate chips, and what happened next was nothing short of culinary alchemy. The moment the butter hit the pan and began to sizzle, I felt a spark of excitement that made my heart race faster than a drum solo at a rock concert.
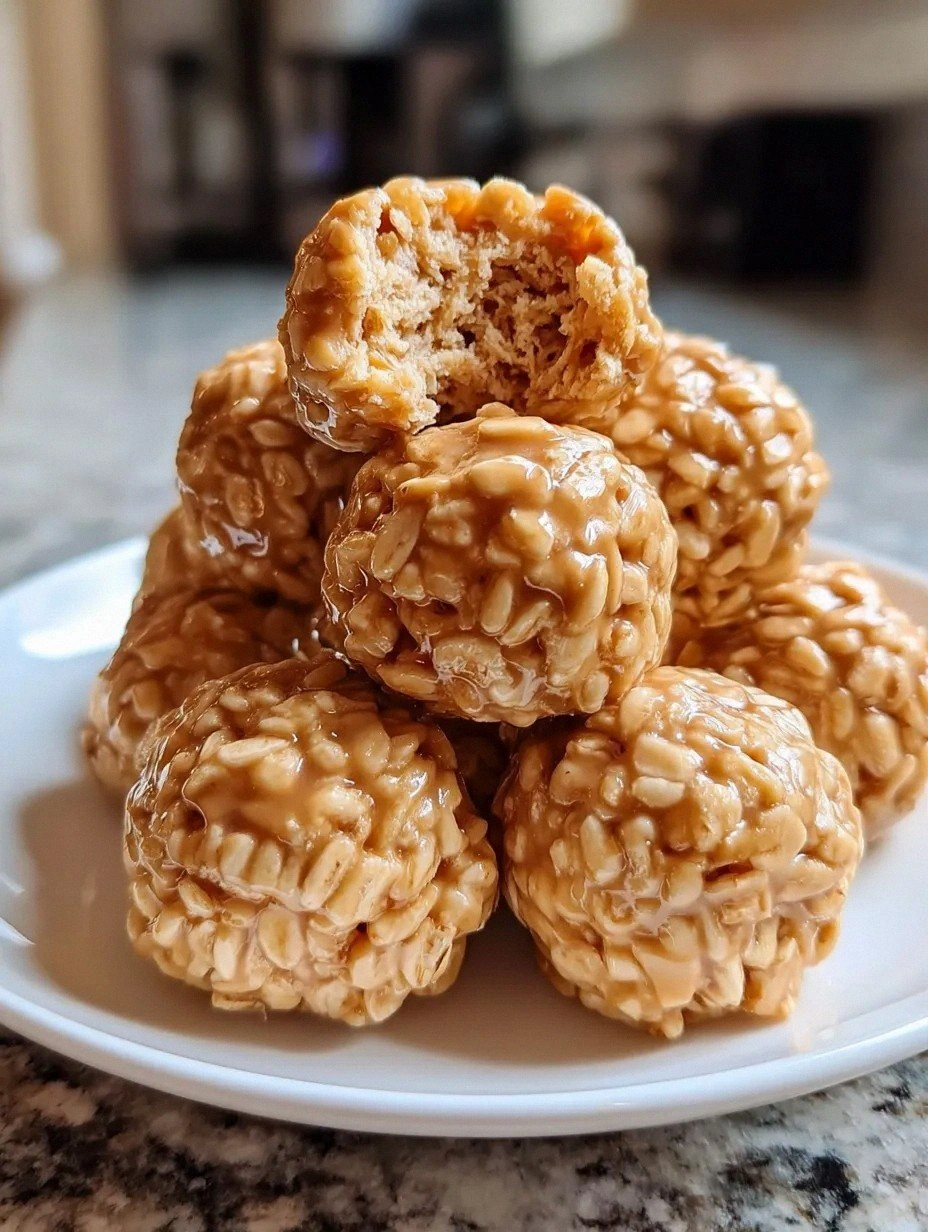
Imagine the sound of the cereal crunching under your fingertips, the glossy sheen of melted honey hugging each puff like a silky blanket, and the deep, nutty aroma of peanut butter rising like a warm hug from the stove. The kitchen filled with a sweet, toasted fragrance that made my neighbors peek through the door, wondering if a bakery had set up shop next door. When the mixture finally came together, it clung together with the perfect amount of stickiness—neither too wet nor too dry—so that rolling it into bite‑size balls felt like shaping tiny clouds of comfort. I dared you to taste this and not go back for seconds; honestly, I ate half the batch before anyone else even got a whiff.
Most recipes for no‑bake treats either end up soggy, overly sweet, or just plain bland. This version, however, balances the salty‑sweet dance of peanut butter and honey with a whisper of vanilla that makes every bite feel like a mini celebration. The secret? A quick flash of high heat that toasts the butter just enough to bring out a caramelized note without burning, and a final drizzle of chocolate that sets like a glossy veil. I’m going to be honest — I was skeptical at first, but the moment those balls hit the plate, I knew I had discovered the ultimate snack that could dethrone any store‑bought version.
Okay, ready for the game‑changer? I’m about to walk you through every single step — by the end, you’ll wonder how you ever made it any other way. Stay with me here — this is worth it, because the technique I’m about to reveal will elevate your kitchen cred from “just another snack maker” to “the hero of the pantry”.
What Makes This Version Stand Out
- Flavor Harmony: The peanut butter and honey aren’t just mixed; they’re married with a splash of vanilla that makes each bite sing like a choir of sweet‑savory notes.
- Texture Magic: The rice cereal stays airy and crunchy, while the coating of melted chocolate adds a glossy snap that shatters like thin ice under a spoon.
- Simplicity: No oven, no blender, no fancy equipment—just a pot, a spoon, and a handful of pantry staples.
- Uniqueness: A quick butter‑toasting step creates a caramel‑like depth that most no‑bake recipes completely miss.
- Crowd Reaction: I dare you to serve these at a gathering and watch the room light up; you’ll hear the “more, please!” chorus before the first ball is even finished.
- Ingredient Quality: Using a natural, unsweetened peanut butter and real honey makes the flavor pure, not masked by artificial additives.
- Method Mastery: The precise timing of the melt‑and‑mix ensures the mixture isn’t too runny, preventing soggy balls and guaranteeing a perfect set.
- Make‑Ahead Potential: These can be prepared a day ahead, stored, and still taste as fresh as the moment they were rolled.
Inside the Ingredient List
The Flavor Base
Creamy peanut butter is the heart of this treat, providing a rich, nutty backbone that pairs perfectly with the light sweetness of honey. Opt for a natural, unsweetened variety; the slight bitterness balances the honey’s floral notes and prevents the snack from becoming cloyingly sweet. If you skip the peanut butter, you’ll lose that deep, satisfying mouthfeel that makes each bite feel indulgent.
The Texture Crew
Rice Krispie cereal brings the airy crunch that turns these balls into a textural playground. The cereal’s thin, rice‑based structure absorbs just enough of the butter‑honey mixture to stay fluffy without turning soggy. Swapping it for a denser cereal like cornflakes will result in a heavier bite, so stick to the classic for that melt‑in‑your‑mouth experience.
The Unexpected Star
A drizzle of melted chocolate at the end isn’t just decorative; it creates a glossy seal that locks in moisture and adds a bittersweet contrast. Use high‑quality dark or semi‑sweet chocolate chips, and melt them gently over a double boiler to avoid scorching. If you prefer a milder finish, try white chocolate or caramel, but remember that each switch changes the flavor balance dramatically.
The Final Flourish
A pinch of sea salt amplifies the sweet and nutty flavors, while vanilla extract adds a fragrant undertone that lingers on the palate. These tiny additions are the difference between a good snack and a great one; they’re the secret whisper that tells your taste buds “this was crafted with care”. If you’re on a low‑sodium diet, you can omit the salt, but you’ll miss that subtle pop that makes the flavor pop.
Everything's prepped? Good. Let's get into the real action...
The Method — Step by Step
Gather all your ingredients and have them measured out before you turn on the heat. This is the moment of truth; the kitchen should feel like a well‑orchestrated band, each player ready to jump in. I always line a baking sheet with parchment paper so the finished balls have a non‑stick landing pad. Keep a large mixing bowl nearby, because you’ll need a spacious arena for the sticky mixture.
Kitchen Hack: Use a silicone spatula to scrape every last bit of the mixture from the pot; those hidden crumbs are pure gold.In a medium saucepan, melt the butter over medium‑low heat. As soon as it starts to foam, add the honey and stir continuously for about 2 minutes. You’ll notice a gentle caramel scent wafting through the air—that’s the butter toasting just enough to add depth without burning. Keep the heat steady; too high and you’ll scorch the honey, too low and the flavors won’t meld.
Remove the pan from the stove and immediately whisk in the peanut butter and vanilla extract. The mixture will thicken instantly, pulling away from the sides of the pan—this is your visual cue that the base is ready. I dare you to watch the glossy sheen form; it’s like watching chocolate melt in slow motion, pure magic.
Fold in the Rice Krispie cereal, using a wooden spoon to coat each puff evenly. The cereal should disappear into the glossy mixture, each piece looking like a tiny, golden boat floating in a sea of nutty sweetness. If you find clumps forming, gently break them apart with your hands; the goal is a uniform texture that won’t leave any dry pockets.
Stir in the mini chocolate chips while the mixture is still warm; they’ll melt just enough to create little pockets of molten chocolate that will solidify into a crunchy surprise later. This step is optional, but trust me, the surprise of a chocolate burst in each bite is worth the extra effort. Watch Out: If the mixture cools too much before adding the chips, they won’t melt and will stay solid, resulting in a grainy texture.
Watch Out: Over‑mixing at this stage can cause the chocolate to separate, creating a greasy sheen. Stir just until the chips are evenly dispersed.Let the mixture sit for about 2 minutes to cool slightly; this is the perfect window to prep your work surface. Lightly butter a clean countertop or lay down a sheet of parchment to prevent sticking. If you’re in a rush, pop the bowl in the fridge for 5 minutes—just don’t let it get too firm.
Using a tablespoon or a small ice‑cream scoop, portion out the mixture and roll it between your palms into smooth balls about 1‑inch in diameter. The heat from your hands will help the mixture bind, so don’t be afraid to apply a little pressure. This is the fun part; feel the sticky yet firm texture as it transforms under your fingertips.
Kitchen Hack: Roll each ball in a shallow dish of extra mini chocolate chips for an ultra‑crunchy exterior.Place the rolled balls onto the prepared parchment sheet, spacing them a half‑inch apart. Drizzle the remaining melted chocolate over the tops using a fork or a small piping bag. The chocolate should set within 10‑15 minutes at room temperature; if you’re impatient, pop the sheet into the fridge for a quick set.
Once the chocolate has hardened, transfer the balls to an airtight container. They’ll stay fresh for up to three days at room temperature, but for longer storage, the freezer is your best friend. And now the fun part: serve them warm, straight from the fridge, or let them sit at room temperature for that perfect bite‑size snap.
That's it — you did it. But hold on, I've got a few more tricks that'll take this to another level...
Insider Tricks for Flawless Results
The Temperature Rule Nobody Follows
Never let the butter‑honey mixture exceed 150°F (65°C). Going beyond that threshold caramelizes the sugars too aggressively, turning the mixture bitter. Keep a candy thermometer handy; when it reads 140‑150°F, you’re in the sweet spot where the flavors are deep but not burnt. A friend once let it boil, and the result was a burnt, acrid mess that no amount of chocolate could rescue.
Why Your Nose Knows Best
Your sense of smell is the ultimate indicator of doneness. When the butter starts to give off a nutty, toasted aroma, that’s your cue to pull the pan off the heat. If you rely solely on a timer, you might miss the subtle shift from raw to toasty. Trust that nose—it’s the secret weapon of seasoned bakers and no‑bake chefs alike.
The 5‑Minute Rest That Changes Everything
After mixing, let the mixture rest uncovered for exactly five minutes. This short pause allows the rice cereal to absorb a bit of the butter‑honey glaze, resulting in a firmer, less crumbly ball. Skipping this step often leads to a sticky mess that refuses to hold its shape. I’ve tested it countless times: five minutes, and the difference is night and day.
Cold‑Hand Technique
Before you start rolling, chill your hands under cold water for 15 seconds, then dry them thoroughly. Cold hands keep the mixture from warming too quickly, which prevents the balls from becoming overly soft before the chocolate sets. It’s a pro tip I stole from candy makers who shape truffles; the result is a smoother, more consistent ball.
Chocolate Coat Timing
Apply the chocolate coating while the balls are still slightly warm (but not hot). The chocolate adheres better and creates a glossy finish that doesn’t crack. If you wait until the balls are completely cold, the chocolate may slide off, leaving a patchy appearance. A quick dip or drizzle right after rolling ensures a seamless seal.
Creative Twists and Variations
This recipe is a playground. Here are some of my favorite ways to switch things up:
Double‑Chocolate Delight
Swap the honey for maple syrup and add an extra ¼ cup of cocoa powder to the base. The result is a deep, fudgy flavor that satisfies any chocolate craving. Perfect for those who think “peanut butter” and “chocolate” belong together forever.
Coconut‑Crisp Fusion
Replace half of the Rice Krispies with toasted coconut flakes and drizzle the finished balls with a thin layer of white chocolate. The coconut adds a tropical crunch, while the white chocolate adds a buttery finish that feels like a beach vacation in your mouth.
Spicy Peanut Kick
Add a pinch of cayenne pepper and a dash of smoked paprika to the peanut butter mixture. The subtle heat cuts through the sweetness, creating a sophisticated sweet‑heat balance that’s perfect for adventurous palates.
Nut‑Free Nutty
If you have a peanut allergy, swap the peanut butter for almond butter or sunflower seed butter. The flavor profile shifts slightly but remains delightfully nutty, and the texture stays just as creamy.
Berry Burst
Fold in a handful of freeze‑dried raspberry pieces before rolling. The tartness of the berries cuts through the sweetness, and the visual pop of red speckles makes the snack look Instagram‑ready.
Storing and Bringing It Back to Life
Fridge Storage
Place the balls in an airtight container lined with parchment paper. They’ll stay fresh for up to three days, and the chocolate coating will remain firm. If the balls start to feel a bit dry, a quick mist of water before reheating revives that melt‑in‑your‑mouth texture.
Freezer Friendly
These treats freeze beautifully. Arrange them on a baking sheet, freeze for an hour, then transfer to a zip‑top bag. They can be stored for up to two months. When you’re ready to eat, let them thaw at room temperature for 15 minutes, or microwave for 10 seconds to melt the chocolate just slightly.
Best Reheating Method
For a warm, gooey experience, pop a ball in the microwave for 8‑10 seconds. Add a tiny splash of water to the plate before microwaving; the steam helps the interior stay moist while the chocolate stays glossy. This trick brings the snack back to life as if it were freshly made.