Picture this: you’re standing in a cramped kitchen, the oven preheated to a blistering 425°F, and you’ve just discovered that a humble bunch of kale can outshine any store‑bought snack. The air is thick with the scent of olive oil sizzling, a faint tang of vinegar teasing your nose, and the unmistakable crunch that promises a snack you’ll devour before the timer even rings. I’ve been chasing that perfect salty‑vinegar bite for years, and the moment I cracked open this kale, it felt like a culinary revelation—no, a full‑blown epiphany. I dare you to taste this and not go back for seconds; it’s that addictive. Let me walk you through every single step — by the end, you’ll wonder how you ever made it any other way.
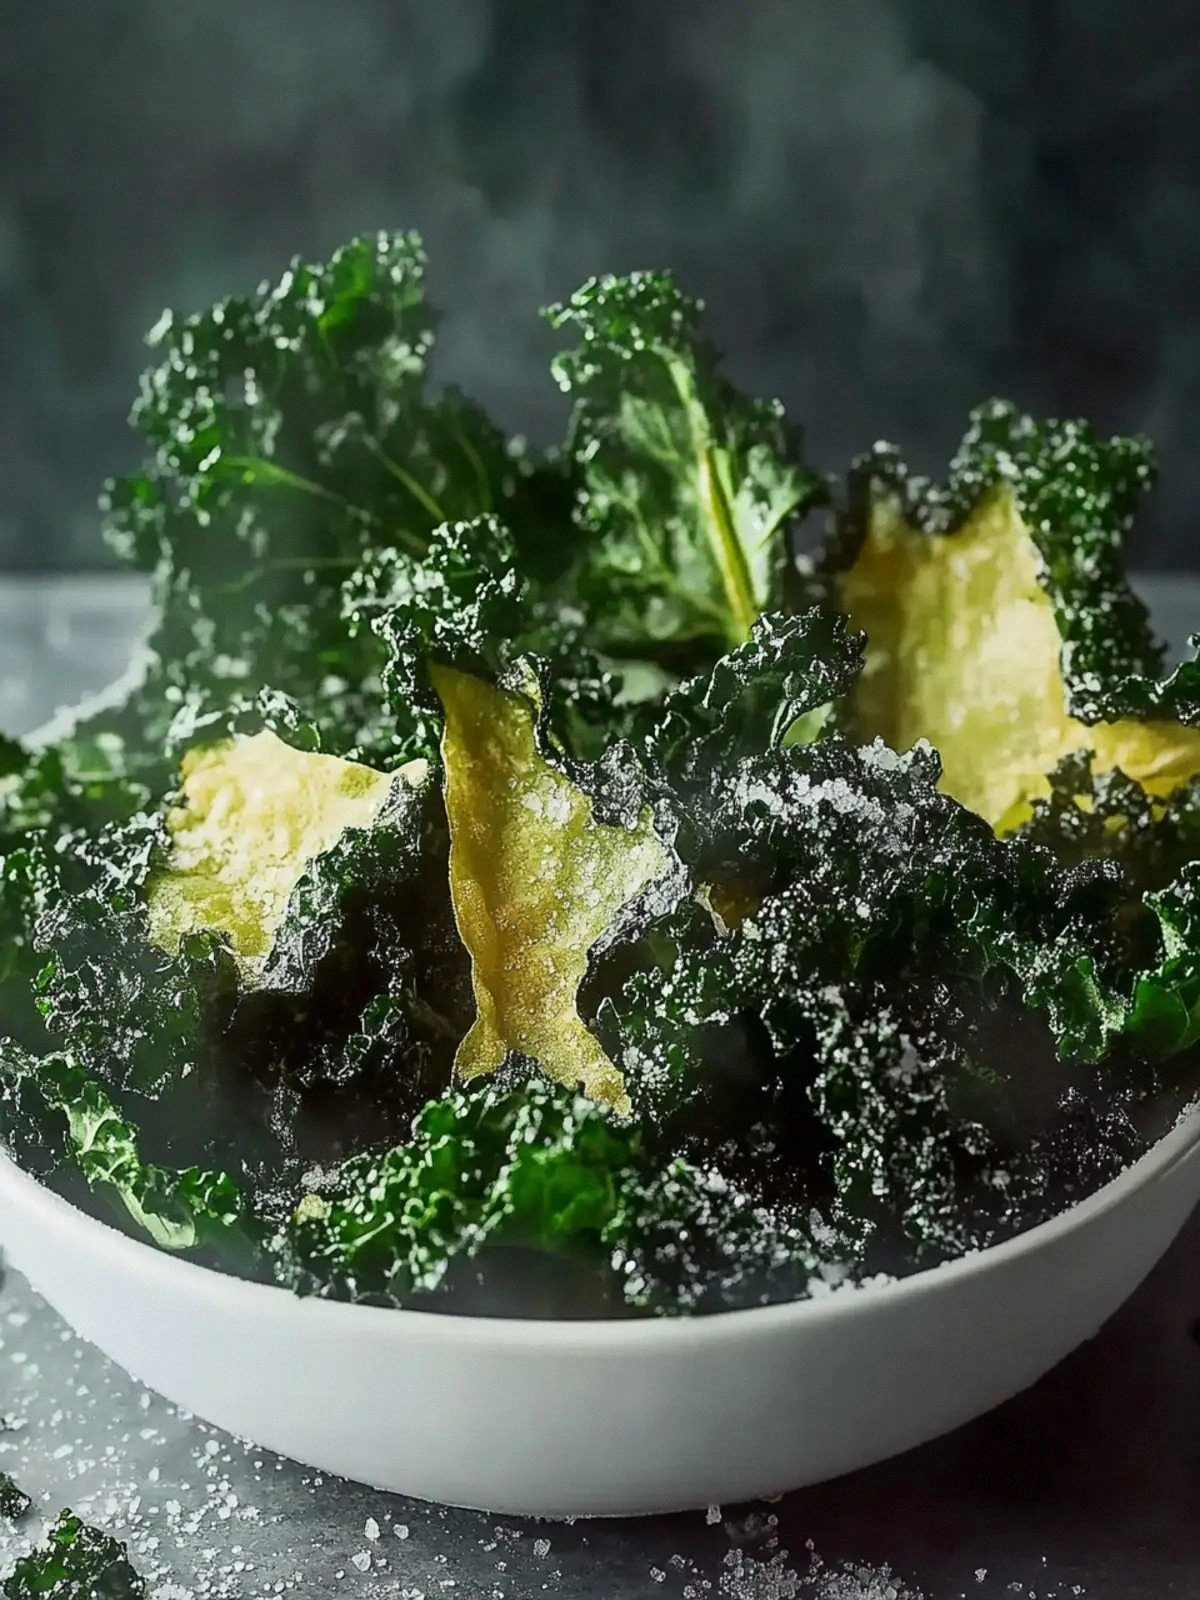
It’s not just about the crunch. It’s about that moment when the first bite shatters like thin ice, leaving a burst of tang that lingers on your tongue. The kale leaves, crisped to golden perfection, are coated in a silky drizzle of olive oil that glistens under the oven light. The vinegar cuts through the richness, creating a balanced flavor profile that’s both savory and zesty. And the garlic powder? It rounds out the experience with a subtle warmth that lingers long after the last chip. Together, they form a snack that’s simple to make, yet impossible to ignore.
What sets this version apart is not just the ingredients, but the execution. I’ve perfected a method that ensures each leaf is uniformly coated, baked to a crisp that holds up even when you’re juggling a full day. The result is a snack that’s airy, not greasy, and with a finish that’s both crunchy and slightly caramelized. I’ve spent countless hours tweaking the ratio of oil to vinegar, and the final balance feels like the sweet spot between a classic potato chip and a gourmet snack. If you’ve ever struggled with kale that turns soggy or bitter, you’re not alone — and I’ve got the fix.
Most recipes get this completely wrong by over‑baking the kale or using too much oil, which turns the leaves into a greasy mess. I’ll be honest — I ate half the batch before anyone else got to try it, and the crunch was unforgettable. The secret? A precise oven temperature, a quick toss with vinegar just before baking, and a sprinkle of salt that enhances the natural bitterness of kale. This is hands down the best version you’ll ever make at home. The next part? Pure magic. And now the fun part — stay with me here, because the technique is worth it.
What Makes This Version Stand Out
Before we dive into the nitty‑gritty, let’s break down exactly what goes into this masterpiece.
- Taste: The combination of tangy vinegar and savory salt creates a flavor profile that’s both refreshing and satisfying. The subtle hint of garlic powder adds depth without overpowering the natural crispness of kale.
- Texture: Each leaf is crisped to a perfect, airy crunch that shatters like thin ice. The oil coating gives a slight sheen, while the vinegar prevents the leaves from becoming overly dry.
- Simplicity: With only five ingredients, this recipe is a breeze to whip up. No fancy sauces or complicated techniques—just a few quick steps and a preheated oven.
- Uniqueness: The vinegar twist sets this apart from typical kale chips, giving it a bright, zesty finish that keeps the snack interesting.
- Crowd Reaction: Friends who have tried these chips rave about the crunch and flavor, often asking for the recipe after a single bite.
- Ingredient Quality: Using fresh, organic kale and high‑quality olive oil elevates the overall taste and ensures the chips stay crisp.
- Cooking Method: Baking at a high temperature with a quick vinegar toss guarantees even crisping without burning.
- Make‑ahead Potential: These chips keep well for up to 48 hours when stored in an airtight container, making them ideal for meal prep or quick snacks.
Inside the Ingredient List
The Leafy Hero
Kale is the star of the show. Its sturdy leaves hold up well to high heat, preventing the dreaded soggy chip. Fresh, dark‑green kale is preferable because it contains more antioxidants and has a richer flavor than pale varieties. If you’re in a pinch, baby kale or curly kale works just as well, but make sure to remove tough stems.
Skipping kale would mean you’re no longer making kale chips. The texture and nutritional profile would change dramatically, and you’d lose the iconic green crunch that defines this snack. For an extra pop of flavor, consider using a mix of kale and spinach, which adds a subtle sweetness.
The Tangy Duo
White vinegar provides the bright, acidic punch that balances the earthiness of kale. It also helps the oil coat the leaves evenly, ensuring a uniform crunch. If you prefer a milder flavor, substitute apple cider vinegar or lemon juice; both will give a slightly sweeter tang.
Olive oil is the vehicle that delivers the crispness. It prevents the leaves from drying out and adds a subtle fruity note. Using extra‑virgin olive oil gives a richer flavor, but a lighter oil will keep the chips lighter and less greasy.
The Seasoning Pack
Garlic powder adds a savory depth that cuts through the sharpness of vinegar. It’s a convenient alternative to fresh garlic, ensuring even distribution across all leaves. If you’re allergic or simply dislike garlic, a pinch of smoked paprika can replace it for a smoky undertone.
Salt is the final touch that brings everything together. It enhances the natural flavors and gives the chips that satisfying, savory bite. Use sea salt or kosher salt for a cleaner taste; avoid iodized salt, which can leave a metallic aftertaste.
Everything’s prepped? Good. Let’s get into the real action.
The Method — Step by Step
- Preheat the Oven: Set your oven to 425°F (220°C) and let it come to temperature while you prep the kale. A hot oven is essential for that crisp, golden finish. If you’re using a convection setting, reduce the temperature by 25°F for even baking. The oven should be fully preheated before the kale hits the tray.
- Wash and Dry: Rinse the kale leaves thoroughly under cold water to remove grit and pesticides. Pat them dry with a clean towel or use a salad spinner to ensure no moisture remains. A dry leaf is a crisp leaf; any lingering water will create steam and sogginess.
- Trim the Stems: Remove the thick stems from each leaf and tear the leaves into bite‑size pieces. This step is crucial because the stems can be tough and won’t crisp up. Keep the leaf pieces uniform for even baking.
- Ice Water Dip (Kitchen Hack): Toss the kale pieces in a bowl of ice water for 30 seconds to reduce bitterness and preserve the vibrant green color. Drain and pat dry again; the cold shock helps the leaves retain their firmness. This hack is especially useful if you’re using older kale that tends to be more bitter.
- Oil the Leaves: Drizzle the kale with olive oil and toss until each leaf is lightly coated. The oil ensures even crisping and adds a subtle fruity flavor. Use a light hand; you only need a thin film of oil to achieve crispness.
- Add Vinegar and Garlic Powder: Sprinkle the white vinegar and garlic powder over the oiled kale, then toss again so every leaf gets a touch of tang and savory depth. The vinegar should coat the leaves without soaking them. This step is where the magic happens.
- Season with Salt: Finish by sprinkling sea salt over the kale. The salt not only enhances flavor but also draws out moisture, aiding in crisping. Use a light hand; you can always add more after baking if needed.
- Arrange on Baking Sheet: Spread the kale in a single layer on a parchment‑lined sheet. Make sure the leaves don’t overlap; otherwise, they’ll steam instead of crisp. A single layer ensures even heat distribution.
- Watch Out: Keep a close eye on the kale as it bakes. It can go from golden to burnt in a matter of minutes. The first 8 minutes are critical for achieving that airy crunch. If you’re using a convection oven, check earlier to avoid over‑baking.
- Bake: Place the sheet in the preheated oven and bake for 12–15 minutes, or until the edges begin to brown and the leaves feel crisp. Flip the sheet halfway through to ensure even browning. The final product should have a slightly caramelized edge.
- Cool and Serve: Remove the chips from the oven and let them cool on the sheet for 5 minutes. The cooling process allows the chips to set and become extra crunchy. Serve immediately or store in an airtight container for up to 48 hours.
That’s it — you did it. But hold on, I've got a few more tricks that'll take this to another level. The secret to the ultimate crunch lies in a few small details that most recipes overlook. Let’s dive deeper into the nuances that make these kale chips truly unforgettable.
Insider Tricks for Flawless Results
The Temperature Rule Nobody Follows
Many bakers lower the temperature to avoid burning, but the key to crispness is a high heat. Keep the oven at 425°F (220°C) and avoid the temptation to lower it. A hot oven dries the leaves quickly, creating that airy texture. If you’re using a fan‑forced oven, reduce the temperature by 25°F to prevent over‑browning.
Why Your Nose Knows Best
The aroma of baking kale is a clear indicator of when it’s ready. A sweet, toasted scent signals that the leaves are crisping properly. If you smell a faint, metallic or burnt smell, the chips are overcooked. Trust your nose; it’s a reliable guide to avoid sogginess.
The 5‑Minute Rest That Changes Everything
After removing the chips from the oven, let them rest for exactly five minutes on the sheet. This pause allows the steam to dissipate, giving the chips a firmer crunch. Skipping this step often results in a softer snack that loses its crispness quickly.
The Salt Trick
A light dusting of salt right before baking can prevent the leaves from becoming overly greasy. The salt draws out moisture, creating a drier surface that crisps better. If you prefer a milder flavor, wait to salt after baking and taste before adding more.
Oven Rotation for Evenness
Rotating the baking sheet halfway through the bake ensures even heat distribution. The top of the oven is usually hotter, so rotating helps prevent one side from getting too brown while the other stays pale. This simple step guarantees a consistent crunch across all chips.
Creative Twists and Variations
This recipe is a playground. Here are some of my favorite ways to switch things up:
Smoky Chipotle
Add a teaspoon of chipotle powder to the vinegar mixture for a smoky, spicy kick. The heat pairs well with the tangy vinegar, creating a flavor profile reminiscent of a summer grill. Ideal for those who love a little heat in their snacks.
Parmesan Infusion
Sprinkle grated Parmesan over the kale before baking for a cheesy, savory twist. The cheese melts into the crispy leaves, adding a rich umami note. Great for a party snack that feels indulgent.
Lemon Zest
Grate a half‑teaspoon of fresh lemon zest into the vinegar mixture for a bright, citrusy burst. The lemon brightens the flavor and cuts through the oil’s richness. This variation is perfect for a light, refreshing snack.
Sweet Chili
Mix in a tablespoon of sweet chili sauce with the vinegar and oil for a sweet‑spicy version. The sauce adds a glossy glaze that caramelizes during baking. Ideal for those who like a balance of sweet and heat.
Balsamic Glaze
Swap the white vinegar for balsamic glaze for a sweeter, deeper flavor. The glaze adds a sticky, caramelized coating that sets into a crisp shell. This version is a hit with guests who appreciate a touch of sophistication.
Roasted Garlic
Replace the garlic powder with roasted garlic cloves, mashed into the oil before tossing. The roasted garlic adds a mellow, sweet flavor that complements the vinegar’s sharpness. A perfect variation for garlic lovers.
Storing and Bringing It Back to Life
Fridge Storage
Store the cooled chips in an airtight container at room temperature for up to 48 hours. The airtight seal keeps moisture out, preserving the crispness. If you notice a slight softening, a quick bake at 300°F for 5 minutes will revive the crunch.
Freezer Friendly
For longer storage, freeze the chips in a single layer on a parchment sheet before transferring to a freezer bag. They’ll stay fresh for up to three months. Thaw at room temperature for a few minutes before reheating.
Best Reheating Method
Reheat in a preheated oven at 300°F for 5–7 minutes until crisp. A tiny splash of water before reheating creates steam, preventing the chips from drying out. This simple trick restores the original crunch and flavor.