It all began on a rainy Thursday when the kitchen clock ticked away the minutes like a metronome, and I stared at a pile of stale, over‑fried pakoras that had somehow survived a week in the fridge. The aroma—half burnt, half forgotten—was a siren call that I couldn’t resist. I grabbed my notebook, scribbled a frantic “quick” and set the stove to medium. The result? A batch of pakoras that were crispy on the outside, moist and flavorful on the inside, and, most importantly, made in under 30 minutes. I was stunned. I had just reinvented a classic for the modern, time‑constrained cook.
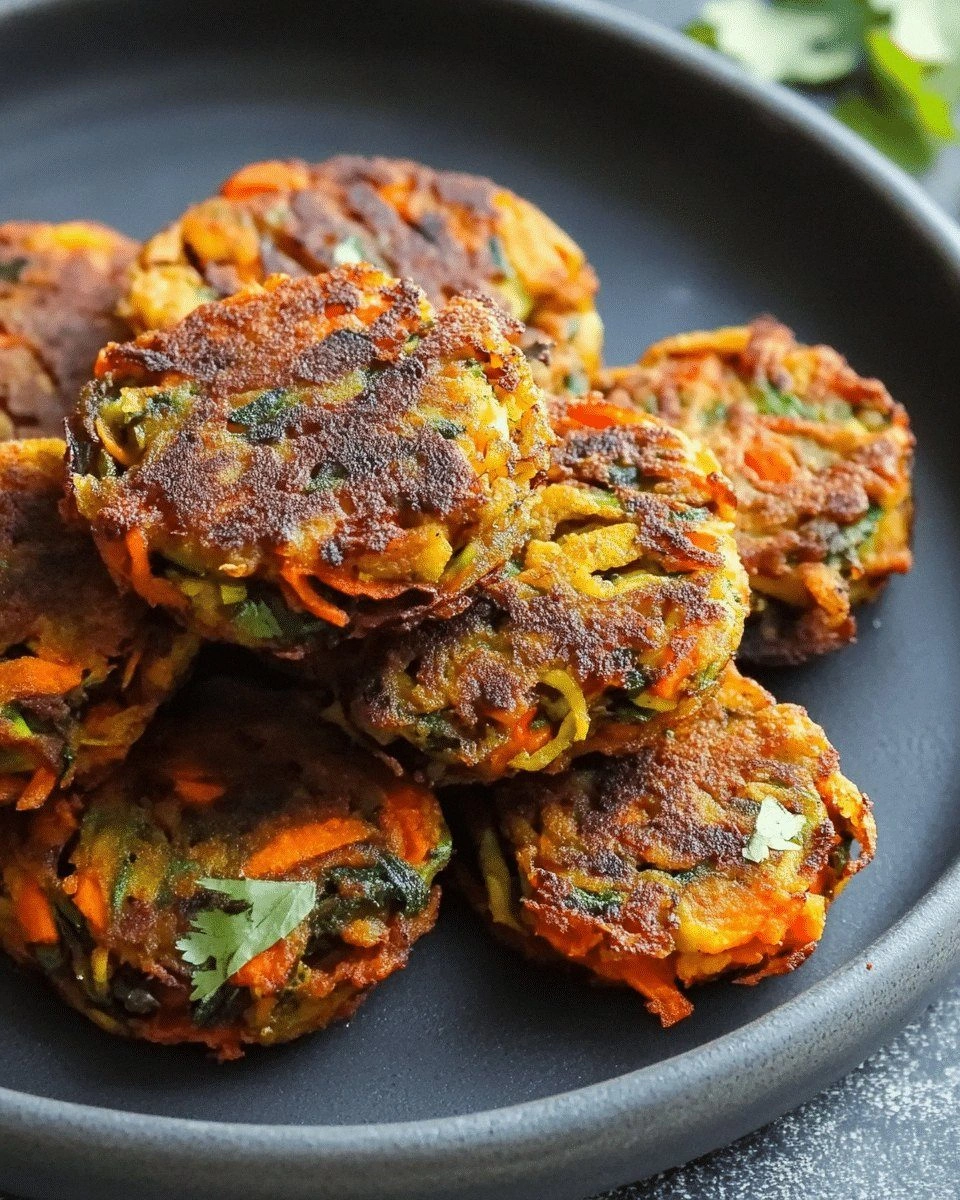
Imagine the crunch of the first bite: the golden edges crackle like thin ice, releasing a burst of nutty, earthy chickpea flour that lingers on the tongue. The vegetables inside—carrot, cauliflower, spinach, and a whisper of peas—sizzle against the hot oil, their colors popping in a rainbow of fresh greens and orange. The spices—cumin, coriander, garam masala, and a daring splash of chili—create a fragrant halo that wafts up to your nose, making you swoon before you even taste. The final touch of lemon juice adds a zing that cuts through the richness, leaving a clean, refreshing finish.
What makes this version stand out isn’t just the flavor. It’s the method that turns a quick snack into a culinary triumph. I’ve streamlined the batter to keep it light yet thick enough to hold the vegetables, and I’ve introduced a secret technique: adding a splash of yogurt to the batter for a subtle tang and extra crispness. The result is a pakora that’s airy inside, yet sturdy enough to resist the oil’s assault. I dare you to taste this and not go back for seconds—once you try it, you’ll never settle for the ordinary.
If you’ve ever struggled to get pakoras crispy without soggy centers, you’re not alone—and I’ve got the fix. Picture yourself pulling a steaming basket of golden pakoras out of the oil, the whole kitchen smelling incredible, and knowing that you’ve created something that’s both comforting and wow‑worthy. This is hands down the best version you’ll ever make at home. Let me walk you through every single step—by the end, you’ll wonder how you ever made it any other way.
What Makes This Version Stand Out
- Flavor: The blend of spices is balanced to highlight the natural sweetness of the vegetables without overpowering them. This harmony creates a taste that feels both exotic and familiar.
- Texture: The batter’s airy consistency ensures a light interior, while the oil temperature is meticulously controlled for a crisp exterior that doesn’t burn.
- Speed: From prep to plate, the entire process takes less than 45 minutes, making it ideal for weeknight cravings or last‑minute gatherings.
- Versatility: Swap out the veggies or adjust the heat level to suit your mood—this recipe is a blank canvas ready for your personal touch.
- Crowd‑pleaser: Guests rave about the crunchy bite and the subtle tang, often asking for a second plate.
- Ingredient Quality: Fresh, locally sourced veggies and high‑grade chickpea flour elevate the dish beyond the usual take‑out experience.
- Cooking Method: The technique of adding a yogurt splash to the batter is a game‑changer that sets this recipe apart from the rest.
- Make‑Ahead Potential: The batter can be prepared up to 12 hours ahead, letting you focus on plating when guests arrive.
Inside the Ingredient List
The Flavor Base
The foundation of any pakora is its spice blend. Cumin seeds provide a warm, earthy undertone, while coriander powder adds a citrusy brightness that lifts the overall profile. Turmeric brings a subtle color and anti‑inflammatory benefits, and a pinch of garam masala offers depth with its aromatic blend of cardamom, cloves, and cinnamon. Together, these spices form a symphony that harmonizes with the vegetables.
The Texture Crew
Chickpea flour, or besan, is the secret to that coveted crunch. Its high protein content creates a robust batter that clings to veggies without becoming heavy. Baking powder ensures a light, airy interior, while a splash of yogurt adds moisture and a hint of tang. These components work in concert to deliver a pakora that feels like a crispy, savory cloud.
The Unexpected Star
A splash of lemon juice is the unsung hero that brightens the dish. It cuts through the richness of the oil and balances the earthy spices, creating a refreshing finish that lingers. If you’re adventurous, try adding a dash of tamarind paste for a sweet‑sour twist that pairs beautifully with the cumin.
The Final Flourish
Fresh coriander leaves and finely chopped green chilies bring a burst of color and a peppery kick that elevate the visual appeal and flavor. The vegetables—carrot, cauliflower, spinach, and peas—provide a mix of textures, from crisp to tender, creating a satisfying bite in every mouthful. Oil for deep frying is the medium that transforms the batter into a golden, crispy masterpiece.
Everything's prepped? Good. Let's get into the real action.
The Method — Step by Step
- Prep the Veggies: Wash and slice the carrots, cauliflower, spinach, and peas into bite‑sized pieces. Toss them lightly with a pinch of salt and a splash of lemon juice to keep them bright. I swear, that citrus hint keeps the greens from turning dull. Let them sit for 5 minutes while you mix the batter.
- Make the Batter: In a large bowl, combine 2 cups chickpea flour, 1 tsp cumin seeds, 1 tsp coriander powder, 1 tsp chili powder, 1 tsp garam masala, 1 tsp turmeric, 1 tsp black pepper, 1 tsp baking powder, and a pinch of salt. Whisk in 1 cup coconut water (or plain water) until smooth, then fold in 1 tsp ginger paste, 1 tsp garlic paste, 1 tsp lemon juice, and 1 tsp yogurt. The batter should be thick enough to coat the back of a spoon but still pourable.
- Heat the Oil: Pour enough oil into a deep pan to cover the pakoras by at least 1.5 inches. Heat to 350°F (175°C). The oil should shimmer, and a drop of batter should sizzle and rise to the surface within a second. This is the moment of truth.
- Coat the Veggies: Dip each vegetable piece into the batter, ensuring it’s fully coated. Let any excess drip off before gently sliding it into the hot oil. The first few pakoras will be the most telling—if they puff up and brown evenly, the oil is at the right temperature.
- Fry to Perfection: Fry the pakoras in batches, turning them every 2–3 minutes until golden brown and crisp. Use a slotted spoon to transfer them to a paper towel‑lined plate to drain excess oil. The edges should pull away from the pan, indicating a crisp finish.
- Add Fresh Herbs: While the pakoras are still hot, sprinkle them with freshly chopped coriander and a few drops of lemon juice. The herbs add a bright, herbal note that cuts through the oil’s heaviness.
- Serve Immediately: Plate the pakoras on a warm platter and serve with your favorite chutney or yogurt dip. The best flavor comes from eating them right away, while the crunch is still alive.
That's it — you did it. But hold on, I've got a few more tricks that'll take this to another level.
Insider Tricks for Flawless Results
The Temperature Rule Nobody Follows
Oil temperature is the linchpin of crispy pakoras. Use a thermometer to keep it steady at 350°F. If you’re watching the batter, it should sizzle instantly and rise to the surface. I once tried frying at 300°F and the pakoras turned out soggy and chewy—don’t repeat that mistake.
Why Your Nose Knows Best
As the pakoras fry, the scent changes from raw batter to toasted chickpea. When the aroma shifts to a nutty, almost buttery scent, it’s a sign the oil is hot enough. Trust your nose; it’s a reliable indicator that the pakoras will crisp beautifully.
The 5-Minute Rest That Changes Everything
After frying, let the pakoras rest on a rack for 5 minutes before serving. This brief pause allows excess oil to drain and the outer shell to firm up, giving you that perfect crunch every time.
Use Yogurt for Extra Lightness
A tablespoon of plain yogurt in the batter creates a subtle tang and a lighter texture. It also helps the batter cling to the veggies without becoming too thick. I’ve found that adding yogurt turns a decent pakora into an unforgettable snack.
Don’t Skip the Fresh Herbs
Fresh coriander and green chilies add a burst of freshness that contrasts the oil’s richness. If you’re vegan, substitute with basil or mint for a different aromatic profile.
Creative Twists and Variations
This recipe is a playground. Here are some of my favorite ways to switch things up:
Cheese‑Infused Pakoras
Fold a handful of grated cheddar or paneer into the batter before coating the veggies. The cheese melts into pockets of gooey goodness, creating a savory, indulgent bite.
Spicy Peanut Sauce Dip
Serve the pakoras with a homemade peanut sauce flavored with soy sauce, lime, and a drizzle of sriracha. The nutty sauce adds a new layer of flavor that complements the crunchy pakoras.
Mango‑Ginger Pakoras
Add diced ripe mango and a splash of fresh ginger to the batter for a sweet‑spicy combo that feels like a tropical vacation.
Cauliflower & Chickpea Fusion
Replace the mixed veggies with extra cauliflower florets and a handful of chickpeas for a protein‑packed, vegetarian delight.
Herbal Tea‑Infused Oil
Infuse the frying oil with dried herbs like rosemary or thyme before heating. The subtle herbal notes seep into the pakoras, giving them an aromatic twist.
Storing and Bringing It Back to Life
Fridge Storage
Cool the pakoras completely before placing them in an airtight container. Store in the fridge for up to 2 days. They’ll keep their crunch if you reheat them in a preheated oven at 375°F for 5 minutes.
Freezer Friendly
Arrange the pakoras on a parchment‑lined tray and freeze for up to 1 month. Once frozen, transfer them to a zip‑lock bag. Reheat in the oven at 400°F for 8 minutes or microwave on high for 30 seconds, then finish in a skillet to crisp up.
Best Reheating Method
Add a splash of water to the pan before reheating to create steam, which helps the pakoras regain their original moisture and crispness. A quick toss in a hot skillet for 30 seconds on each side is usually enough.